Tuesday, June 10, 2014

Wrap Around Border Tutorial

During the construction of my Modern Medallion, I was instructed to do a "wrap around border".  Hmmmm.....  After much huffing and puffing and trying to work out how to do it, I gave up!  And I just did a regular border for the first one.  But when it came to attaching my drunken geese border, I was determined to figure it out.  So I thought I'd give you a very quick tutorial on how I did it.

DSC_0404

First thing to do is pin your first border on.  Starting at the end you will begin sewing at.  I'm not a big "pinner", so pin about every 10 inches or so.

DSC_0405

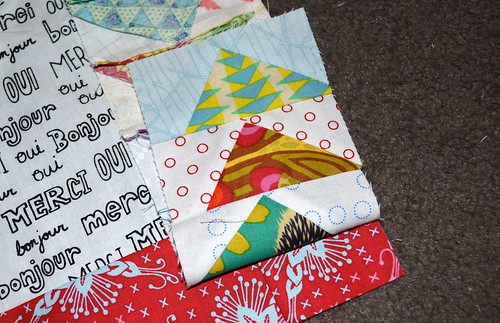
Your border will be a few inches longer than your quilt top.  You want to sew the border on all the way towards the end, but then stop a couple of inches before the end!

DSC_0406

Fold back the border you've just sewn, exposing the next side of the quilt.

DSC_0407

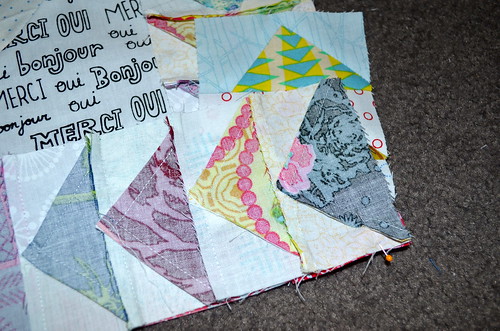
And pin your next border on.

DSC_0408

Sew it on - the same as the last one, so leaving a couple of inches unsewn.  

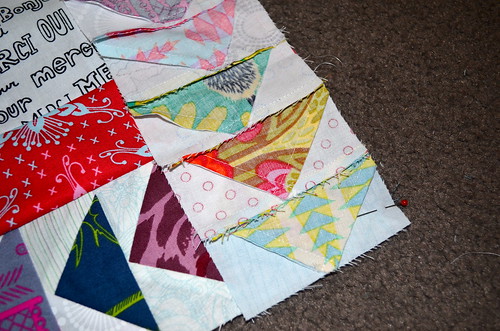
DSC_0409

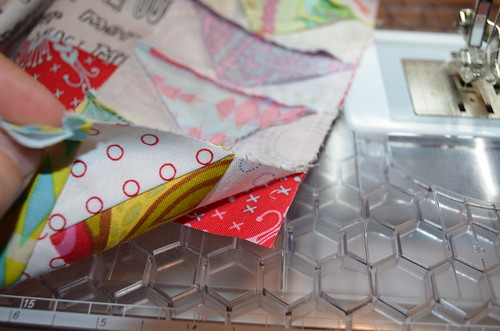
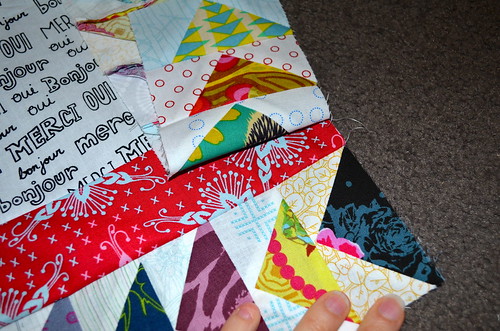
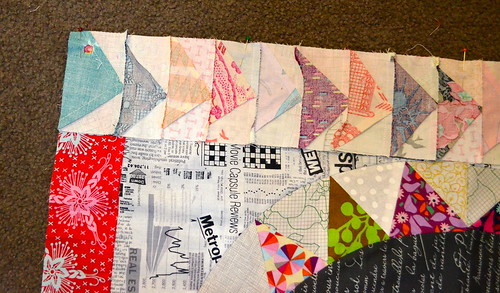
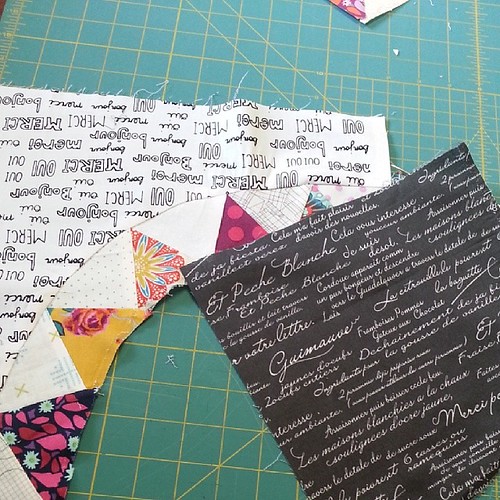
Then you take your first border and place it over the second border like above photo.  Then sew the remaining few inches of that first border over the top of the second one!  Continue this with all four borders.

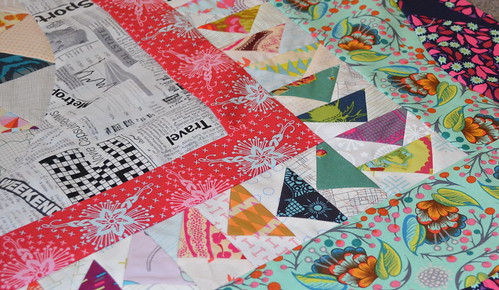
DSC_0366

And press it down!  Sneak peek here at my curvy border!

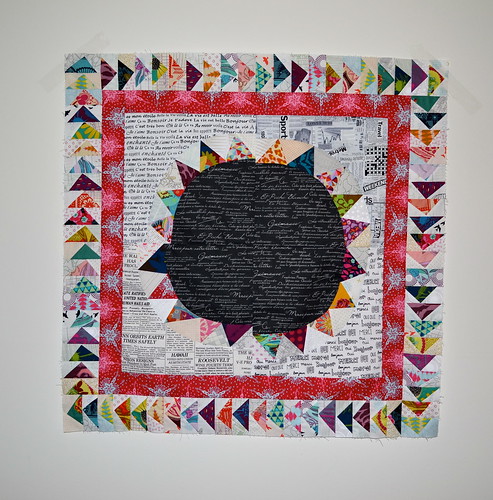
DSC_0413

And hello!!  You have a wrap around drunken geese border!

It's actually incredibly easy once you've wrapped your head around it!  I hope you've found this helpful!

I finished my quilt top this afternoon.......and am hoping to have a big fat reveal here on Friday - so be sure to pop back in!

Monday, June 9, 2014

Bohemian Triangle Quilt

I know I said after my first triangle quilt that I wouldn't be in a hurry to make another, but I really just couldn't help myself!  You see, I signed up for a Pink, Gold & Pearl Showcase over at Siiari Rose, thinking it could push me a little to use colours I would never normally choose.  And then I wondered what the hell I had done, because I couldn't find any fabrics that suited the theme.  Until the last #greataussiedestash on IG, when I found a great big bundle of Art Gallery Bohemian fabric!  I had hit the jackpot.  Half of the range is in green and yellow tones, but this half was perfect.....

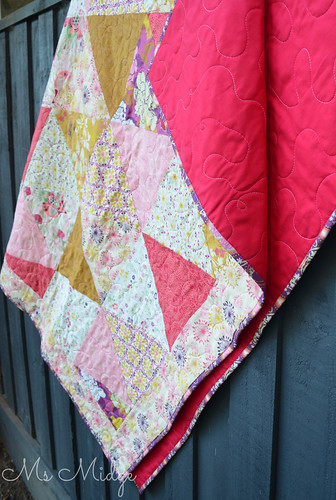
Bohemian Triangle Quilt


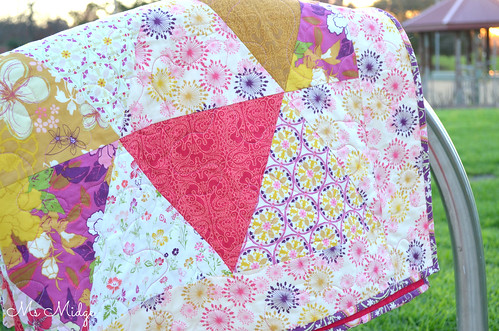
And the first thing I wanted to do with them was cut triangles.  So I did.  And I could. not. be. happier. with the end result.  I've always loved Art Gallery fabric, but to make an entire quilt top using them is beyond divine.  They are so utterly silky and smooth and sort of......sexy.  Hahaha......

Bohemian Triangle Quilt

 I got out of my FMQ groove, and jumped in.  I used the gorgeous variegated pink Aurifil thread in a 40wt, in a free flowing meandering pattern with a few loops here and there. The backing is literally the perfect match to the pink print on the front.  It's not as "hot pink" as the photo depicts - it's actually called "ruby" and is true to its name.  It is a broadcloth cotton.

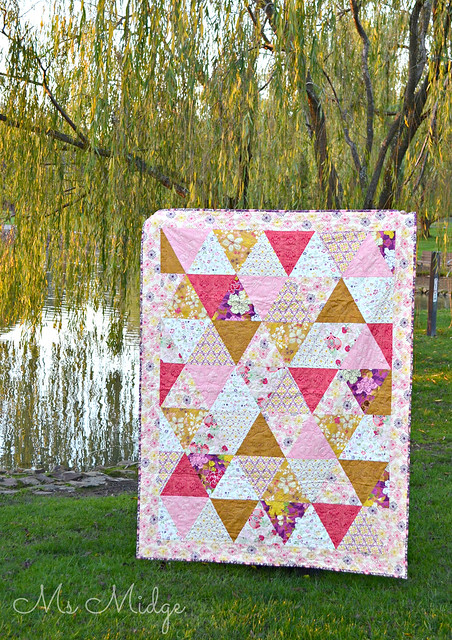
Bohemian Triangle Quilt

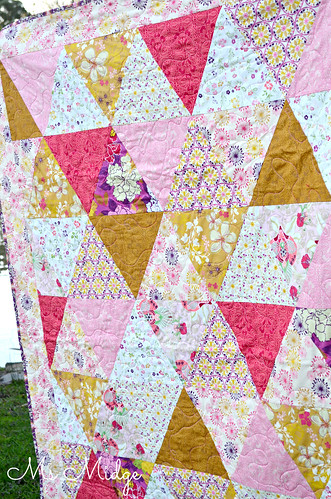
This is an "equilateral" triangle quilt.  I used my triangle ruler and made them 9" each side.  I followed the same rules and tips I used for my Isosceles on Point quilt.  Too easy. 

Bohemian Triangle Quilt

I was cross at the weather-gods all of Saturday, as the rain came down......but by Sunday afternoon the sun was shining.  I coaxed my husband out of his tv-viewing comfort and we wandered down to the local park just as the sun was setting.  I promised him he'd only get a few strange looks and he stood where I told him to stand - right in front of the most amazing golden tree on the lake.  I couldn't have asked for a more perfect background to this most perfect quilt!

I'm pleased to say this lovely finish will be available to purchase in the Showcase on July 8.

I'm linking up - everywhere - You can too!
stitch by stitch

Sew Cute Tuesday

Fresh Poppy Design

No Waste Drunken Geese Tutorial

Welcome to week two of the Modern Medallion Quilt Along!  I'm here to help you through the next couple of steps.  By now, you should have your New York Beauty Contest done and dusted, and looking to get your plain Jane border and  drunken geese on.  Now, I'll be perfectly honest here, and tell you that I just couldn't figure out how to do the wrap around method for the plain Jane border!  I read the pattern multiple times, but it just wouldn't click.  So I did a regular border.  BUT, I did figure it out eventually, and attached my drunken geese border wrap around style!  So I will share a quick tutorial for that method tomorrow.

For now - let's make some geese - NO WASTE style!  I decided to figure out the no waste method for these little blocks, basically because I started hyperventilating about wasting lots of my precious AMH fabric.  After some searching of the net and desperate search for the mathematical part of my brain, I came up with this...


DSC_0375

Cut yourself 20 Large squares of your coloured fabrics - 4 3/4".  These will become your triangles (geese).

DSC_0376

Then attack your low volume stash and cut out 80 Small squares - 2 5/8" (these become the outers of your geese).

DSC_0377

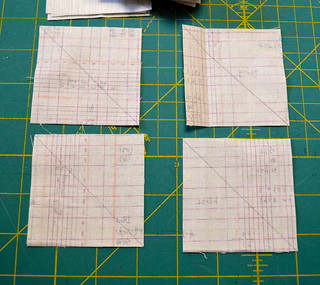
Draw a line diagonally on every single low volume square.  


DSC_0380

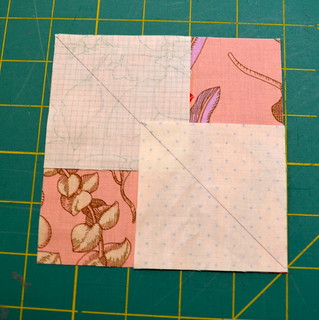
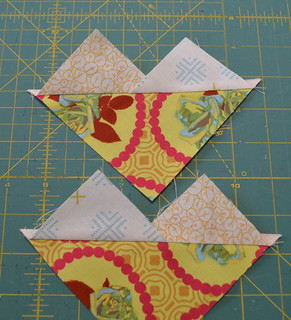
Place two of your low volume squares over your large square like so.  Making sure your diagonal lines match up with your corners and eachother.  

DSC_0384

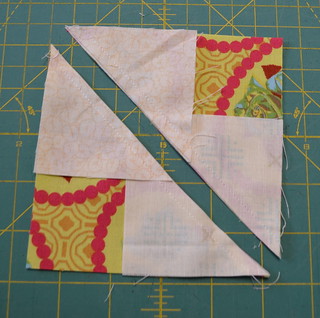
Sew 1/4" on either side of your diagonal line (chain piecing works wonderfully with this technique and saves a whole lot of time!  And makes some literal flying geese - see below!).  Then cut straight through the middle on the drawn line.

DSC_0400


DSC_0385

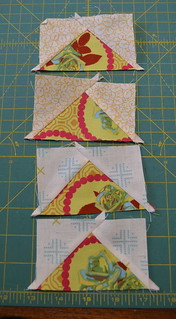
Press them to the side like above.

DSC_0386

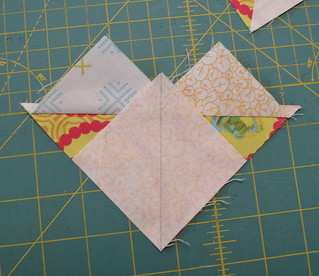
Take another low vol square and place it on top like above.  Once again lining up your diagonal line.  Sew 1/4" on either side of your line, and then cut through the middle again.

DSC_0388

And once pressed - you will have four flying geese from each block!  Now to make them wonky....

DSC_0390

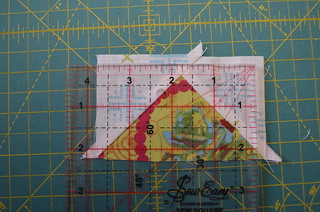
As you can see, your geese end up 4" x 2.5".  We want them to end up a finished size of 2" x 3.5", so you have a little room to work with.   Take your ruler - the smaller the better, this is a 4.5" square - and position it on top of your block.  If you want to keep the points of your geese intact, ensure you have a 1/4" above the point.

DSC_0392

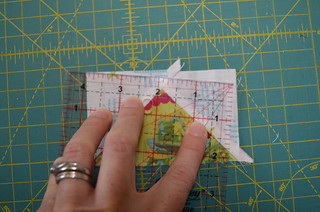
Then turn your ruler in any direction you wish - as long as you have 4" in width and 2" in height.  Trim these two sides.

DSC_0394

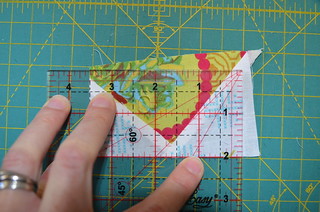
Flip your goose around and then square it up, lining up the two sides you have already trimmed with your finished size on your ruler.  Now trim the other two sides.

DSC_0395

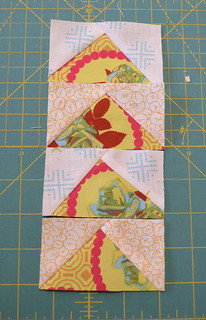
And HELLO wonky geese!  This tutorial will yield 80 of these suckers for you!  And I can tell you I had all 80 geese done and dusted within a day.  Winning!

Honk honk! 80 little geese ready to be wonkified! #modernmedallion #modernmedallionquiltalong

I hope you found this helpful and look forward to seeing a whole lot of drunk geese getting around!  Remember to check back in a couple of days, when I share the wrap around border tutorial!


Sunday, June 8, 2014

Sunday Stash & Dash

I'm pleased to say I haven't made any SUBSTANTIAL purchases of fabric in recent weeks.  A few metres here and there of Homespun for quilt backs and this little bundle of yummy.....

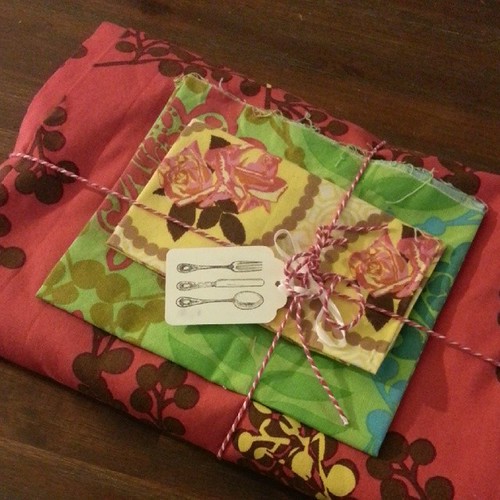
Just home from work to find my beautiful fabric from @jotickle arrived! Thanks for the extras!  Xx

I bought this AMH yardage from Jodi at Tickle & Hide (she's having another destash on IG tomorrow!) and will use it for my Modern Medallion backing.  She threw in the other goodies which was just lovely!

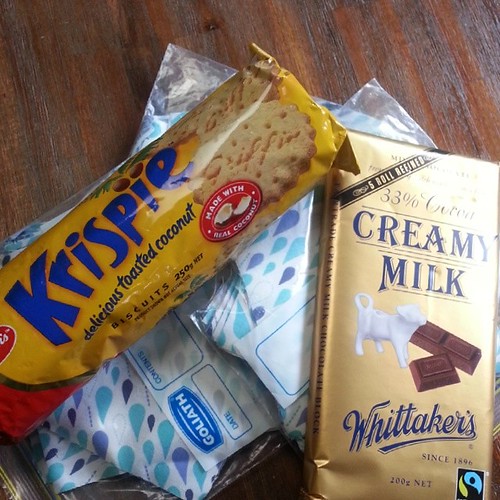
Ok @mummahump you deserve a big kiss too! ! #aussiecharmswap

I'll class these as stash additions, because hey, doesn't everyone need cookies and chocolate to sew?!?!  The Kate Spain Aussie Charm Swap is in full swing, and the lovely Amy popped these in with hers - they will be most appreciated whilst sorting five billion charm squares!

Another hour of sorting done! @katespain #aussiecharmswap

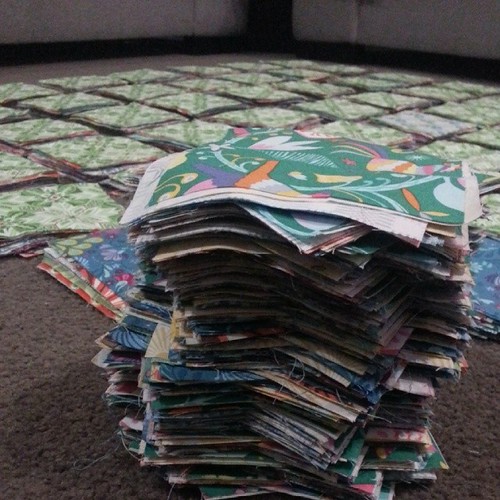
Speaking of sorting - this is what charm square madness looks like people.  56 piles of fabric goodness.  It's FRIGGING hard work!!!!  But the end result will be UH-mazing!!

I'm partying hard here.  #saturdaynightcraftalong #cosineededanewproject #koi

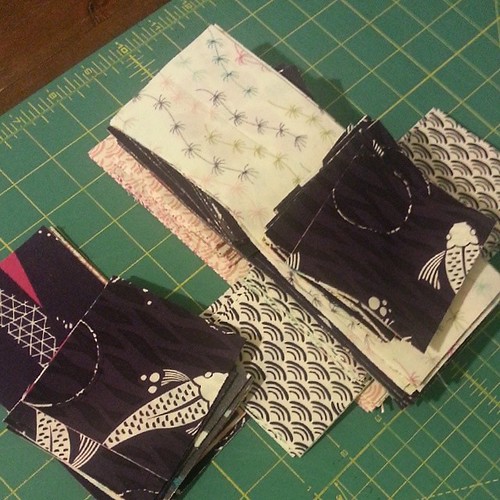
And just quickly....... a late night pic off my phone last night, to illustrate how wonderful surprises can be hiding in your stash.  This is the oh-so-divine Koi fabric range, and has been sitting patiently on my shelf awaiting a project.  What better time for inspiration to hit than a Saturday evening??  It was all chopped up, and today I put a whole quilt top together!  I will share it with you all on Wednesday.  All I will say is this - my bestest friends in the world better bloody love me!

I'm linking up - You can too!


Molli Sparkles

Friday, June 6, 2014

Modern Medallion Quilt Along - Week One

This week has brought the beginning of the Modern Medallion Quilt Along!  And for those of you playing along, I thought I'd give you a quick rundown of how the first step of this pattern went for me, along with a couple of tips/pointers.

First of all - make sure if you are using low volume fabrics in your quilt that you have a TONNE of them!  I was really worried about not having enough, until I did my fabric pull and found 37 fat quarters!  Doh!  I am at the finish line now and can tell you that I have used half to three quarters of each fat quarter!  That's a lot of low volume!

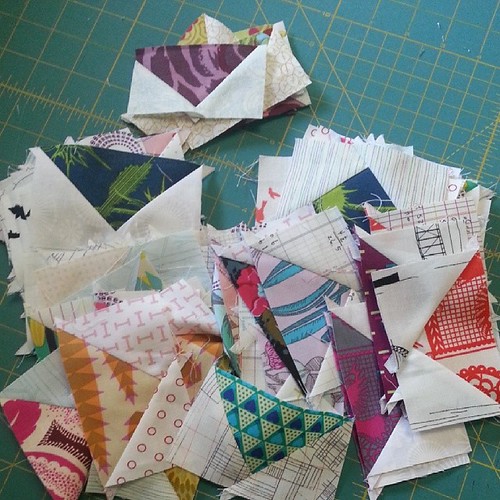
I spent some time yesterday worrying about my perceived lack of low volume fabrics, given how much I'll need for my #modernmedallion quilt. Ummmm..... 10 minutes in the stash produced these. .... do you think I'll be right @2littleausbirds lol. #thankgodf

If you are unsure what qualifies as low volume, here's my take - any pale/light background fabric that has a print on it!  So they could be anything from white to pink/blue etc, as long as they are a pale tone.  One trick to help can be taking a photo of your fabrics, then editing it to black and white, and you will be able to pick out the lighter and darker tones.

Now, on to the construction.

Ok @2littleausbirds @gnomeangel I've put aside my freakin out and come up with these!  #fingerscrossed #modernmedallionquiltalong 

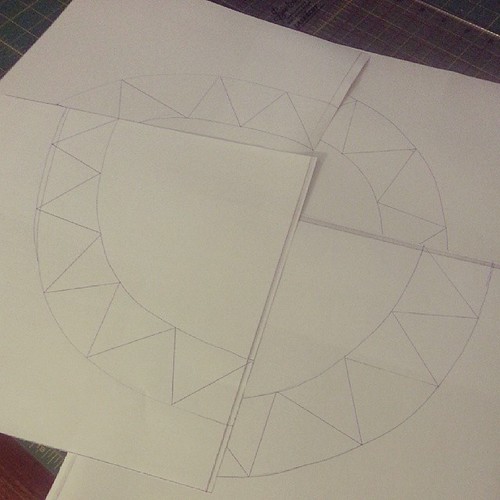
The pattern calls for lots of Improvisation piecing and wonkiness.  I can tell you now that this has been incredibly difficult for me to embrace!  Drawing up my NYB Contest paper piecing patterns was excruciating, and took lots of patience.  I DID NOT use a compass or anything trace-able - I literally free hand drew them.  As you can obviously see above!  The one thing I could not let go however, was the points.  I am a strong believer in triangle points not being lost!!!

It's a very good thing I have to go out for lunch!  Unpicked twice and cut fabric twice....... frustrated!

The sewing together of the arcs with triangles was super easy - I would like to think I am a pretty advanced paper piecer, so it did not worry me at all.  But the arcs.  THE ARCS!!!!!!  I am also a pretty experienced curves put-together-er, but this had me absolutely freakin stumped!  Because I had no pattern as such, I just could not get the sizing of the fabric pieces correct, and was incredibly grateful for a two hour lunch date with a friend that day.  I'd already unpicked the black centre piece twice before lunch, but returned home with a calmer exterior and curved the s*it out of it!!

So my biggest tip for this part of the pattern - PATIENCE.  Take is slow.  Have your unpicker close by ;)

This is how my centre medallion looked when finished....


As you can see - the wonkiness was well and truly pulled off!  If I had to do it again, I think I would have used four different fabrics for the centre pieces - but - I still love it!

Pop over to Schnitzel & Boo later on today, where Kristi will share her week of 
Modern-Medallion-ing!

And if you stop by here on Monday, I will have a tutorial for you for the drunken geese border!  Have a fabulous weekend! xxx

Thursday, June 5, 2014

I Quilt - Party Over Here!

Truth be told - I'm feeling like a bit of a blog-hosting-hussy of late!  But a blog friend has to do what a blog friend has to do......  And tonight, Ms Gemma from Pretty Bobbins is feeling rather poorly, so the I Quilt party is being held here!  Go throw your quilts in the air and shake em like you just don't care!  Ok, maybe not.....

I Quilt @ Pretty Bobbins

Lucky for you I managed to stop off at the local park this afternoon, dodged the rain and froze my butt off - but got some lurvely photos of my latest finish.


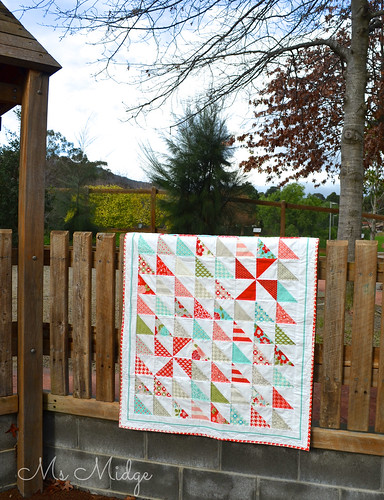
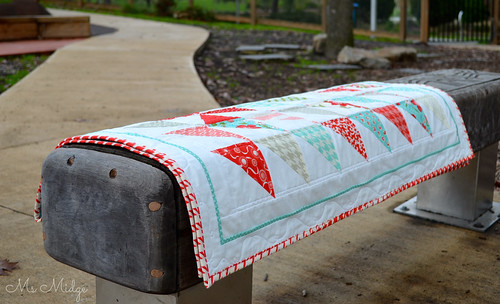
Vintage Modern Pinwheel Quilt

I found a Vintage Modern charm pack amongst my stash a few weeks ago, and thought it would be perfect for the upcoming "I See Red" Showcase over at Harley Barley on FB.

Vintage Modern Pinwheel Quilt

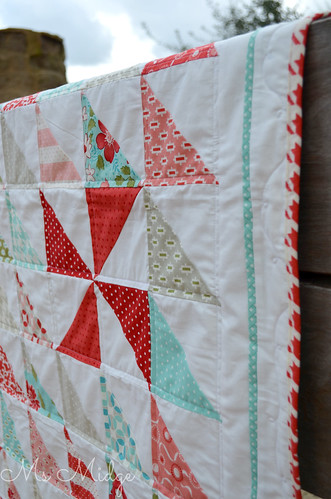
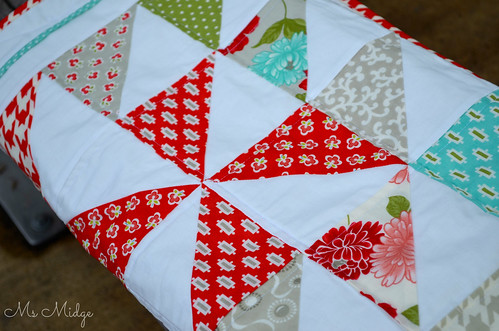
It is a VERY simple design - all HST's laid out in a simple row, with a couple of red pinwheels thrown in the mix for added interest!  The little peep border is a first for me, and I just love what it brings to the quilt.


Vintage Modern Pinwheel Quilt

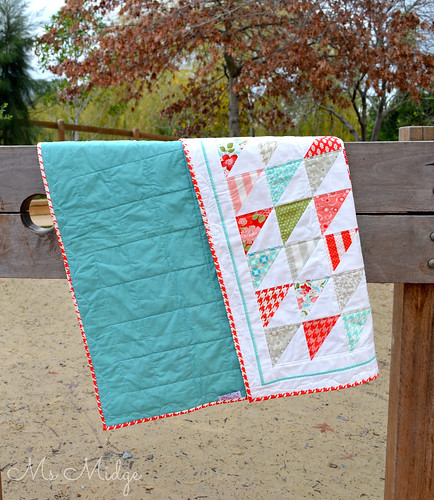
I've backed it in a green homespun I had here on my shelf - and I promise it's not all puckered and bunched up!  It had been folded for a week or two, and I didn't think to iron it before heading out!

Vintage Modern Pinwheel Quilt

I really love that a simple 42 piece charm pack can be turned in to something so beautiful.  My Aussie Charm Swap mates and I are pinning ourselves silly at the moment on my Charm Square LOVE Pinterest board.  Pop by and have a look!

Vintage Modern Pinwheel Quilt

This quilt has a finished size of 40" x 46" - perfect for a cot/toddlers quilt or a child's lap quilt.  It will be available to purchase on the 18th of June!

Now - I mentioned last week that I had lost my FMQ-jo.  This little project was the one that lead me to that conclusion.  I was so sad.  I wanted to free motion to heck out of it, but just couldn't get myself together, and instead went with some straight lines through the blocks.  I did manage to do a little swirly pattern around the outer border, which I think is darling and suits this pretty little quilt.  And I used my favourite Aurifil #2024 50wt thread to both piece and quilt.

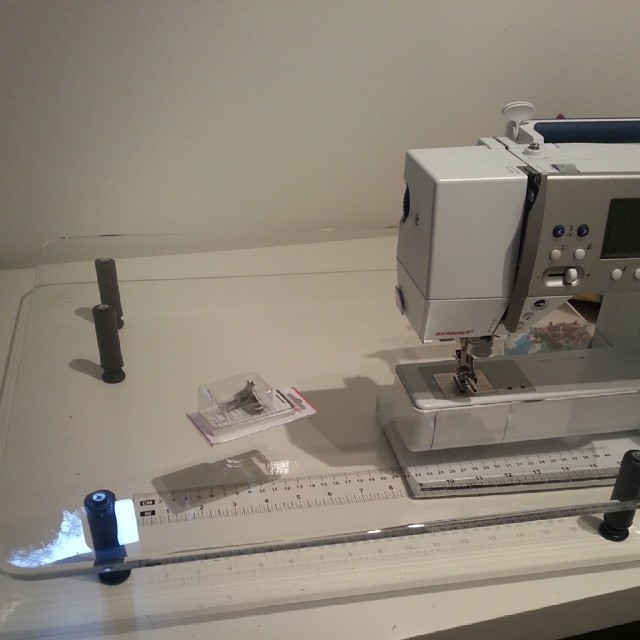
Since then, I have purchased myself an extension table for my Bernina.  I've set it up and have had it in place whilst piecing a few blocks this past week, but am finding it strange to get used to.  I'm hoping with time, it will become part of my regular setup and will make quilting SOOOO much easier!?  Time will definitely tell - as I have two quilts tops ready to baste and quilt!

So tell me - how do you get your sew-jo or FMQ-jo back when it's gone on hiatus??  And have you changed your quilting set up in order to help?  Did it take a while to get used to?

SPILL!

Please link your quilty process below and visit three other linkers - it's always nice to share the love!

P.S.  Anyone notice anything different around here?? ;)


Sunday, June 1, 2014

Sunday Stash - Incidentals.....

Some additions to the stash, I think, can just be written off as "incidentals".  Or "accidentals".  Here's a couple I think you will understand.....

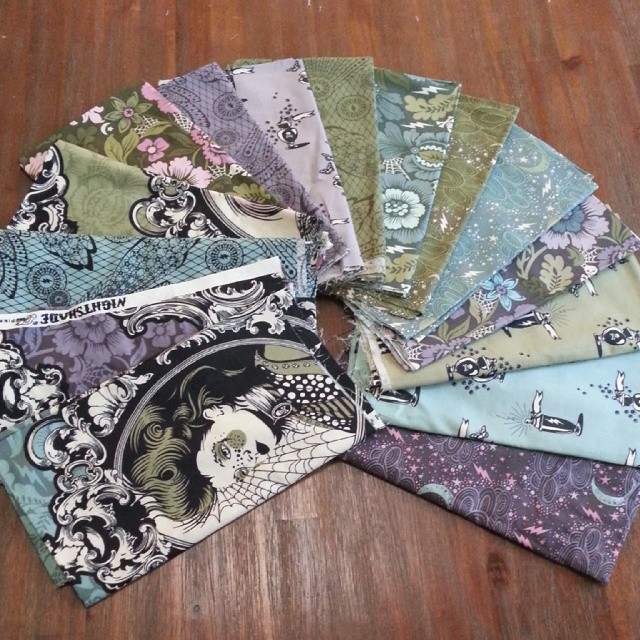
Ohmyfeckinggod!!!! #bestmaildayever #bestquiltyfriendsever thank you thank you thank you @quiltjane xxxx

I didn't plan on gaining this UH-mazing bundle of Nightshade....but hey.  I just happened to be chatting to my lurvely friend Jane - aka Quilt Jane - on FB one night, discussing her super fabulous Nested Churn Dash block.  Which lead to a discussion on Tula Pink........which lead to me saying I had been been trying to get my hands on some Nightshade.......and next thing I know - I've bought myself some!  Soooooo lucky to have such wonderful quilty friends!

I only went to the shop to get a new fmq foot....... whoops! Hoping this is going to make things easier when quilting? !

And ummmmmm, this really was an accidental purchase!  I went to the sewing shop to get myself a better FMQ foot - and knowing it was the last day of the Bernina sale, I sort of started looking in all sorts of directions once I got in there.  And then sort of asked whether they had any of the extension tables.  And then bought one.

I am looking forward to many many hours of joy bonding with this perspex beauty.  And hoping it will help me gain my confidence back so I can free motion bigger quilts again!

Whilst I have your attention - Just a little reminder that the Modern Medallion Quilt Along has officially kicked off today!  Stay tuned for lots of updates on my progress, and next week will be my stop on the blog hop!  Go and check out Crystal's post today!
I'm linking up - You can too!


Molli Sparkles
Related Posts Plugin for WordPress, Blogger...