Showing posts with label Patience. Show all posts

Tuesday, July 8, 2014

Making It Work - A Lesson In Patience

I've been channelling Tim Gunn this past few days (Project Runway for those of you scratching your head), and have babbled "make it work" on more than a few occasions.  You see, my darling Bernina came very close to being thrown through my wall on Friday, after repeatedly snapping threads and just being an all round biatch of a machine.  After the 542nd thread snap, I snapped.  And turned to my IG friends, asking for advice......  Which lead to Gemma texting me instructions to do this......
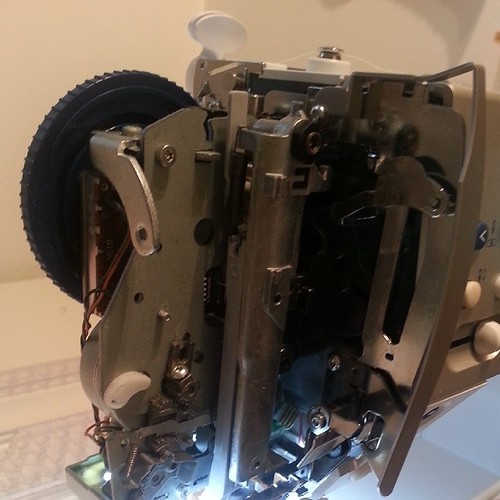

Well that was terrifying!  Thanks for that little lesson @prettybobbins 

After holding my breath for a while, I managed to gently dust the machinery and dislodge a little thread in the uptake thingamajig, then put it back together again.......  It worked for a whole five minutes then 
SNAP!!!!

I called the dealer I bought her from (in Tasmania) and walked through some trouble shooting, and she gave me the bad news that I'd need to take her somewhere to be looked at.  Thinking tension discs or a burr on the bobbin case.  Sigh......

Anyway, I picked up my bottom lip and rang my Mum.  Drove around there and picked up this......
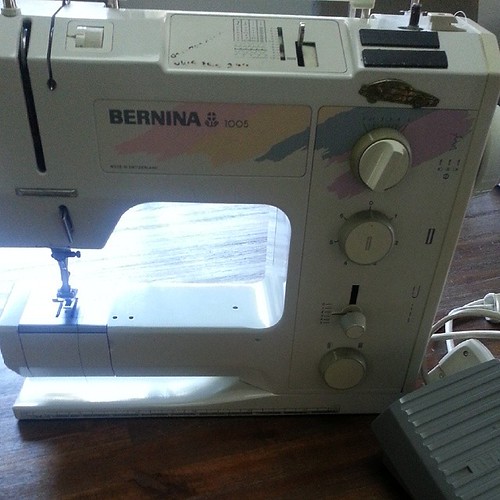
So after a call to my Bernina dealer in tassie.....ive booked my baby in for a service and just picked up this one from my mum.  Shattered but grateful! 

Good old faithful!  I used this for quite some time before buying my own Bernina, and it's an absolute work horse.  HOWEVER....  it has no quilting extension table thingy, nor a walking foot, nor a zipper foot.  Hence, I have had to make it work.
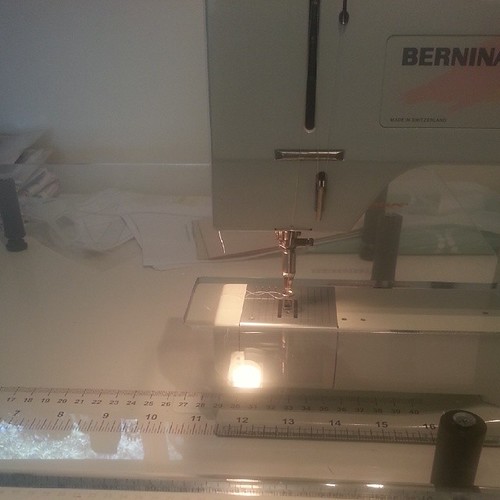
Trying to make fmq work with my mums old bernina. #imissmymachine #todolistssuck 

My to do list this week is literally packed.  And I was so depressed about my missing baby, I couldn't bring myself to sew.  Kicked myself up the bum this morning and got out my big extension table and just sort of sat it there.  Worked out how to drop the feed dogs and whacked on the fmq foot and just gave it a crack.
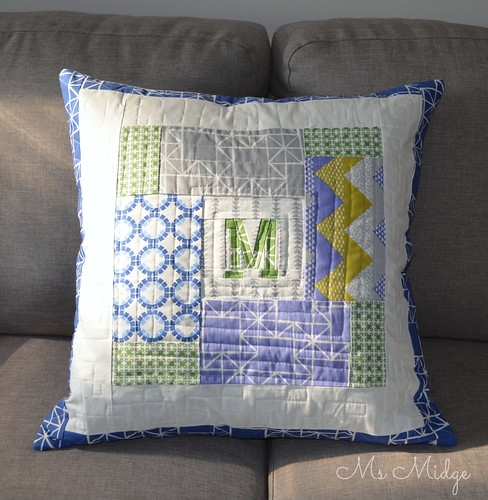
M is for Mitchell 

And ta-daaaaa!  Look, it's far from perfect, but given there's no needle down function, the fmq foot is not actually genuinely made for this machine and the dodgy way I had the extension table set up - it's pretty damn good!  I had this cushion cover top finished a few days ago - it's a birthday gift for one of my youngest daughter's friends.  M is for Mitchell!  I pulled out a bag of scraps leftover from my SON's QUILT, which I knew eventually would come in handy!  The letter M is from Quietplay's alphabet patterns, and is super easy.
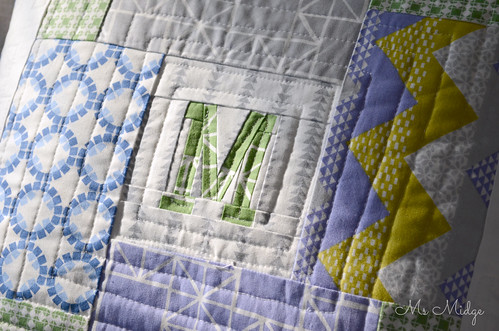
M is for Mitchell 

I literally started in the middle of the cushion and worked my way outwards.  There's some wonk in those "organic" straight lines!  But I am actually very impressed with the consistent stitch length - that's one tick!  I used my go to thread - Aurifil #2024.
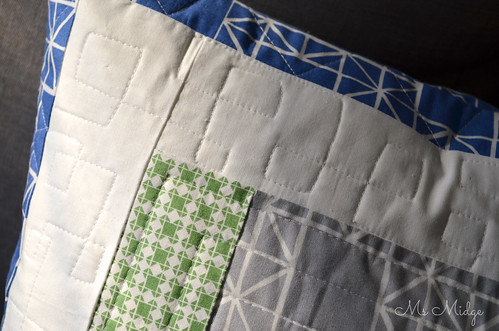
M is for Mitchell

Once I got the the white space, I tried a little pattern I've seen around, and just love it!  I can see myself using it on a bigger scale on quilts.

I'm not even showing you the back!  Let's just say that inserting a zipper without a zipper foot is not my forte!  But hey - six year old boys are not likely to criticise?  I hope?

All in all, it has been a very interesting experience.  I have learnt patience in my quilting.  After I'd finished this cushion, I kept going and finished off two other cushion cover tops for Collaborate For A Cause.  And the quilting is actually incredibly neat and as I said before, the stitch length is perfect.  So there's a lot to be said for quilting with anxiety!  I am however looking forward to a phone call from the service guy telling me I can pick up my baby!

I'm linking up - You can too!


Sew Cute Tuesday


Sunday, December 22, 2013

Sunday Stash - Fabric Enabling!

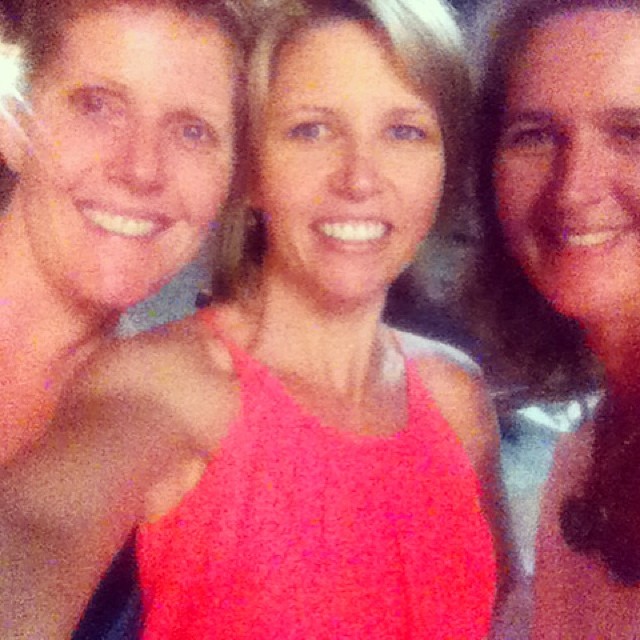
Earlier this year, my Tokyo Bff travelled carrying THIS HAUL for me.  It was like I had won the Lotto!  And as it happens, I've just returned last night from another visit to the Gold Coast to catch up with two of my longest and dearest friends, one of them the "Tokyo Bff".

Suzie - AKA Tokyo bff and her two gorgeous children!

Friends for 32 years
Friends for 34 years!  (IG late night photo explains the graininess!)
Amongst the talking, laughing, wine drinking, swimming and being chased by toddlers - I was also handed a bag from the infamous Tomato store in Nipori Fabric Town!  Suzie is great at letting me know she just happens to have an appointment nearby so will pop in and grab me something!  The following is what she grabbed for me this time round....


My Tokyo BFF went shopping in Nipori again.....
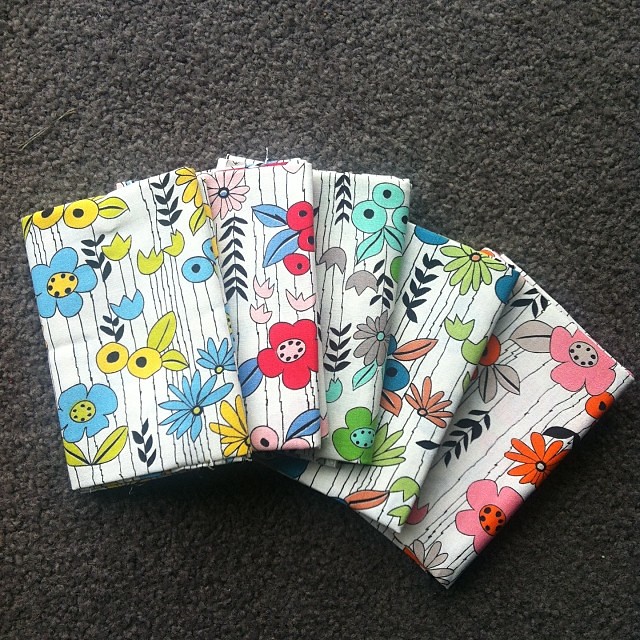
A divine little fat quarter bundle of Kei.  I knew I had seen this fabric before, but couldn't work out where nor who the designer was until I posted the photo on IG.  Jeanette from Polka Dot Tea filled in the blanks for me!  They sell a few of these prints in their store!
So excuse me whilst I share them to Flickr via here!
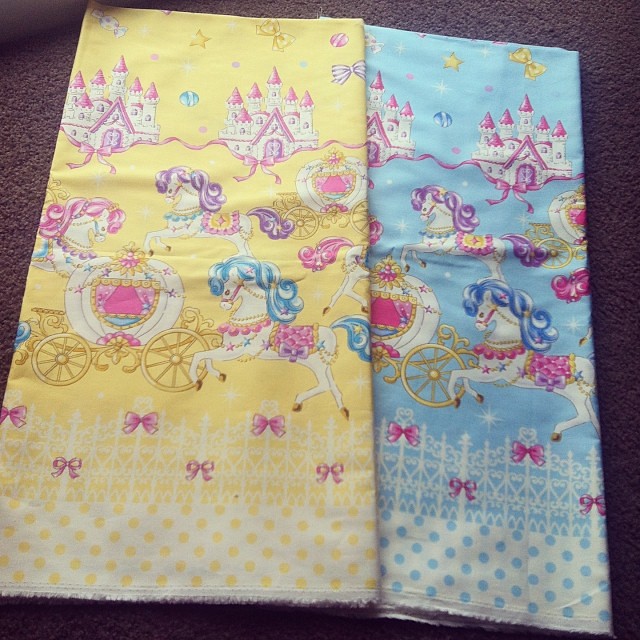
These two gorgeous Princess border print fabrics.  They will make amazing frocks!
upload
And a little mix of other goodies!  The trains I'd seen around also - from Cosmo Textile Co.  The ribbon print is a Kokka and is kind of like a Cotton Lawn.  Quirky Japanese cartoon prints, a fq of Princesses and Tomatoes!  A bit of everything!  I desperately want to make a visit to Nipori myself one day.  Suzie has lived there for 15 years, so it's about time I pull my finger out......
In other breaking news - I purchased fabric and waited six weeks to receive it!  Yes, true story.

My mother in law went to the USA and all I got was this fabric! Boohoo! #insertsarcasmhere I love only paying US shipping rates for once!
When my mother in law was about to depart to the USA for a five week jaunt, Pink Castle Fabrics were having a fabulous sale, and I thought I best get on board.  So I grabbed myself the Joel Dewberry True Colours bundle along with the Word Up bundle. (And no this is not a sponsored post - I just love the damn bundle!) I'd been coveting the Word Up bundle for quite some time and when I did the math (yes, another amazing feat) and realised I could order all of this, at a discount + have it shipped to the MIL's hotel = Winning!  I just had to be patient......  And I was.  All in all I saved around $60!  The patience was worth it, because it's all just so divine!  As per usual, I have no idea what I'm going to do with it all, but I'm sure it will come to me?

And that's it folks!  I've shown great restraint fabric purchasing wise the past couple of months.  Christmas + four children = broke.

I'm linking up with Sunday Stash @ Finding Fifth!  You can too!


Wednesday, October 2, 2013

W.I.P. Wednesday - Triangles

Something I am yet to have made is a triangle quilt.  Until now.  I started on it yesterday, cutting out triangles upon triangles, but still a gazillion triangles to cut out!


I used a template provided by the tutorial I am roughly following, and really was hoping it would be ok!


Last night, I took all of said triangles, and laid them out to get an idea of placement.  Then saved them before Bella the cat mistook them for something for her amusement, and popped them in piles of rows.


And today - well, I sewed together two whole rows of them!  And then stared at them for ages, knowing that they weren't right.  My instincts were correct, and when I trialled sewing the rows together, I stopped after about 3 triangles, and scratched my head.....


The remainder of my afternoon was spent searching the interwebs for help.  And my un-picker was put to good use, painfully.   I found THIS fab bit of advice over at Stiched In Color, and in the end, I figured that the whole "blunt edge" on the triangle did not work for me, so I have now also spent some time shearing the edges off about 60 triangles, getting rid of the blunt edge and making them pointy.  


And what do you know?  I'm now getting perfect rows of triangles with 1/4" overhang to allow for the sewing of rows together.  The fact that it's taken me a couple of hours of frustration and a sore wrist from un-picking really doesn't matter......hmpfffff.

I currently have a few W.I.P.'S on the go - strange times for me!  I will be sharing another of them on Friday........so watch this space!

I'm linking up with W.I.P. Wednesday - which just happens to be hosted by my friend Kristy today! - You can too!


WIP Wednesday at Freshly Pieced

P.S. - To all of you lovely peeps who left me wonderful comments on my Refractatorium Quilt - I THANK YOU!!!!  I've had trouble replying to everyone due to the fact I've had my kids + some here for school holidays!  Please know I LOVE reading your comments and thank you dearly for your encouragement xxx

Tuesday, August 6, 2013

The BIG Swoon Reveal!

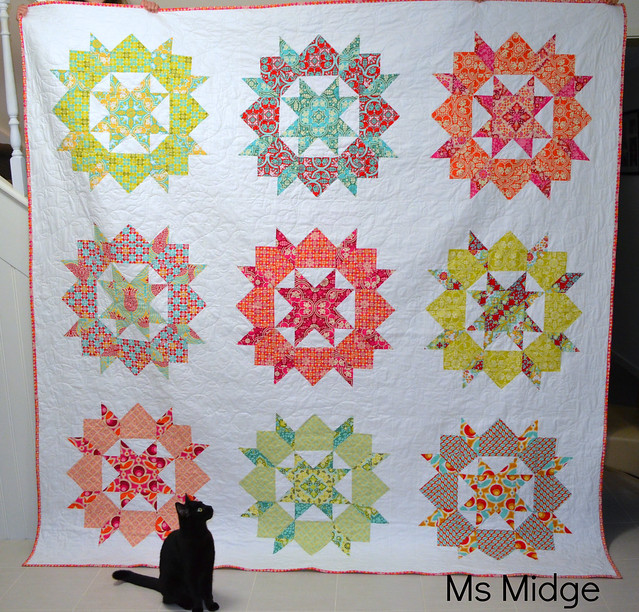
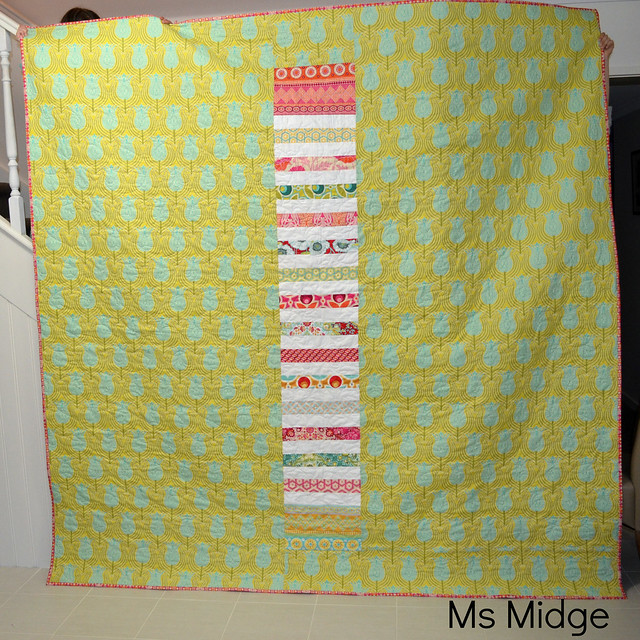
The day has finally come - I can share my biggest finish with you all!  That's right - my Swoon is done and dusted!  I managed to bind it on the weekend, and Saturday night, got my little minions to work, using muscles they never thought they had.  This baby is HEAVY!  I could have waited for delightful sunshine and dry skies - but you wouldn't have seen photos of it for about a month - Melbourne's Winter is in full force at present!  So, without further ado - here she is - "Swoon".....

Swoon finished!

Bella the cat appreciates a good quilt when she sees one.

Swoon finished!

Minion's muscles fading fast.  I LOVE how the pieced back shines.  And I LOVE the fact that you can hardly tell where I have joined the prints!

Swoon Finished!

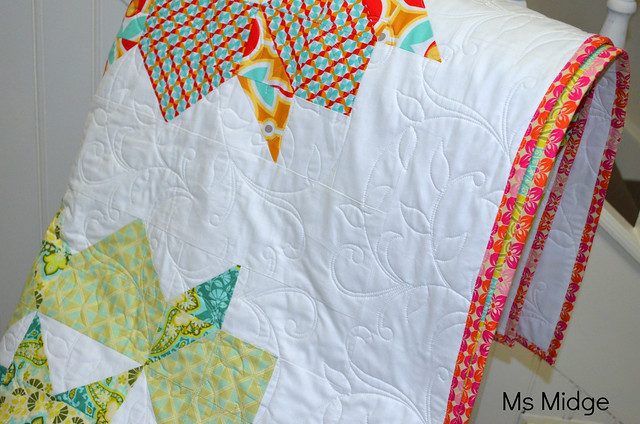
But most of all, I LOVE the beautiful quilting that Jeanette over at Gone Aussie Quilting did for me!  This is the first time I have sent a quilt away to be quilted.  It took me days of looking at digital designs, making a short list, and then asking my quilty friends for their votes, before I went with this vine design.  It is literally PERFECT in every sense.  I didn't want a dense quilting pattern, I wanted it to skim over the blocks and not take away from their brilliance.  I think my choice has achieved that!

Swoon Finished!

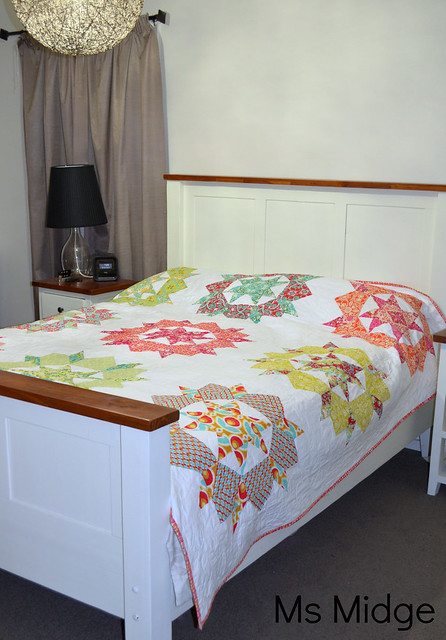
And here it is on our queen size bed.  I took a gazillion 50 photos that night, but thought I would spare you!  I could sit and look at this quilt all day, but alas, I have other quilts to make now.

Through the process of making my Swoon, I've had many people ask me if it is a difficult pattern?  My answer?  It really is a fairly simply pattern to make.  It is made up of HST's and Geese, and a bunch of squares and rectangles.  The cutting for the blocks is a little tedious, but once I made the first block, I then worked on three blocks at a time, chain piecing them to make the process run smoother.  The blocks then came together relatively quickly.  In fact, I made all nine blocks in around four days.  Yes, they were big days, but it's very do-able!

In the details:  Machine pieced and machine bound.  SIZE - The finished size of the pattern is 80" x 80", I made my sashing 5" wide, which brought the finished size up to 90" x 90".  As you can see, that is plenty big for a queen size bed!  It will shrink up a few inches on its first wash, and will still be big enough.  FABRIC - I used Notting Hill by Joel Dewberry.  I bought the entire fat quarter collection - which you can still get HERE, HERE and HERE (just to name a few!).  This pattern is perfect for fat quarters - you only need 18 in total.  QUILTING - Jeanette from Gone Aussie Quilting is situated in New South Wales.  I posted the front and back to her, and she supplied the batting.  She has a TONNE of digital designs to choose from for her edge to edge service.  And she has a fabulous special price for quilting Swoon quilts.  And she's also super quick!  If you're in the USA, there is a special quilting offer for edge to edge quilting from a lady in New York.  If you join the Swooning on a Hop Along Flickr group HERE you will find that offer too.  And if you want to buy the pattern for yourself, you can find it HERE.

So.  Where to now?  More quilting I guess!

I'm linking up with Sew Cute Tuesday AND Show & Tell Tuesday - You can too!

Better Off Thread


Monday, March 25, 2013

Some Would Say

Some people would say I am a sucker for punishment.  At times, I think I would agree with them!  Often when I think my plate can't get any fuller, it overflows.  Last Friday, I was reminded by my 14 year old that we had a Japanese student arriving today......For a split second, panic set in, but then moved along.  Until the same 14 year old told me he'd left all the information regarding said Japanese student in his locker at school.

After a quick phone call to the school late Friday afternoon, another quick phone call to the Japanese co-ordinator that evening and a fairly limited email of information close to midnight, I let it be and accepted that I would be a little unprepared for our visitor.

Fast forward to today.......  A quick re-shuffle of my work day meant that I was only five minutes late to pick him up from school - and an instant smile and a long thought out answer of "I'm good" from him meant we would be A-OK!

We have only had two weeks notice for this visit.  You see, the Australian and Japanese governments are working together to bring out these kids for an Australian experience.  This group of children are from the Minami Sanriku area in Japan.  Their town and surrounding areas were flattened by the tsunami a couple of years ago, so many of the children have lost everything.  I didn't think twice when the information came home asking for host families.

We've had conversations, albeit very quick ones, with our children about what our visitor may have been through, and I followed our Japanese co-ordinators advice and googled the town.  I was speechless.

Sooooo, it is with much pride and happiness that I have watched and listened to my children this afternoon and evening, communicating with Ryuoto (pronounced Rio-toe).  Playing Wii with him - which he told us he was very good at, and then proved it very quickly!  They've taken him over to the local park and are now sitting with him watching tv.  He loved my cooking - telling me very clearly that my roast beef was delicious!  He can stay.....

This is the third time we have had a Japanese student stay with us, and although the first experience was extremely difficult and could have quite easily put us off ever hosting again, the second time was a breeze and joy!  I am so glad that my kids are so accepting and willing to go out of their way to make someone feel so welcome.  I think by the time all four of them have made it through high school, we could have a dozen or so extra children all over the world!

Google translater getting a run for its money.....
And the universal language of gaming......Bless.

Tell me - have you ever had an international student stay with you?  Would you?  Could you?

Thursday, March 21, 2013

Where I'm At - A Little Old Mental Health Check In

As I sat down this afternoon, to finish off some Ms Midge orders, I felt really bad.  I felt bad because usually I have a reasonably quick turn around on orders.  Most of the time I let customers know that it will be around two weeks from order to delivery, and I can generally get orders sorted within a week - just to surprise everyone!  But lately, things have been very slow, and for that I feel like I need to give a little bit of an explanation.

Sure, the heatwave here in Melbourne set me back a bit.  Our new house does not have air conditioning downstairs, which in turn means sewing in my little room starts resembling an episode of a fitness program - with sweat in places I don't like to sweat!  

But I have also been dealing with some other time and mind consuming issues.

I've mentioned briefly in past posts that my gorgeous sister has a mental illness, and although I don't tend to bang on about it (because hey, let's face it, it's her story to tell, not mine), there are times I would like to shout from the roof tops.  Scream to anyone who will listen.  Instead, I tend to internalise things.

What I will say is that being the only child of three who doesn't have a mental illness, is not as easy as you would think.  For me, it has been heart breaking, frustrating, infuriating, sad, confusing and mind boggling.  There were times when I couldn't be around my sister.  I had to separate myself, as a way of protecting myself.  Because I would get so overwhelmed by what she was going through, that it would inadvertently bring me to my knees, which would then affect my own family.  I have explained this to her, and thankfully, she gets it.

I try to understand.  I try to put myself in her shoes.  But I can't.  A few weeks ago, I went and saw "Silver Linings Playbook" at the cinema.  I had no idea what it was about, until after I had bought the tickets.  I cried on and off throughout the film, and then sobbed the whole drive home. And afterwards I dropped past to see my sister, to let her know that I'm trying my hardest to understand and to learn more about her mental illness - but regardless of my lack of understanding (because I don't think anyone can truly understand unless they themselves have a mental illness) I would ALWAYS HAVE HER BACK......

Which brings me to the here and now.  I'm currently advocating for my sister.  I'm making calls, sending emails and sitting in meetings with her.  I'm speaking for her, when she can't speak for herself.  And I'm crying with her.  Crying for her.  Crying all the time.  If I had collected all the tears I have shed these past few years, I could break droughts.

What I want most right now is for others to see what I see.  To see the amazing person who has been flattened by her demons.  To see that although on the outside, she portrays to the world a wild, whacky and weird woman - on the inside, she is fragile, determined, a little bit broken and a little bit weird, but most of all she is WONDERFUL.  And to see that she needs help, support, love and understanding - not judgement.

What I want you to know is that people with mental illnesses have families, they have people who care for them, advocate for them and are frightened for them.

I'm struggling a bit to keep my head above water.  I have diagnosed myself with "sad-sack-itis" - something I find myself dealing with when I'm dealing with too much other "stuff".  So the Ms Midge sewing has taken a bit of a back seat these past few weeks, and will probably unfortunately remain there for a little bit longer.  I haven't forgotten about my lovely customers!  I HAVE ordered some beautiful Autumn/Winter fabrics with the hopes of making lots of yummy warm outfits for your littlies!  And I will be listing them for custom orders in small quantities.  There will be no mass production lines or mini collections like I used to churn out!  I'm hoping you will stick around and see what I can produce!

A special BIG thank you to those of you who have ordered this past month and have been very patient and understanding.  I really do appreciate it!

Soooooo..........onwards and upwards!  I'm hoping that by sharing this little piece of me, it will help lift a bit of the burden I'm carrying, and lift the old sad-sack-itis far far away!

xxx


Monday, March 18, 2013

A Bag From Numbers - Tutorial (of sorts!)

Whilst I was in Queensland last month, I had to pleasure of catching up with my Tokyo BFF, and her lovely family.  Lucky for me, her gorgeous little girl also just happens to be my God Daughter!  Anyway, at the end of our weekend, after she had handed over the MOTHER LOAD of fabric, she got out her notepad and pen and wrote a little list of things her little boy required for Kindergarten.
It's been living in my handbag pocket, and survived a near death experience via Chloe's pen.....

The last time I made bags for these gorgeous kiddies, I looked up tutorials, and it was actually quite time consuming trying to find a tutorial that had the same measurements etc that I was looking for.  This time, I thought I would dive straight in and just make it up as I went.  Given my lack of mathematical ability, this could have turned out a disaster.  But I'm happy to say - it didn't!  Here's how I made a bag from numbers.......

I got my scrap piece of paper out and searched the house high and low for a pen.  Once found, I took the numbers from my little note and drew some very technical diagrams.  I basically worked out that I needed four sides to the bag, which are the two top drawings above, and then guesstimated how long the handles needed to be for a three year old to carry. I also needed a bottom for the bag, which I initially was going to cut another "pattern" piece, the bottom diagram.  But I sacked that idea and just went with a longer single piece of fabric, which was made up of the two main pieces and the bottom piece.  Are you still with me???

I picked out this gorgeous Japanese train print!
And these are all the pieces cut out ready to go.  Main piece 15.5 inches wide x 26.5 inches long.  The sides were 11.5inches x 3.5 inches (two).  And the handles were 11.5inches x 4inches (two).  I cut two strips of heavy iron on interfacing, 1inch wide.  And also replicated all of the pattern pieces in a navy blue poplin for lining.

I took the fabric for the handles, ironed them in half lengthways, and then folded the sides in to the middle and ironed again, making them into a large sized binding.

Popped the strip of interfacing in and ironed it on, to give it some added strength.  Then ran four lines of stitching through it to give it more strength and stability.

I was going to use batting for the main section (as my friend said these particular bags are usually quilted - who was I to argue?), however found some fusible wadding.  Fab.  Cut a piece of the same width and length and ironed that baby on!

I then found a lovely scrap piece of homespun and made myself a quilt sandwich, and used some basting pins to keep it all secure.
Then got my free motion quilting on!  I love this, so much fun just whizzing around!

Once I had the quilting sorted, I then needed to work out how on earth I would put it all together.  Possibly something I should have done earlier?  I decided to measure half way on the length, and pinned it, then took the side pieces (which I failed to note also have some heavy weight interfacing ironed on, and then ran a few rows of stitching through them) and at their centre mark, matched it up with the pin marking the centre of the quilted piece.  I secured the sections together about 1/4" in.

I then brought the sides of the bag up flush with the length of the side piece, and pinned them together.


Right on the corners, I just squished them flat, and stitched from one end through to the other.

And then repeated it on the other three lengths.

This is how the sides of the bag ended up looking.
I measured the centre top of the bag to work out where to place the handles.  Got out my trusty quilting ruler and spaced them four inches apart.  Then stitched them on.  A bit of backstitching was required here.

And this is what it looked like! Don't mind the mighty overhang prior to trimming the side pieces!

And I was happy when I turned it right side out and it looked like a bag!

Time for the lining!  I put the lining pieces together exactly the same way as the main bag.  Then with RIGHT SIDES TOGETHER, I popped the bag inside the lining and pinned it all together, matching the side seams, and making sure the handles are sitting between the lining and outer bag.


And sewed all the way around the top of the bag, only leaving a few inches, backstitching at both ends.
Like so!

Time to wrestle!  Anyone who has ever turned a bag or anything out the right way will tell you that there will be a few moments of doubt, when you wonder if you will actually succeed in pulling it all out without ripping it to pieces?  It's a game of slowly, slowly.  And I promise it will end well.....

And you will exhale when you end up with this!
Push the lining inside the bag and finger press (ok, it took me a while to figure out what that meant - use your fingers like an iron!) the layers together, so your seams match beautifully and pin them.  Then sew all around the top edge of the bag, making sure the opening you used for your wrestling is tucked in nicely.

And BAM!  You have a bag!

Phew.  I hope this makes some resemblance of sense and that you have learnt even the tiniest bit from it?  I know I did, hence why I wanted to try and share!  The moral to this story is - anything can be made from next to nothing - even when all you have is numbers!
And just in case you were wondering - here are the other two requested bags!  The Japanese teachers requested thick cord so they can teach the kids how to tie bows!  Great idea!
I'm linking up today with

Plum and June

Being hosted by the lovely Jamie Lee over at Busy Bee Quilts!
Related Posts Plugin for WordPress, Blogger...