Thursday, February 27, 2014

9" Economy Block Tutorial

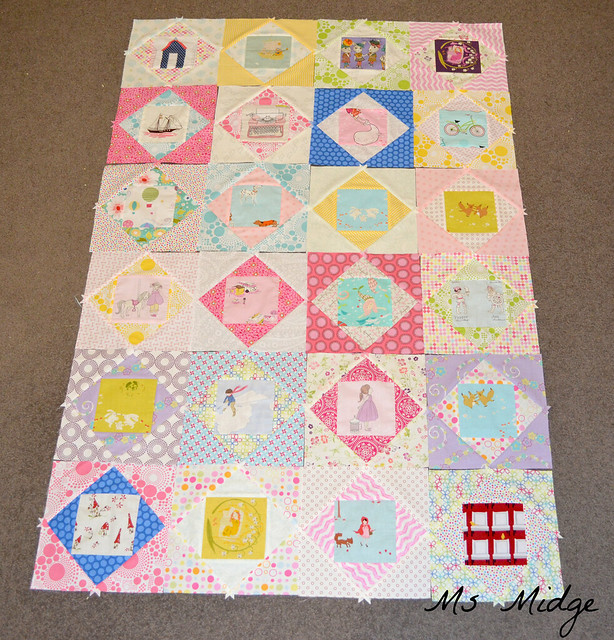
This week has me economising, and as I showed you YESTERDAY, I'm making 9" blocks, opposed to the 5" paper pieced version by Red Pepper Quilts.  As promised, I have a tutorial for you!  And as usual, I have lots of photos to hopefully make it easy to follow.

Now I didn't make these measurements up!  My tutorial is an adaptation of one I followed a couple of years ago by The Oz Material Girls - so thank you Louise!  They have a charity FB page called "Do Your Block", gathering blocks from quilters and making them in to quilts to donate to people in need.

On to the tutorial.........  These measurements make a 9.5" finished block - 9" when sewn together.

IMG_2169

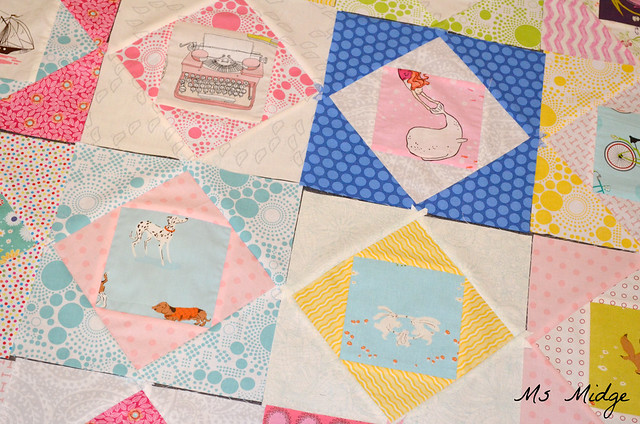
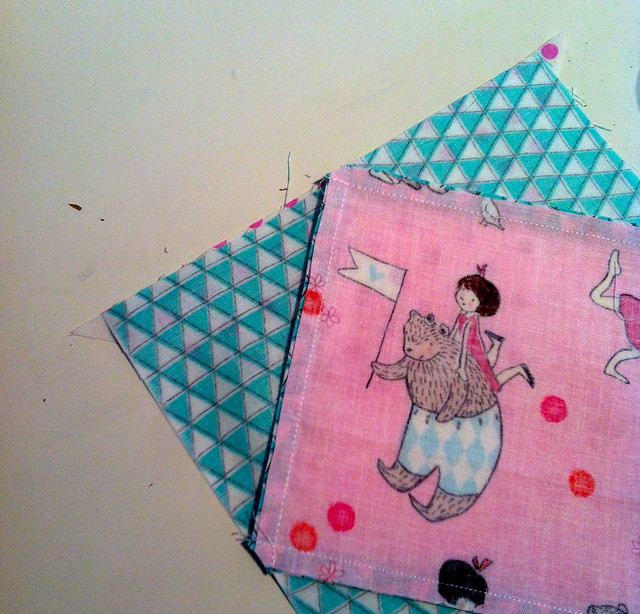
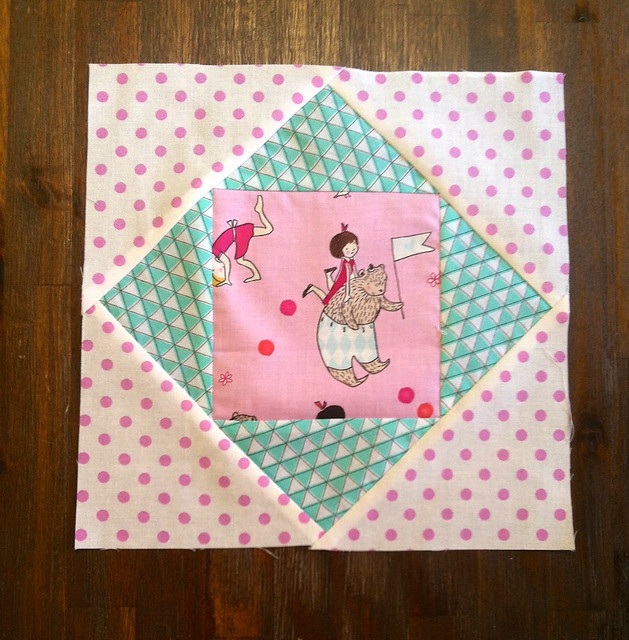
First things first, you need to choose your fabrics.  You don't necessarily have to have "fussy cut" prints like I have chosen, you can get out your favourite prints and use them as centrepieces to highlight them.  You will need a 5" centre square (fussy cut in this instance).  2 x 4" squares for inside triangles (green) and 2 x 5 3/8"(pink spot) squares for outer triangles.

IMG_2170

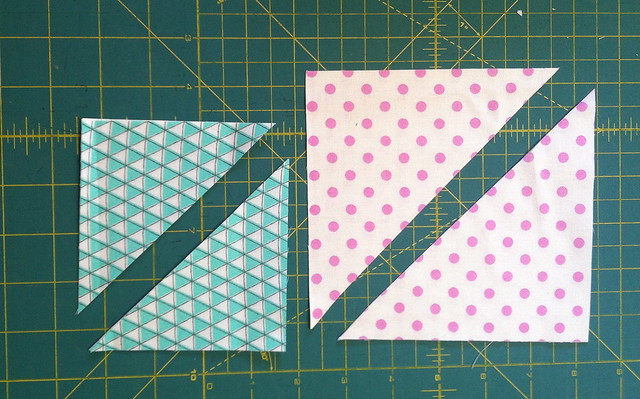
Take your outer squares and cut diagonally to make the triangles.

IMG_2171

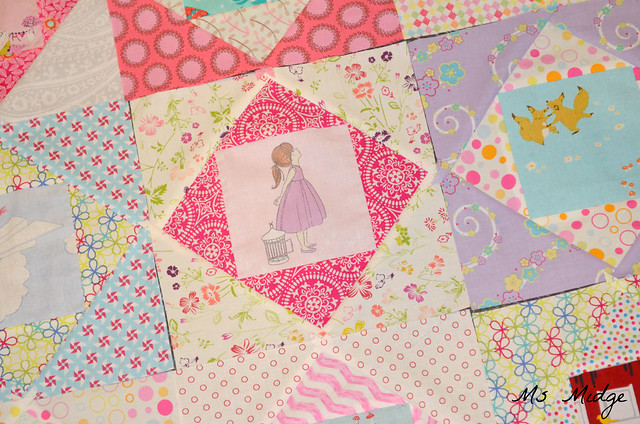
Lay your pieces out together to be sure you like the combination.  This is especially important when you cut out a million squares/triangles at once ready to chain piece 12-24 blocks in a day!  I ended up with some very interesting colour/pattern combinations that I would never normally have paired up together - but I must say, it has worked beautifully!

IMG_2172

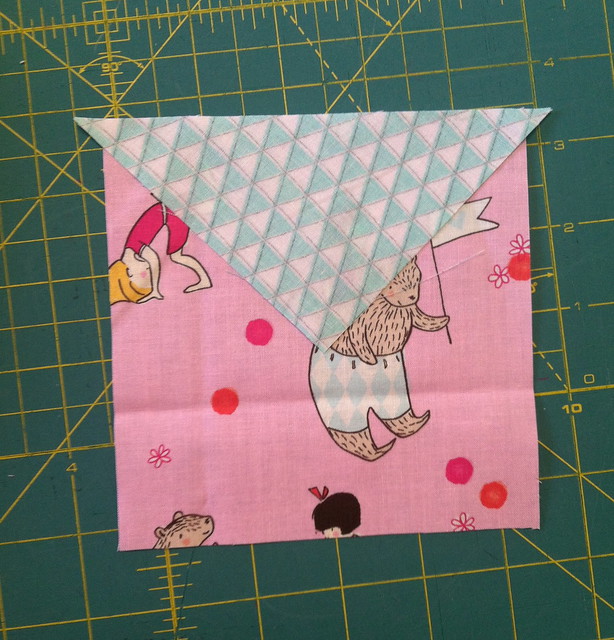
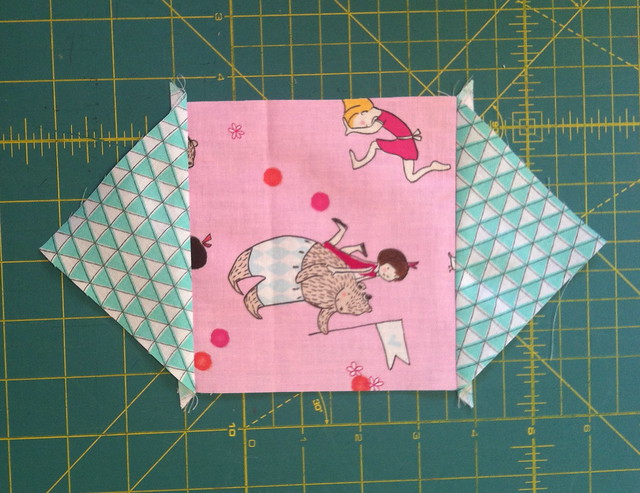
Take your 5" square and place one of the smaller triangles over one edge, centred.  I have shown you above as an example, but as you will see throughout this tutorial, I sew all of the pieces with the triangle pieces on the bottom.

IMG_2174

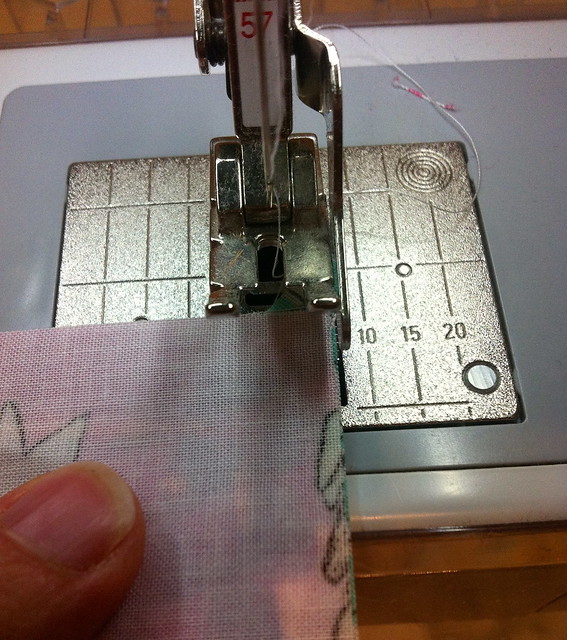
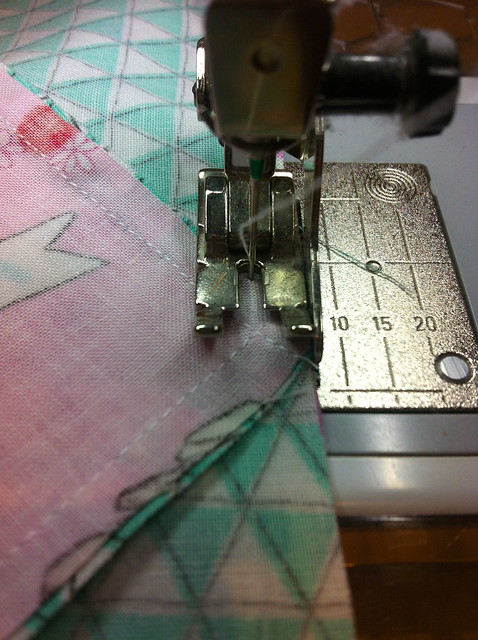
You will have two little "dogs ears" poking out on either side of your squares, when you start to sew them, you want them to almost line up with your 1/4" point - ie. my needle.

IMG_2175

Sew right along the side, making sure you still have your little dogs ear sticking out at the other end.  As you can see above, the needle/stitching finishes at the same/similar point to where the dogs ear is.

IMG_2176

Repeat on the other side, so you end up with the above.

IMG_2177

Press your triangle outwards.

IMG_2178

Then repeat on the other two edges of your square.

IMG_2179

This time round you will have two dogs ears sticking out!

IMG_2180

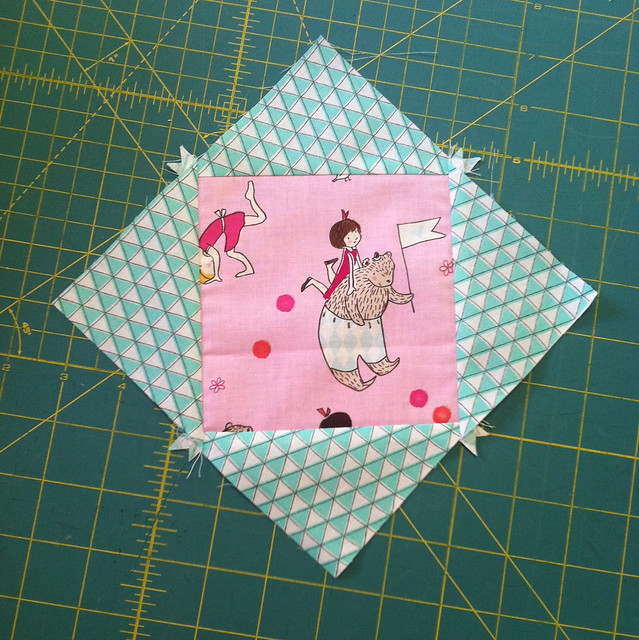
Press the triangles outwards again, and you should have a relatively square block.  Trim off your dogs ears.........

IMG_2181

But only trim back to the edge of the seam furtherest from your points.

IMG_2182

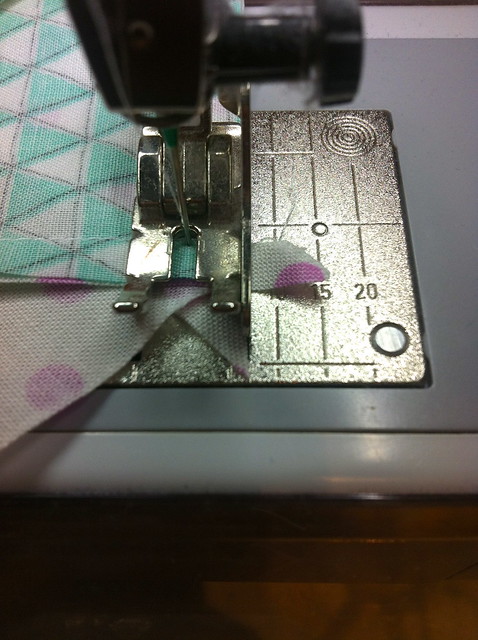
Because when you take your large triangles to join to this square block, you may have some uneven seams as above.  Line up your triangle with dogs ears sticking out the sides again, and sew with your 1/4" seam.......

IMG_2183

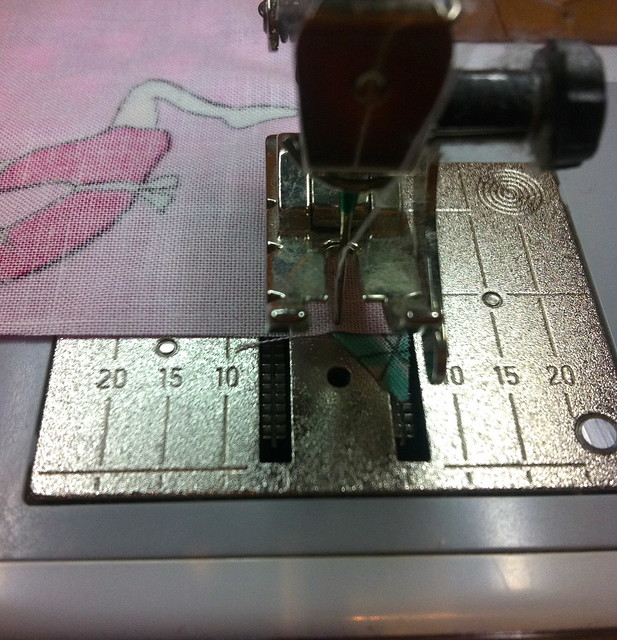
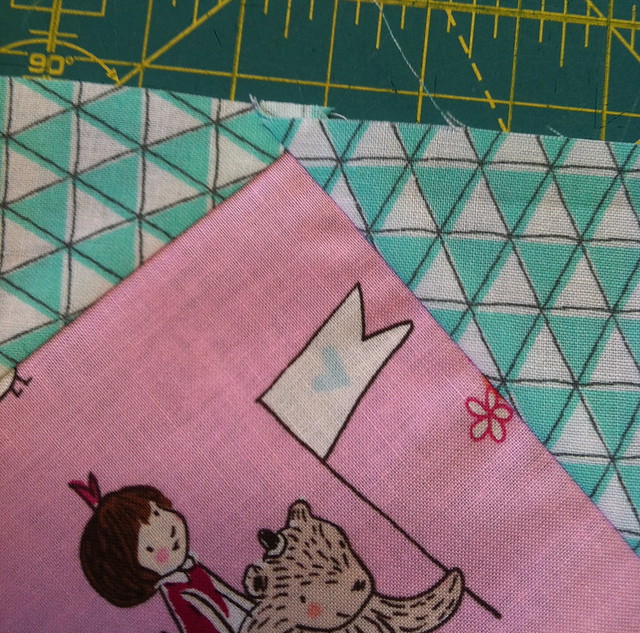
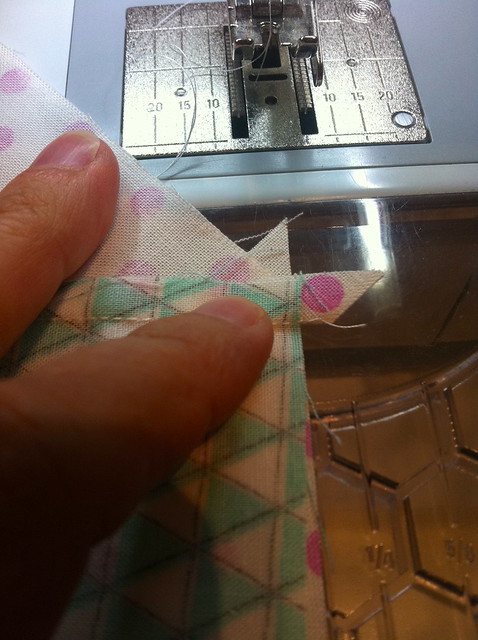
Take your time, and when you get to the intersection where your points are, make sure your needle is lined up just a smidge above the point intersection - as above.  This is how you can ensure your fussy cut square will have four perfect little corners/points!

IMG_2184

Repeat on the other side and press the triangles to the side.

IMG_2185

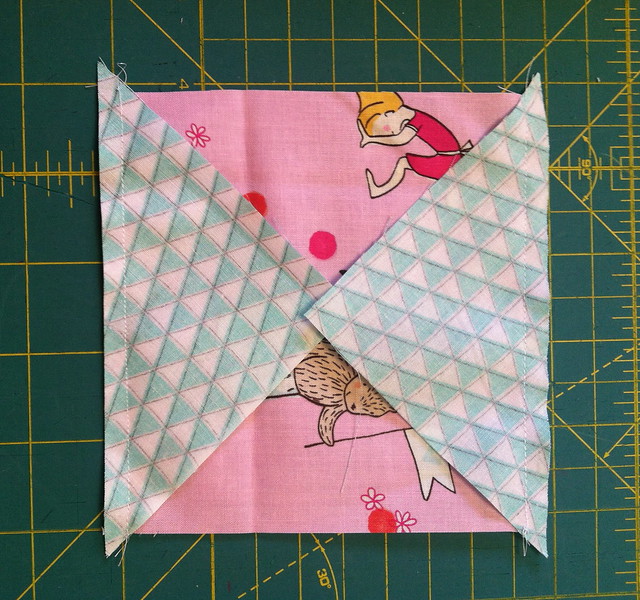
Now take your last two triangles and line them up as you did for the inner triangles.

IMG_2186

And your last intersections!

IMG_2187

Press your final triangles outwards and you're finished!  In theory, you should have a 1/4"to spare around your block, so that when you piece your blocks together, you will have your points intact from your inner triangles!

IMG_2188

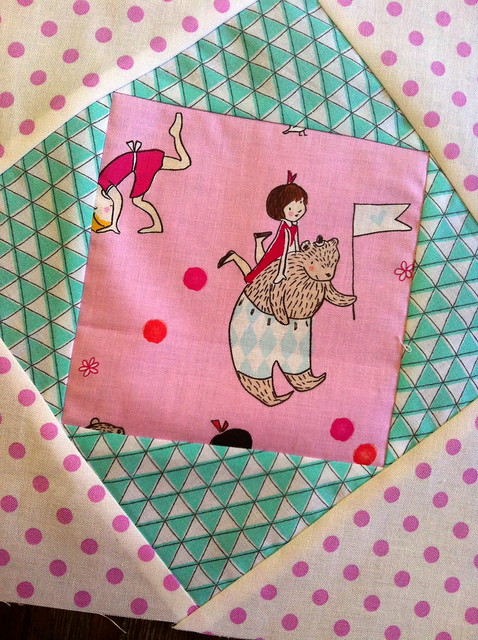
I really hope this makes sense!  The most important part of constructing these blocks is having your points intact, and as you can see above, this block's points are fab!  If you've been around long enough, you would know I am not a "nit-picker", and as long as the end result is good, it doesn't "really" matter how you got there!  Miraculously, I've now made 30 of these blocks, and they are all almost perfectly measuring 9.5"!  And I haven't lost a point on any of the squares - so if I can do it - anyone can!


IMG_2189

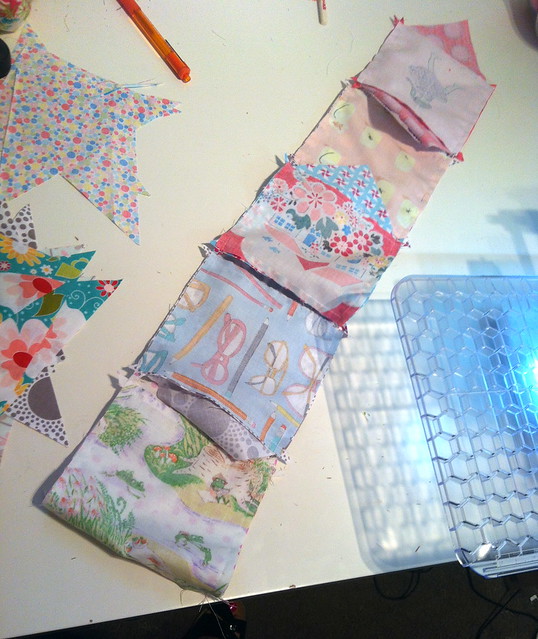
And just to show you - you can chain piece these blocks like there's no tomorrow!!  Yesterday, I pieced 12 blocks at a time - I only had six left to do today, and this is how I rolled!

So - who's going to economise with me?!?!!

9" Economy Blocks

I'm linking up - You can too!


Wednesday, February 26, 2014

WIP Wednesday - Economising

Back at the beginning of this year, a strange phenomenon took hold of the quilting world - the economy block. I took note, but did not participate, basically because all of my pretty fabrics were bigger fussy cuts than the finished 5" paper pieced block everyone was using! I knew I would economise eventually,I just needed the time and the right size.   Yesterday, the time arrived and I got the size sorted........ So I started cutting.  And today - this happened.........

9" Economy Blocks

Ahuh.  I is addicted!  24 of these9" beauties put together in around four hours! Winning!

9" Economy Blocks

These babies aren't paper pieced! They're a lovely mix of triangles and a fussy cut square. And I adore them.

9" Economy Blocks

I have pulled out tonnes of fabric, and all my favourite prints for fussy cutting.

9" Economy Blocks

And I will be back here tomorrow to share a little old tutorial with you! Who is going to come back??
 
I'm linking up @ Freshly Pieced - You can too!


Monday, February 24, 2014

Sunday Stash - It's Still Sunday Somewhere?

I'm late.  But not without good reason.  I spent all day yesterday in the middle of an apple orchard.  With 100's of motorbike riders.  Ahuh.  Make Sense?  No.

This is my day...... In an apple orchard in the middle of the Yarra valley surrounded by dirt bikes!
  My Lachlan has been riding motorbikes since he was about three.  And yesterday I took him up to the Yarra Valley (towing a trailer!!!) for a day of riding.  It was the first time I'd seen him ride.

My dirt bike boy. I'd be lying if I said I wasn't having a heart attack....

Anyway, basically, I was too stuffed to get to this post last night!  So here I am....

I had a few new additions to my "stash" last week. A parcel that I had been patiently awaiting for a few weeks arrived, and I literally jumped up and down! You see, Maureen Cracknell shared that one of her favourite stores {Project Anthologies} was closing down, so I headed over to find an abundance of delights! And they were all very heavily discounted....

Super happy mail part one! Thank you to @maureencracknell for wording me up on Project Anthologies. What a beautiful store and shame they're closing
Half yards of Art Gallery and a couple of random prints I liked.
And part two!
And multiple yards of Lou Lou Thai, Lark and the last half yard of AMH butterflies......sigh.
I have no plans as such for any of them, I just liked them and bought. True. 
Took me a little trip down to #aurifil Australia for some re-stocking and friends orders. I showed some severe self-restraint!!
And I finally headed over to my Aurifil supplier to stock up on goodies!  Although they are only 25 minutes drive away, it's hard to find that some days!  Anyway, I wandered around the store drooling and picking out what I needed and wanted - the vibrant green there just jumped out at me and had to be bought, same with the coral - and also a bunch of threads for a couple of customers.  YES - I can supply you with Aurifil!  I am very slack and still have not yet got a website sorted out for people to order from, however, if you are after Aurifil thread and don't have a supplier, then please feel free to contact me and I can get you sorted!  I can post Australia wide or if you're local, you can pop in and collect.
I'm linking up - You can too! 


Molli Sparkles

Friday, February 21, 2014

Black & White Finish

I told you I needed to get this finished.....so I did!  I got this baby basted yesterday after having some doubts over my backing choice, but decided to go with it, realising that this quilt was never going to be conventional or traditional in many, if any senses!  I'm so glad I did - I love how it has turned out!

B&W

It was very difficult to get a good full photo of it, given the ten minute window of sunshine I had culminated with the same time I had to leave for cricket, and Lochie was moaning about standing on the wet grass!  But you can sort of get the sense of how the quilting turned out.

B&W

I did a very simple cross hatch on the squares, which was a little tricky because each square is 9", which is pretty big when you're trying to go corner to corner using your eye for straightness!

B&W

When it came to quilting the outside black border, I went as organic as I think I have ever been!  I literally started with swirls, then added some pebbles, and then meandered along to a dragonfly.  It just sort of happened!  I used a gorgeous variegated black and white Aurifil thread - #4652 in 40wt.  It really made things very interesting!  One minute you're making bright, shiny white pebbles, next thing they disappear!

B&W

This is my controversial (in my head) backing fabric.  I bought this yardage of gorgeousness from Ikea a couple of years ago, and really have just waited to find something to use it for.  I pulled it out and ummed and ahhed about it.  Mostly because the front doesn't have any green on it.  But when I rationalised in my head that this started off as a plain black and white quilt, with no colours involved, I justified its use.  In the spirit of "going with the flow".  And once again, I love it.  The recipient will basically be getting two quilts in one :)

B&W

Here are a few more views of the quilting to show how the variegated thread can look so different!

B&W

B&W

So what started out to be a very simple black and white quilt, has turned in to a very unique and somewhat different looking quilt!  Which works perfectly, because the intended recipient is much the same!  I'm looking forward to seeing how it is received.....

That's my big finish for the week!  In fact, it's my first finished quilt for 2014!

The Stats:  Finished size - 49" x 66"
Fabric - 29 different black & white prints from stash and Black Homespun
Backing - Ikea bird print
Thread - Black Aurifil 50wt for piecing and #4652 40wt for quilting

I'm linking up - You can too!


Wednesday, February 19, 2014

W.I.P. Wednesday - Back to Black

After I finished my NYB yesterday, I wandered aimlessly around my house (cos that's what you do when you have no more children at home!) wondering what I could tackle next?  Not long in to wandering, I picked up my very substantial pile of black and white fabrics and took them to my cutting mat.  And this is what happened next.....

B&W 

This super quick quilt top was put together in a couple of hours.  But don't let time fool you - there has been a lot of thought put in to it!  You see, I've been collecting black and white prints for quite some time, knowing there would come a time when I would NEED to pull a rabbit out of my hat.  Now is that time.  I will explain further once it's finished and belongs to whomever it is being given to.....

B&W

Amongst my pile of B&W was a fat quarter of those divine dragonflies.  I picked it up at the Quilting Convention last year, just because, and man I'm glad i did.  Oh and of course, the Ghastlies had to be thrown in for good balance.

I'm hoping to have this baby finished by the end of the week.  Wish me luck.

I'm linking up with Freshly Pieced - You can too!


Tuesday, February 18, 2014

New York Beauty

The Wombat Stew paper piecing bee is rolling on for 2014.  February is Gemma's turn as Queen, and after much thought, she threw us a curly challenge!  A slightly open ended one at that.  Gemma asked us all very kindly if we would make her a New York Beauty block............. 
 **crickets** 

After the initial shock, horror and gasp - we all agreed.  Then hit Pinterest!  I found a multitude of amazing blocks, in all shapes, colours and sizes.  Then stepped away cross-eyed and anxious.  I mean, they're a pretty full on block to tackle!  Anyway, I took a deep breath and decided to choose THIS ONE.  But knew it would look completely different!  Gemma gave us a colour palette to work with, so I drew from that and spent over an hour pulling fabrics, putting fabrics back, re-visiting fabrics and then walking away.  Another deep breath and I jumped in!

And a few days later, this is the result.....

New York Beauty

Isn't she lovely?  Now, it's not perfect, but damn I came close!  I basically managed to match all of the seams except one quite obvious one!  And I'm too scared to unpick it!  So I shall leave it for Gemma to ponder :)

New York Beauty

I chose the orange, purple, pink and reddish floral first, then threw the yellow in for POW factor.  I think it worked?  The turquoise Art Gallery print was added after some consultation with Gemma.  Blue wasn't in her colour palette, but when i think of Gemma, the first colour that comes to mind is turquoise! I think it works perfectly.  The next stressful decision was the centre circle.  I spent a considerable amount of time auditioning fabric, before once again handing the choice over to Gem!  I think her choice is spot on.

New York Beauty

After working myself up over how difficult this block was going to be, I have to be honest and say that it really wasn't bad at all!  In fact, it's all rather straight forward paper piecing.  The curves had me worried, but turned out to be not so bad after all!  The tricky(ish) part is putting your four quadrants together.  Matching the seams is daunting, and I had to make sure to use quite a few pins, which for someone who doesn't usually pin - was quite amusing!  The lining up of the text wasn't really a fluke, I made sure when cutting the wedge shaped pieces out, that I cut them around in a circle.  The part I am most proud of, is the matching up of seams on the "sun rays" at each quarter!  They are perfect-o!

Soooo, where to now?  Well, I must say I am keen to get my New York Beauty on again!  In fact, I'd LOVE to have a bit of a sew along.  Make sure you check back here in the very near future, and I will have some more info to share!

Have you ever wanted to tackle a New York Beauty?  Want to join me?

I'm linking up - You can too!


Sew Cute Tuesday


Fresh Poppy Design


Paper Piecing Party
Related Posts Plugin for WordPress, Blogger...