Showing posts with label FMQ. Show all posts

Tuesday, July 1, 2014

Quilted Placemat Tutorial

Do you have special little people in your life - you know, the ones that you've basically made almost everything under the sun for?  So that when it comes around to their birthday, you're left wondering what on earth to make?  Well, that's where I found myself this week!  My youngest God-daughter lives in Tokyo, and she has a multitude of handmade goodies, including cushions, wall hangings and clothing!  I have a quilt in mind to make for her when she moves in to her big girl's bed, but the postage to Tokyo is a killer, so I'm hoping to get it done for Christmas, and hoping even more to make it over there to hand deliver it - but that's a whole other blog post!

Soooooo........yesterday I decided I would make a personalised placemat for her.  Ummmm, how?  I threw some questions to my homegals/guy over in QCA, and they gave me the encouragement to go forth with my idea.  So I did.  
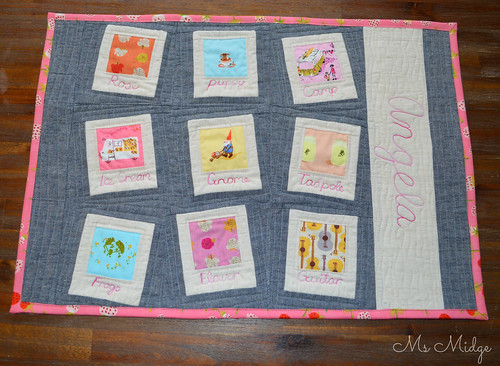
Quilted Heather Ross Placemat

I was so excited to get out my Heather Ross stash, and knew it would be super special, so thought I would take some photos in case I could make a tutorial from it.  And well, what do you know - here's a tutorial!

WONKY POLAROID QUILTED PLACEMAT
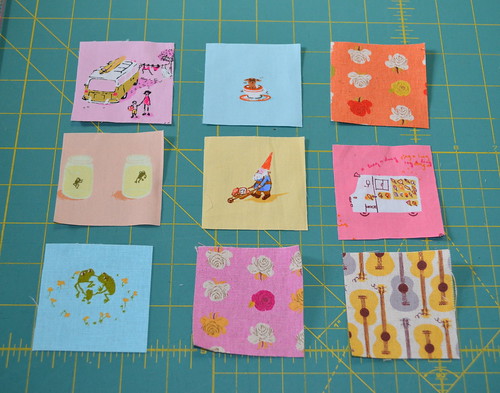
DSC_0363

Find yourself nine fussy cut prints, and cut out 2.5" squares.
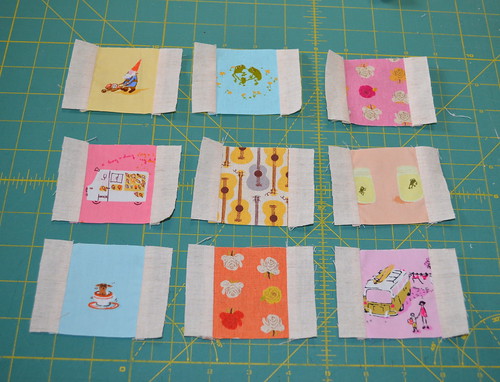
DSC_0364

Cut out your side pieces at 1" x 2.5".  You will need 18 of these.  I have used a natural looking linen - sort of gives it an aged polaroid look!  Sew them on with a 1/4" seam allowance and press.
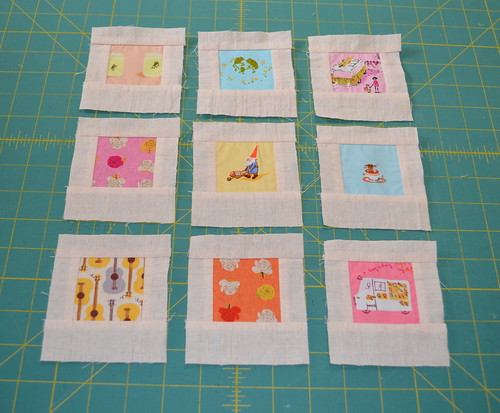
DSC_0366

Next up, cut nine strips for the top at 1" x 3.5".  And nine strips for the bottom at 1.5" x 3.5".  Sew them on and press again.  You will then have your little polaroid rectangles.
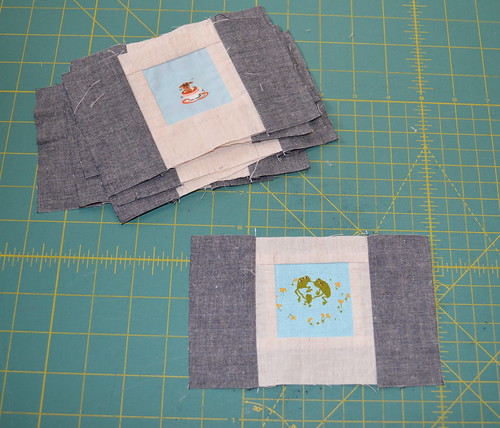
DSC_0367

You now need a darker fabric for the framing of the polaroids.  I have used a blue/charcoal linen.  Cut out 18 strips at 2"x1.5" and sew on to the sides and press.
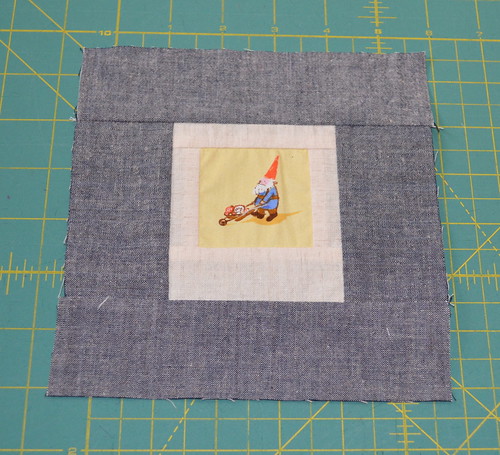
DSC_0369

And 18 strips of 2"x7" for the top and bottom.  Sew on and press.  You will now have nine finished polaroid blocks.
DSC_0370

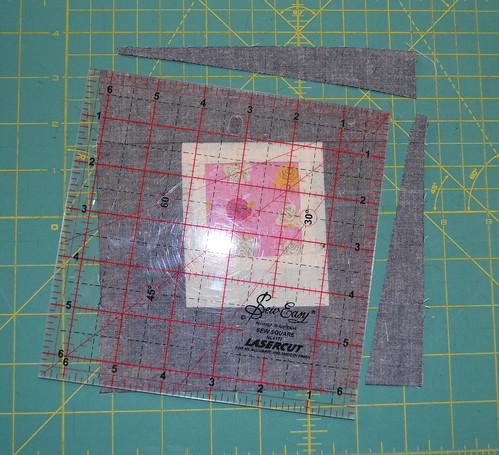
To make your blocks wonky, place your ruler (a square one is perfect) over the top of the block and then turn to one side as above.  You want your wonky block to finish at 5" square, so when lining the ruler up, make sure you have at least 3/4" away from the polaroid on each of the sides.  Trim.
DSC_0371

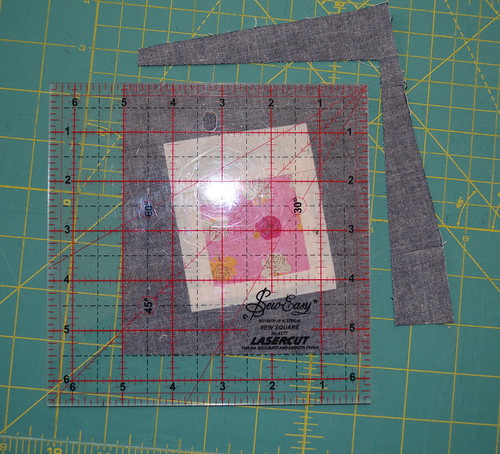
Then turn your block around and square it up with your ruler again.  (Take no notice of the fact that I have it lined up at 5.5" above!!!!!!  It should be 5"!).  Trim again.
DSC_0372

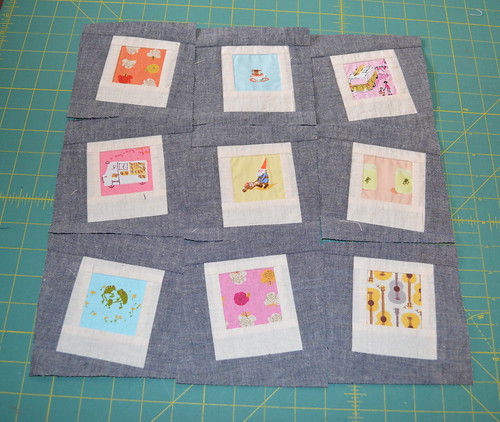
Alter the direction you turn your ruler, so your blocks are all kinds of wonky!  Sew these nine blocks together.
DSC_0373

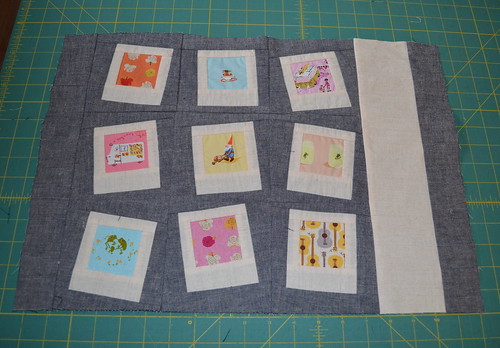
You can then begin to add strips of fabric for personalising.  I chose to add a 2" strip to the left hand side, and then a cream strips 3.5" to the right, followed by another 1.5" strip of dark.
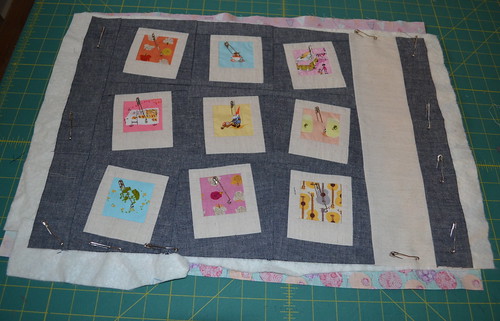
DSC_0374

Make yourself a quilt sandwich and baste ready for quilting.  And yes - I do have a batting jigsaw puzzle down there on the bottom!  Use up scraps of your batting - you don't have to sew it together, just pin it down and the quilting will sort it out.
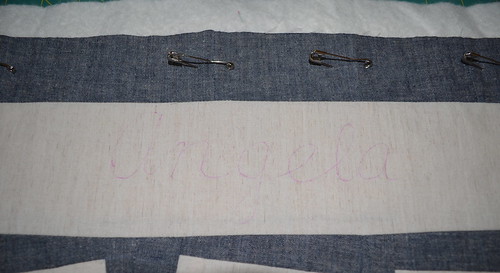
DSC_0375

When doing large lettering on items, I sometimes use an erasable marker for an outline to follow.  I know lots of clever quilting peeps who like to hand embroider, but you all know me by now yes?  So it's free motion quilted lettering here!
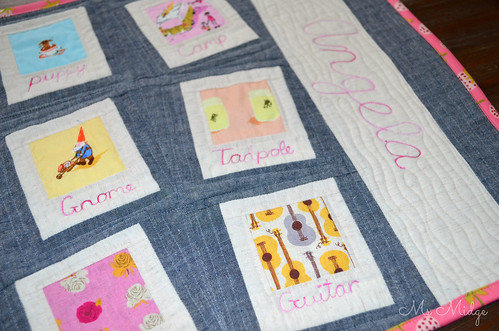
Quilted Heather Ross Placemat

I chose a variegated Aurifil 40wt - Pink Taffy - for the words.  I love how it looks!  All of the little words under the polaroids are completely free handed.  Hence, they are not perfectly centred.  But it looks more like they have been written on.  I also used a 50wt #2000, which is a beautiful cream/gold thread, for the outline of the fussy cut and the wavey lines through the cream linen.
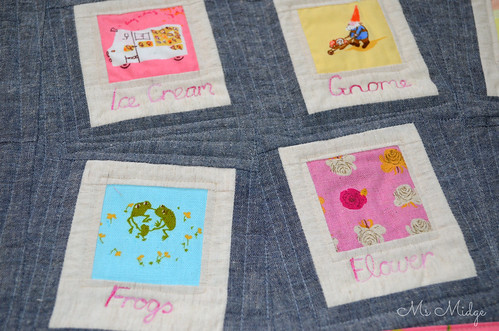
Quilted Heather Ross Placemat

It was suggested to me that placemats need to be quilted quite densely in order for them to sit flat enough.  I chose #2610 Silver/grey and started outlining the blocks, and just kept going and going until I was certain there were enough to give it stability.  I LOVE the end result!
Quilted Heather Ross Placemat

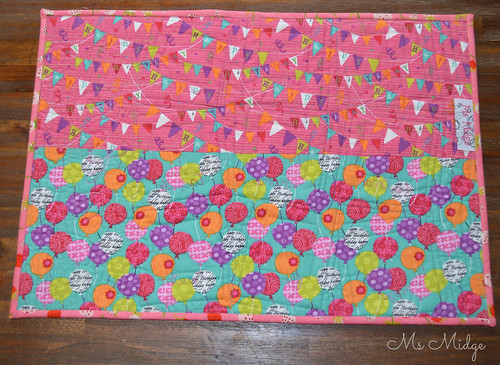
A couple of cute birthday prints on the back making it perfect to flip over for birthday celebrations!  I completed it with a Briar Rose print for the binding.
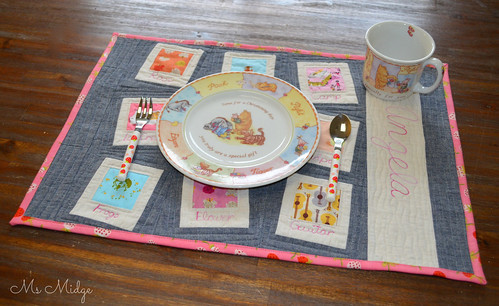
Quilted Heather Ross Placemat

I'm pretty damn chuffed with the end result!  The finished size is 19.5" x 13.5".  As you can see - a great size for a little one.

I've used a cotton batting, you could add insulbrite if you were wanting to make them a little more heat resistant, however, for a three year old, I thought the odds of her having a burning hot meal were pretty low :)

So there you have it - a quick and easy gift!  This took me a few hours to whip up!

I'm linking up - You can too!

Sew Cute Tuesday

Wednesday, May 28, 2014

W.I.P. Wednesday - Gonna Put This Song On Replay

For it seems this is going to be an ongoing story for me this year!  The quilter's ADHD has kicked in full force and I'm getting through my list of projects whilst I have some time off work here and there.  Here's a bunch of goodies I've been working on this past week..... {Photos Care of IG}


Almost hyperventilating with excitement! ! Once again the kids need for food trumps my need to sew these into rows!  #modernmedallion  #modernmedallionquiltalong

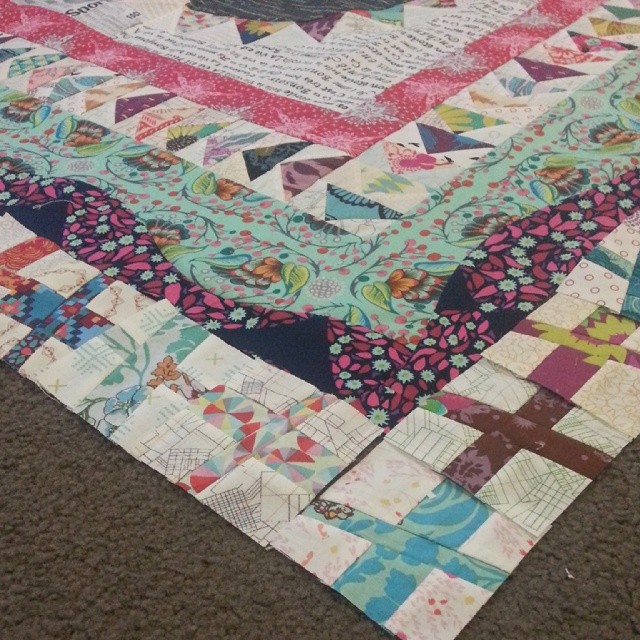
I've actually sewn all 80 of these wonky crosses on to my Modern Medallion, but have not had the time nor inclination to get out my good camera!  I can reassure you it looks freakin awesome!

Just put some of my #qcabee5 blocks together! This #radiatingsparkler block will be up on the blog this week so everyone can make their own! @katespain ♡♥

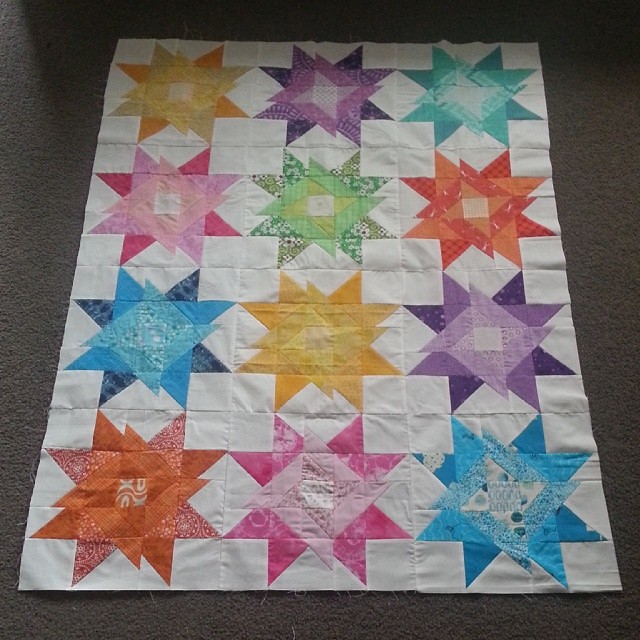
My QCA Bee #5 gals have delivered the goods, and I've sewn together these divine Radiating Sparkler blocks!  I have to expand the quilt top further to make it a decent size, but that will be done soon-ish-ly.  The tutorial for this block will be up here on the blog by the weekend!  Promise!

#quilted #justneedsbinding #iwannadosomethingelse

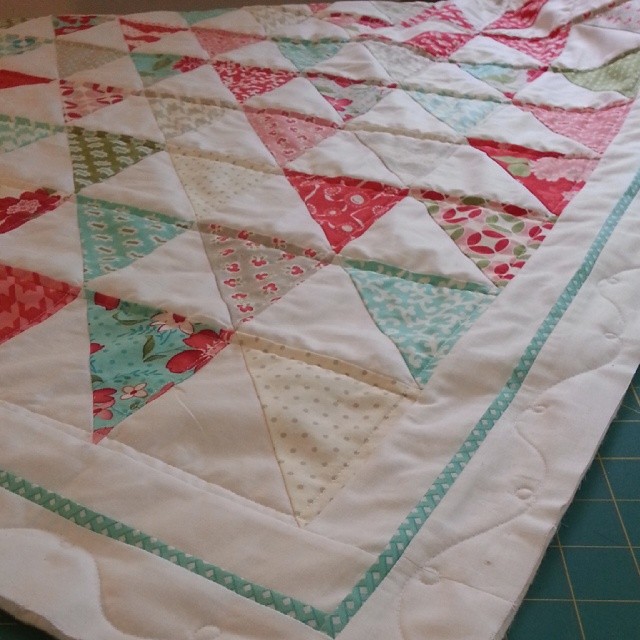
I quilted my little Vintage Modern quilt yesterday.  And whilst at it realised I had lost my FMQ-jo.  That's right - I just can't get my s*it together enough at the moment to free motion anything larger than a bloody cushion!  Sigh.  Anyway, just need to bind this baby!

Omg @quiltjane these #nestedchurndash blocks are freakin huge!!!! #thinkingillstophere #schnitzelandboominiquiltswap

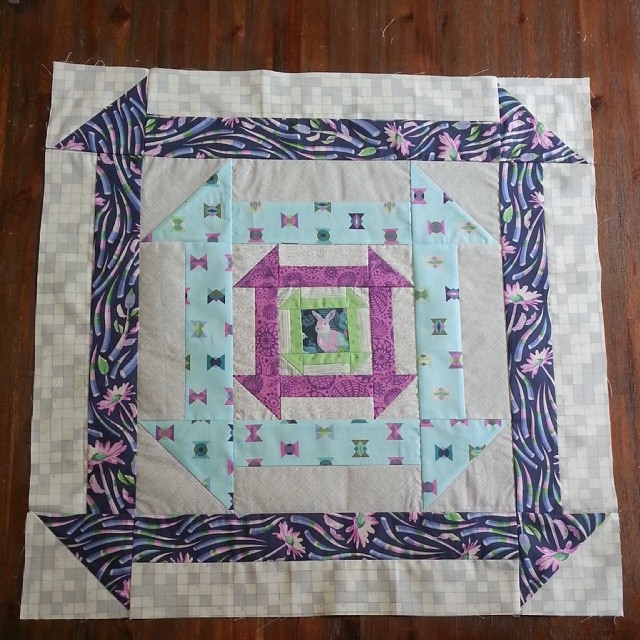
I started my mini quilt for the Schnitzel & Boo mini quilt swap!

#justneedsbinding #schnitzelandboominiquiltswap

And also managed to quilt it.  Another project that just needs binding.  I adore the nested churn dash pattern by Quilt Jane.  Seriously, go get yourself one!

And just because I have a list a mile long.....another project started...... #pinkgoldpearlshowcase

And lastly - I started this project this afternoon.  Big 9" triangles in Pink, gold and Pearl for a special upcoming showcase.  I've had to refer back to my Triangle Tips post!  I have never made an entire quilt top using all Art Gallery fabrics.......  But may just have a new addiction.  Seriously yummy piece of work!

Phew.  Another week, another million projects!

I'm linking up with Freshly Pieced & Little White Dove - You can too!


Little White Dove

Thursday, April 3, 2014

A Cushion Confession

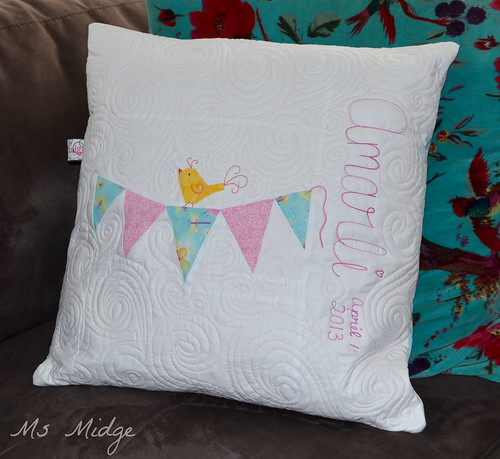
If you've been around here a while, you would know I am somewhat a fan of the quilted cushion.  It is my "go to" gift for anyone and everyone.  Birthday?  Have a cushion!  Christmas?  Have a cushion!  Wedding?  Have a cushion!  They are a bright little spark of instant gratification.  Today was one of those days.  We have so many celebrations coming up, and amongst them are a couple of first birthdays.  So I decided I would make both these littlies a personalised cushion.  I popped over to Quiet Play and purchased a couple of gorgeous patterns, and jumped in to the first one today......

Amarli's Cushion

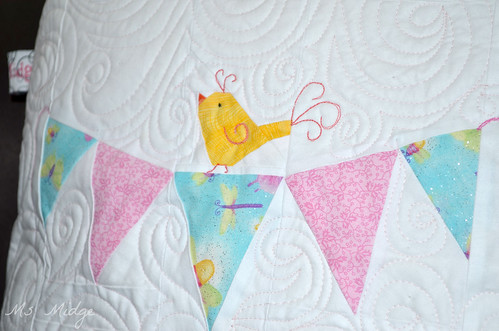
I absolutely ADORE this bunting and birdy pattern!  SOOOOOOO easy to put together!  Once I had the paper piecing done, I made the cushion front the right size, basted it and got my free motion quilting on.  Whilst swirling myself silly, I realised just how much I love the freedom you get with FMQ.  And I came to a little old conclusion - the last few quilts I've made, I've found it very difficult to free motion quilt them.  And by that, I mean I just can't FMQ a complete quilt top.  I start, and then unpick because it's just not how I want it to look.  And then I chicken out and just straight line the main part of it, and FMQ around the borders.  It's rather frustrating!  BUT - I find my body thanks me for it.  Regardless, I really, really want to get my FMQ mojo back!  I remember how accomplished I felt when I finished my Flying by the seat of my pants quilt.  I was so utterly impressed with myself!  I want to feel like that again.  And I realise now that the reason I haven't finished my Star-Crossed quilt, is because I know I want to free motion it, but am yet to find that mojo.......  Send me some mojo people!

Amarli's Cushion

Back to this cushion........  I used beautiful baby pink Aurifil #2410 to free motion all the swirls around the pieced sections.  And a little bit of Coral Aurifil to embellish this little birdy with some feathers!

Amarli's Cushion

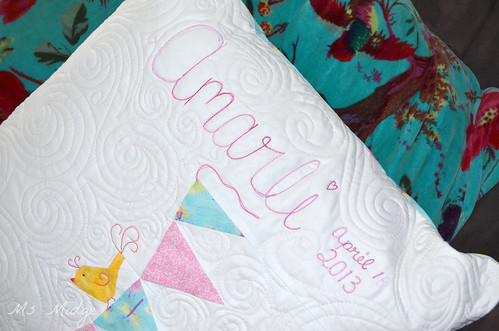
For the name and date, I used a variegated pink Aurifil #3660, and just lightly wrote the name with a pink marker first, before free motion quilting it.

Amarli's Cushion

And the backing has used up these two gorgeous prints that were originally bought and utilised for this same little girl's cot quilt I made for her when she was still in utero!  It feels like a lifetime ago, but I made this quilt only just over a year ago!

Kissing Fish
More photos of Kissing Fish Quilt HERE.

Soooooo........ That's another project to tick off my list.  Would you believe I have no power all day tomorrow?!?!?!!?  And it's not a work day.  Seriously bummed!  So it will be head down, sewing machine on this weekend.

I'm linking up - You can too!


Paper Piecing Party


Friday, February 21, 2014

Black & White Finish

I told you I needed to get this finished.....so I did!  I got this baby basted yesterday after having some doubts over my backing choice, but decided to go with it, realising that this quilt was never going to be conventional or traditional in many, if any senses!  I'm so glad I did - I love how it has turned out!

B&W

It was very difficult to get a good full photo of it, given the ten minute window of sunshine I had culminated with the same time I had to leave for cricket, and Lochie was moaning about standing on the wet grass!  But you can sort of get the sense of how the quilting turned out.

B&W

I did a very simple cross hatch on the squares, which was a little tricky because each square is 9", which is pretty big when you're trying to go corner to corner using your eye for straightness!

B&W

When it came to quilting the outside black border, I went as organic as I think I have ever been!  I literally started with swirls, then added some pebbles, and then meandered along to a dragonfly.  It just sort of happened!  I used a gorgeous variegated black and white Aurifil thread - #4652 in 40wt.  It really made things very interesting!  One minute you're making bright, shiny white pebbles, next thing they disappear!

B&W

This is my controversial (in my head) backing fabric.  I bought this yardage of gorgeousness from Ikea a couple of years ago, and really have just waited to find something to use it for.  I pulled it out and ummed and ahhed about it.  Mostly because the front doesn't have any green on it.  But when I rationalised in my head that this started off as a plain black and white quilt, with no colours involved, I justified its use.  In the spirit of "going with the flow".  And once again, I love it.  The recipient will basically be getting two quilts in one :)

B&W

Here are a few more views of the quilting to show how the variegated thread can look so different!

B&W

B&W

So what started out to be a very simple black and white quilt, has turned in to a very unique and somewhat different looking quilt!  Which works perfectly, because the intended recipient is much the same!  I'm looking forward to seeing how it is received.....

That's my big finish for the week!  In fact, it's my first finished quilt for 2014!

The Stats:  Finished size - 49" x 66"
Fabric - 29 different black & white prints from stash and Black Homespun
Backing - Ikea bird print
Thread - Black Aurifil 50wt for piecing and #4652 40wt for quilting

I'm linking up - You can too!


Saturday, February 1, 2014

A Birthday Keepsake

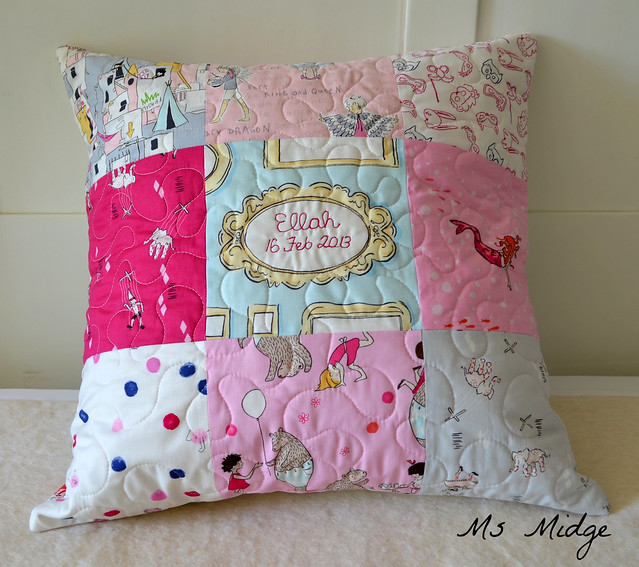
Cushions seem to be my "thing" in recent times!  And that's ok!  I adore making quilted cushions, and love that my customers want me to make them!  One such customer messaged me Thursday night and put in a request for TWO!  This is the first.....

Personalised Cushion for Ellah

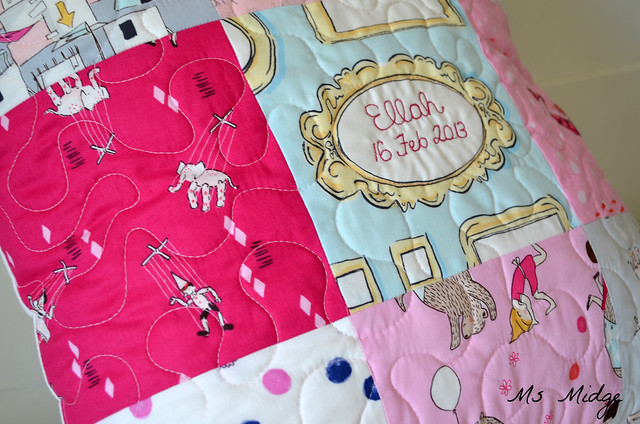
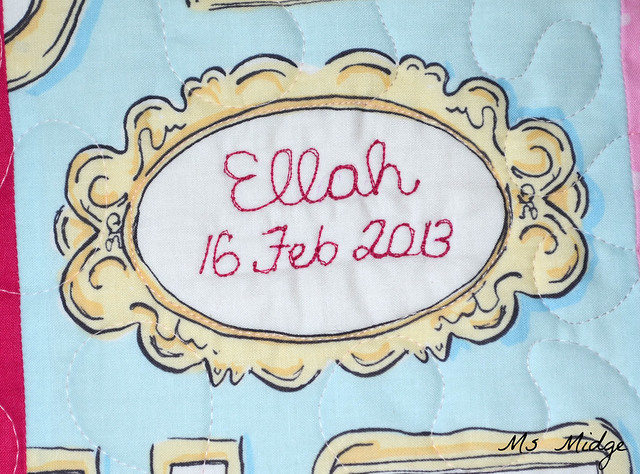
The only specifications I had were: Girly fabric and personalised with name and birth date.  Easy!  I have had this Sarah Jane fabric sitting on my shelf awaiting the perfect project.  I've cut out 6.5" squares, and knew I'd hit the jackpot when I saw the Mirror print - perfect for personalising!

Personalised Cushion for Ellah

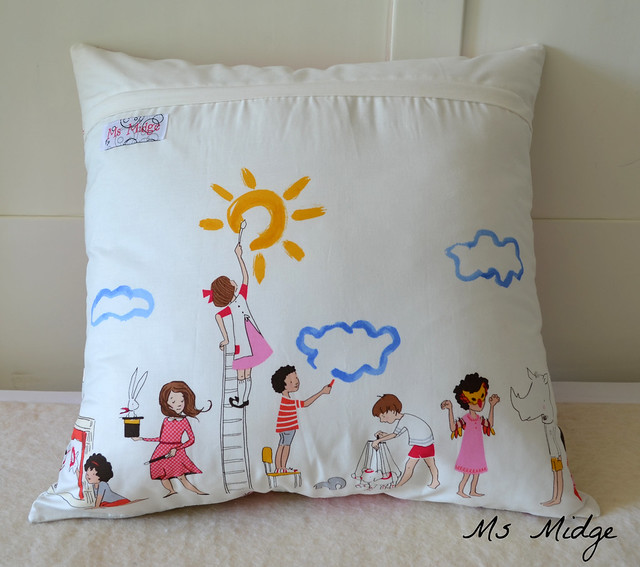
I also had some of the fabulous border print leftover from some little frocks I made last year.  It works brilliantly as a cushion back! 

Personalised Cushion for Ellah

I did a simple meandering quilting pattern using Aurifil #2410.

Personalised Cushion for Ellah

and then for the name and birth date, I've used Aurifil #1100 and free motioned the writing.  It was just a little bit tricky, due to the size of it, but I'm pretty pleased with the outcome! 

Now to get a start on the second cushion ordered.  It's going to be pretty darn cute!  Think paper piecing and woodland creatures.

Have a great weekend!

Tuesday, December 10, 2013

Cushion For Christmas Blog Hop - Paper Pieced & Machine Binding Tutorial

I hope you're enjoying the Cushion For Christmas Blog Hop!  

Today is day 10 and if you head over to On The Windy Side, you will find Adrienne's fabulous quilted Christmas Cushion!


Cherry Christmas Wreath Cushion

Now - today I have another tutorial for you - How I machine bind….

I use this same method for my quilts, for many reasons, but mostly because A. I don't hand sew AND B. I don't hand sew…..

When it came time to bind my first ever real quilt, I searched the web for machine binding tutorials.  My friend Gemma also directed me to Red Pepper Quilts, where Rita had shared her technique.  So I started with that and then figured out I could never catch the binding on the back perfectly, so altered things a little to suit me.

First of all, measure up and make your binding.  I usually work with a 2.5" wide binding for cushions, but you can really make it as wide as you like.  There's a fantastic app by Robert Kaufman called Quilting Calculator.  HERE is a review of it.  I swear by it!

The delightful cushion I am sharing with you to illustrate said binding, is a paper pieced cover.

Paper Pieced Quilted Cushion

Paper Pieced Quilted Cushion

I used a pattern designed by Kristy @ Quiet Play.  You can find it HERE with all her other fabulous patterns.  If you're only new to paper piecing, it's a great pattern to try.  Also great for using up scraps.  I pulled out the scrap bag from my Swoon quilt.


As I mentioned on my Honey Honey Orphan Blocks Cushion, cushion covers are the perfect place to work on your free motion quilting!  So go for your life!  For this, I used a slightly different swirly pattern, sort of with an "eye" in the middle.  I love it!  I also just did some squiggles through the inside of the paper piecing.  I used my favourite and most used Aurifil #2024.  I now use it for all my piecing and garment making too.

Now, on to how I bind…

Once I've put my cushion cover together, sewing just shy of 1/4" around the outside, I work out how much binding I will need and get cracking…..

I then start sewing the binding on, 1/4" from the edge, on the BACK of my cushion/quilt.  When I start, I leave around 5" unsewn - sort of like a tail.  

When I get close to the edge, I stop about 1/4" before the corner, backstitch a bit….

Then take it from the machine like so….

Now it's time to prepare for mitred corners.  Take your binding and fold it back at an angle, making sure to line the bottom raw edge up straight with the edge of the cushion…..

Then fold it back over on to of itself….

Making sure to line up the folded edge of the binding with the edge of the cushion you have already sewn….

Place your cover back in the machine, and start sewing about 1/4" from the edge, backstitching a little, then continue sewing along the edge again.  Repeat this at each corner you get to….

When you get to the end, leave another tail, so you have a gap and two tails like above.  The wider the gap and longer the tails, the easier time you will have!

Lie your binding tails down flat on your cover and make them meet like this.

This will be where you join the binding, so you need to cut the tails off with about 1/4" - 1/2" for your seam.

Flatten the binding ends out and sew your seam at the width you left.

Your seam will look like this on the inside. You can see on mine there are two lines of stitching, that's because my guesstimate wasn't big enough to have my binding sitting flat enough!

Fold your binding in half at the seam, and you should have a nice flat binding!

Continue sewing the gap of binding together, and you will have one side done!

Now here you will see there are two rows of stitching.  The closest to the edge is the row from sewing the cover together, the second row is where I've attached the binding.  You want to pull your binding over from the other side, so that it just covers that second row of stitching.

Like this.  Now I know a lot of people like to use pins or clover clasp things, but I find it easiest to just use my hands.  I feel like I have more control!

Now your aim is just stitch as close to the edge of the binding as you can.  

When you come to the corner, slow down and leave your needle down.

Pull the fabric corner up from behind the cover.

Bring the bottom binding up and over your second row of stitching….. You will have a neat little fold in the side binding.

And then bring the side binding up over the stitching so that the little fold meets up with the edge of the bottom binding, giving it its mitred finish.

I then continue stitching down the binding as close to the edge, and hold my finger on the mitred edge as long as is physically possible before being squashed!  When I get to the corner, I backstitch a couple, then leave my needle down, turn the cover, and continue stitching.  I repeat these steps at every corner, and then I'm finished!

Finished from the back!

In theory, if you attach your binding this way, you "should" have a row of stitching on the back that is either very close to the ditch of the binding, or just on the binding.  I personally use this way, because as I said earlier, I can't get the stitching perfect enough attaching the binding to the front first!  And I'd rather some minor dodgy stitches on the back of my cushion/quilt than the front!

And finished from the front!
I still haven't decided who will be receiving this cushion for Christmas!  I'll have to see how naughty or nice people have been….

If you're new here, or catching up, head over to my original Hop post HERE for the complete schedule AND all the fabulous sponsors and prizes!  There's only four more days until I open up the linky for you all to add your creations!  Woot woot!


Ms Midge
Related Posts Plugin for WordPress, Blogger...