Sunday, August 31, 2014

Sunday Stash - The Magazine Edition

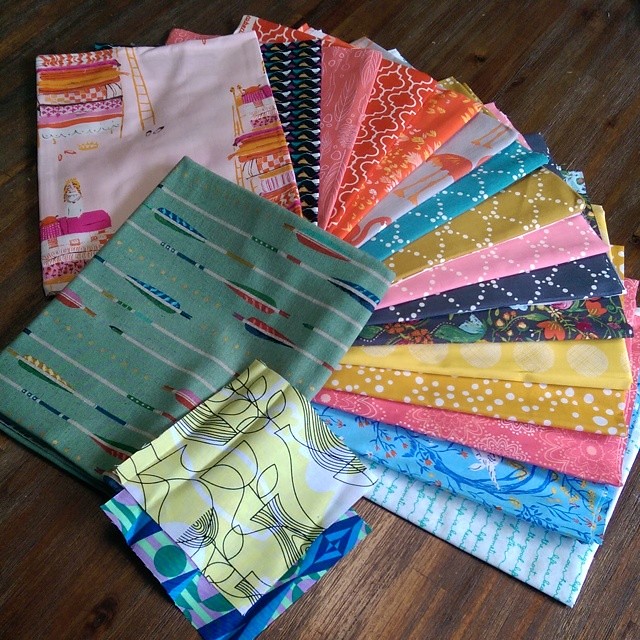
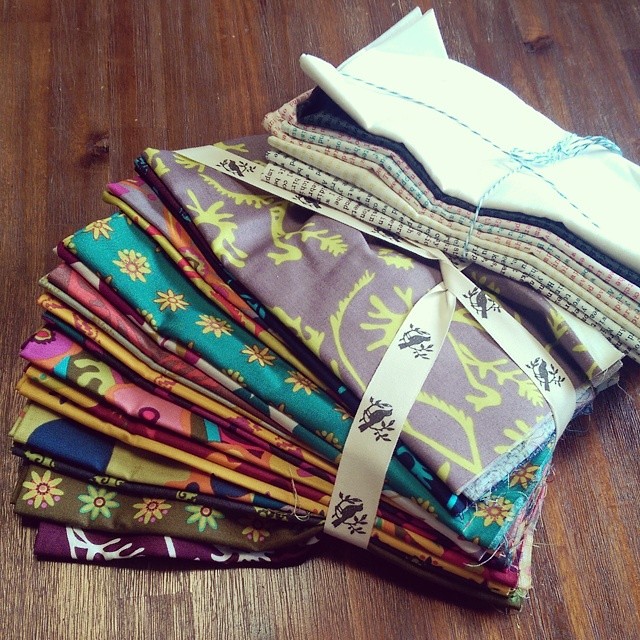
A few years back, a friend's Mum de-stashed a huge amount of sewing goods.  Part of that stash was a big old pile of quilting magazines.  At the time, I was not a quilter, so had absolutely no use whatsoever for them!  A lady from an online sewing group came past and picked them all up happily.  Then, once she found out I was quilting, she dropped a bunch back in to me.....

2014-08-31_06-56-04

Where they have happily sat atop my shelves in my sewing room.  Without being opened.  Ummmmm.......

So why am I telling you all of this?  Wellllllll.......... Something very exciting is happening in the quilting world, and I just happen to be playing a part in it.  You see, the first and only Australian online quilting magazine will be released tomorrow!!  And I was asked if I would like to be a contributor!  Ahhhhh, yeh!!!

Make Modern is - well, let them tell you what they are:

MAKE MODERN: An online quilt magazine for quilters, by quilters.

We strive to inspire, motivate and enable quilters around the world! The Make Modern team is passionate about modern quilting and sewing - and we know we're not alone in this. So if you're looking for your next project (despite the fact you may have 15 projects already on the go), then you have come to the right place. Our magazine has projects for those new to sewing, as well as advanced projects for those sewists looking for a challenge. Let us unite in our love of cutting up perfectly good fabric and sewing it back together again!

Let's Make Modern.

Doesn't that sound perfect?

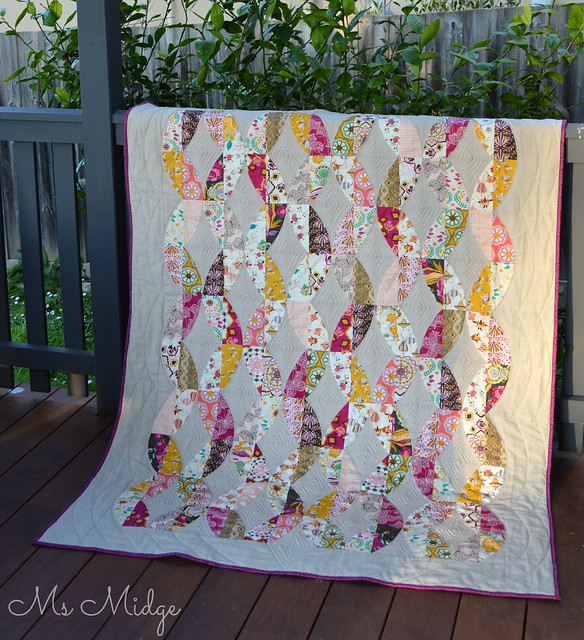
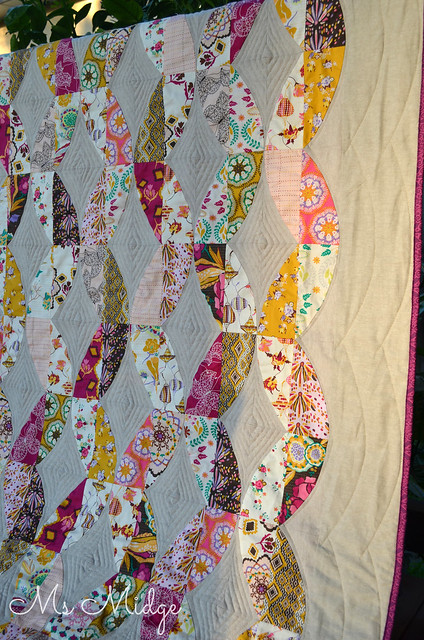
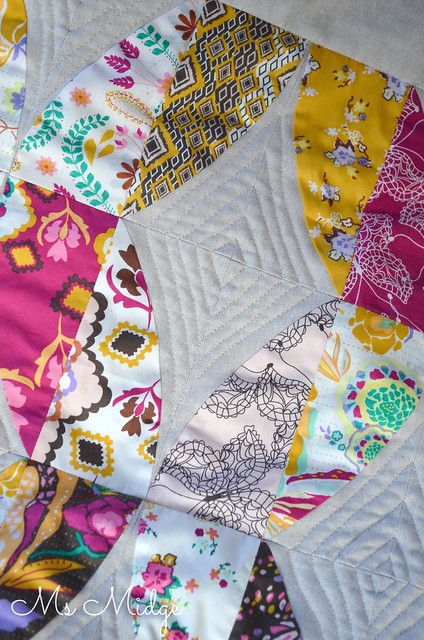
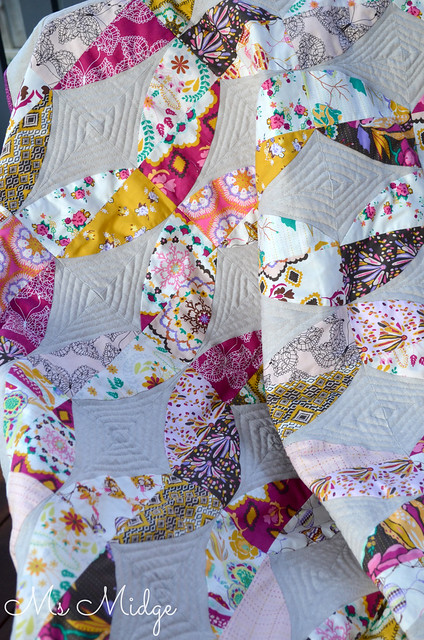
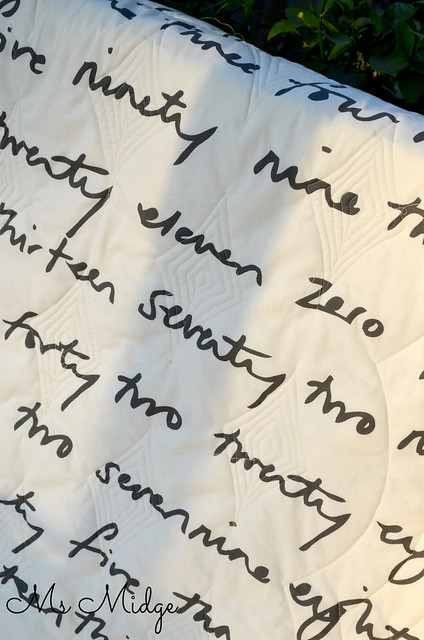
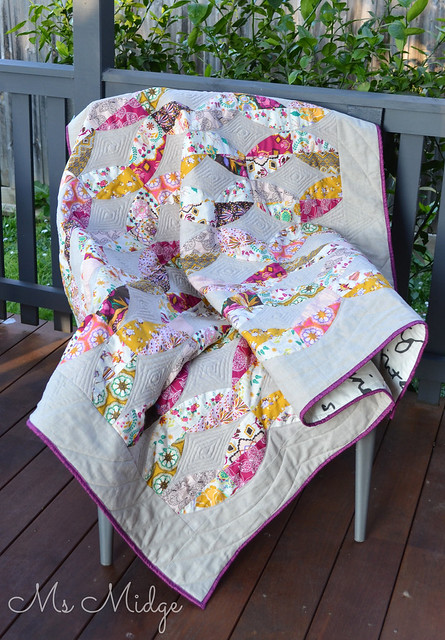
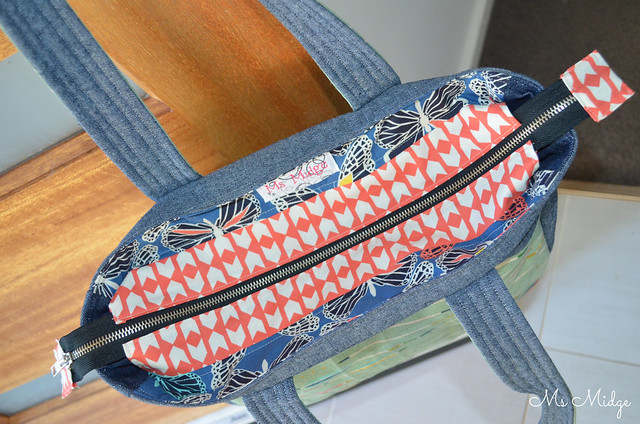
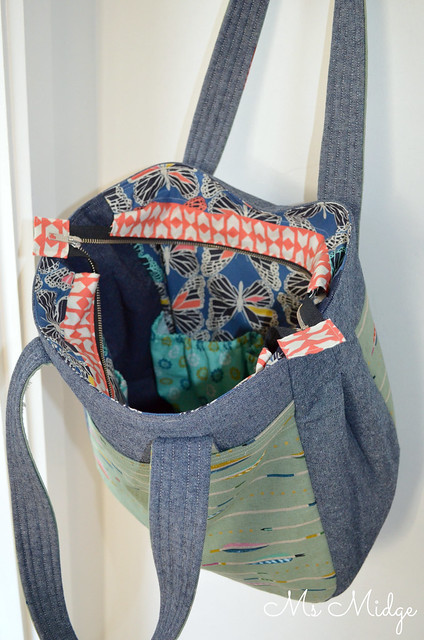
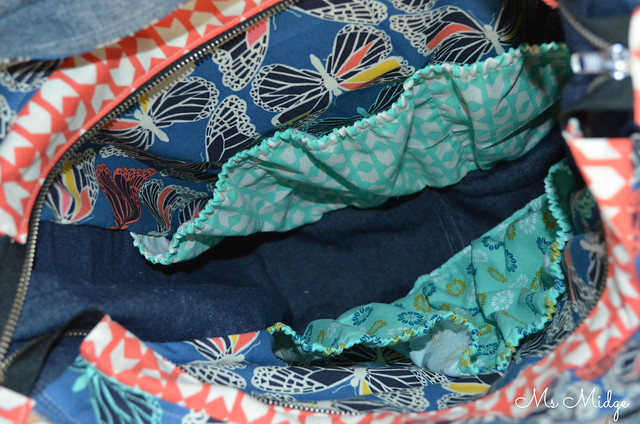
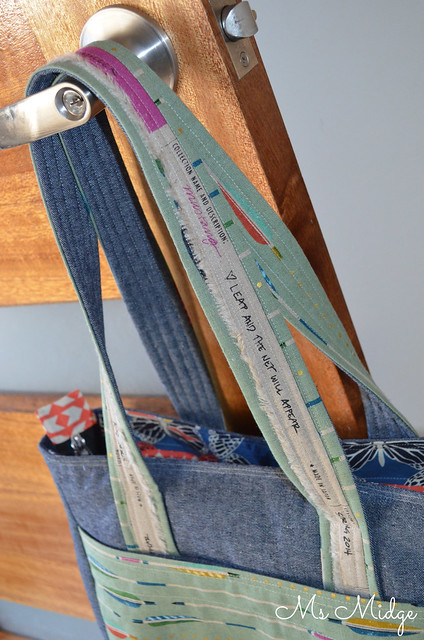
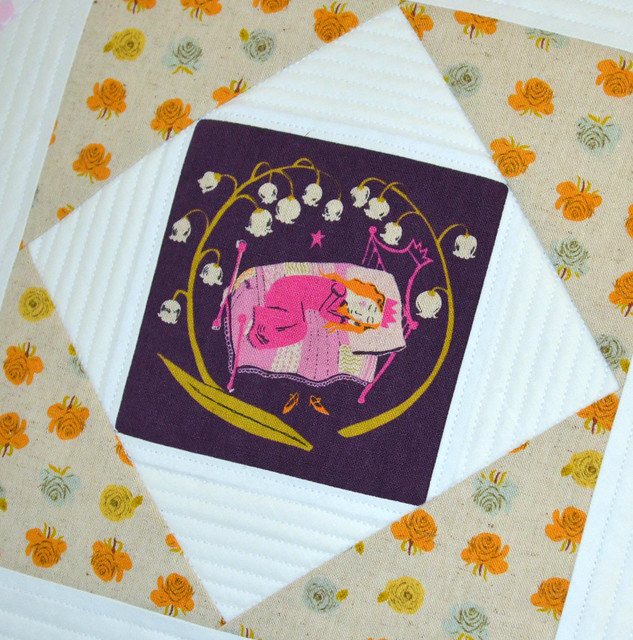
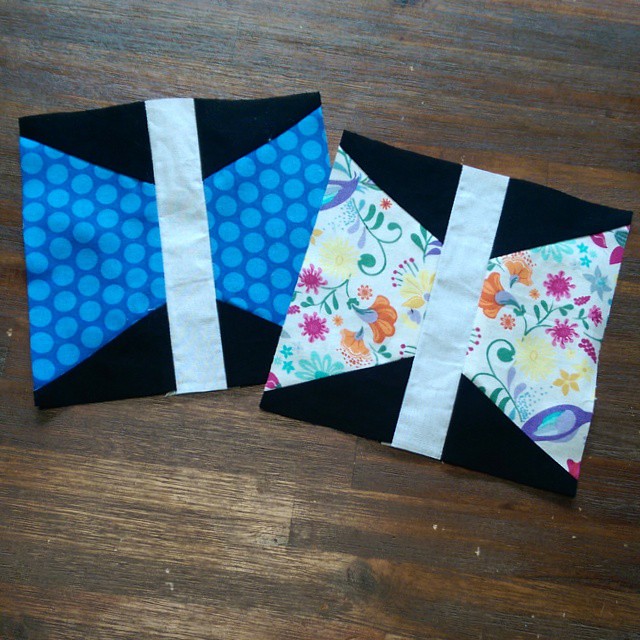
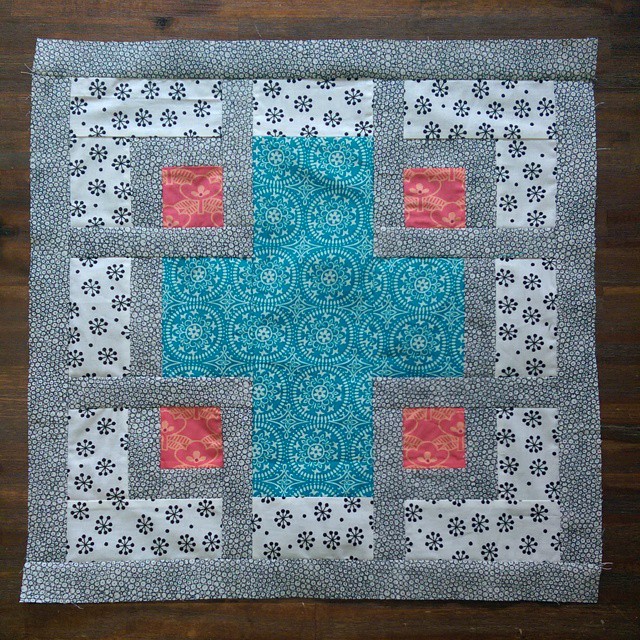
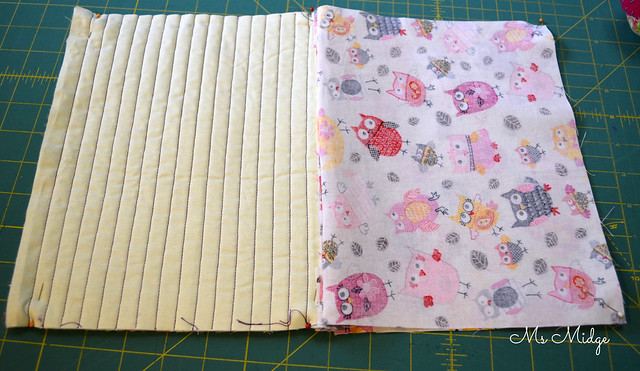
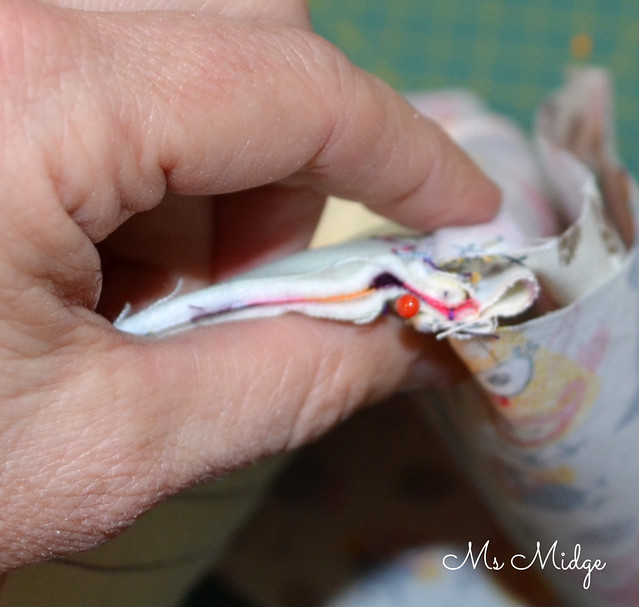
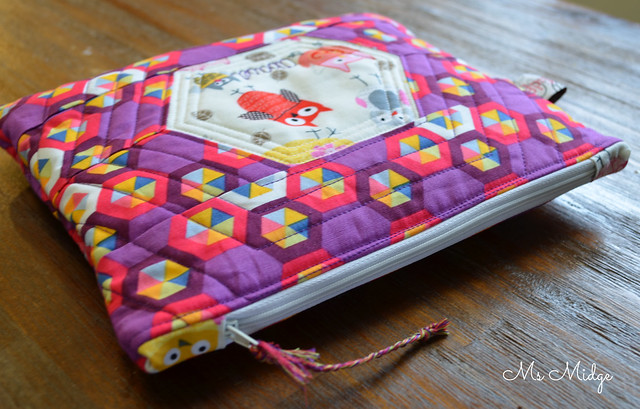
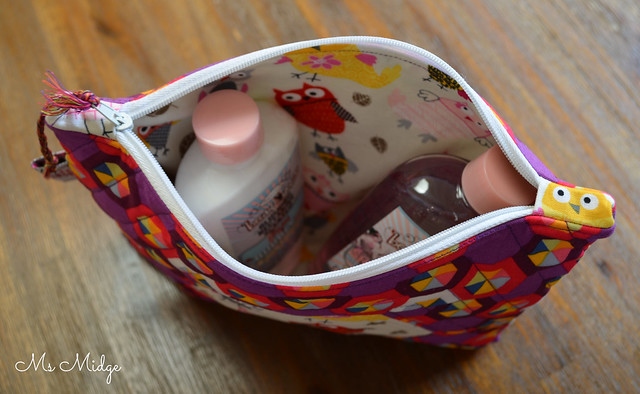
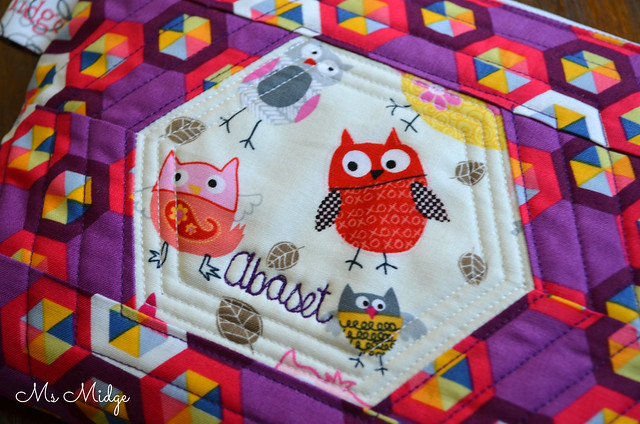
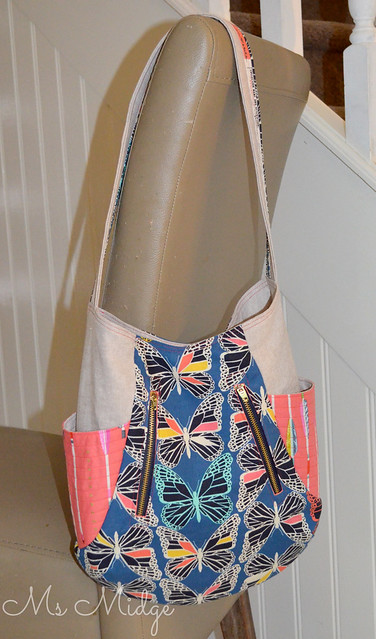
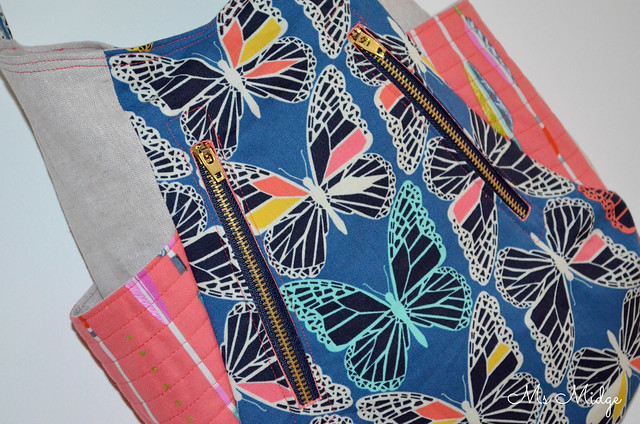
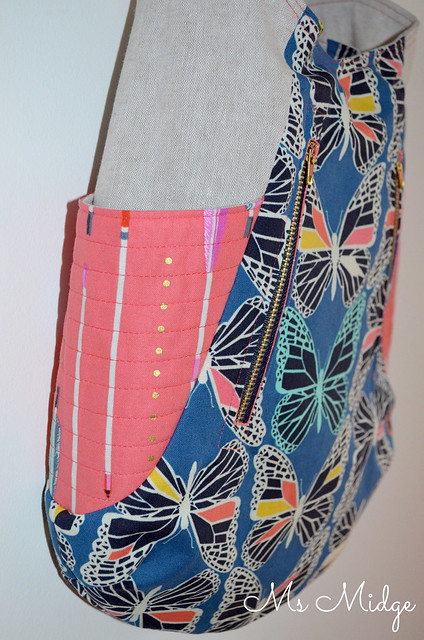
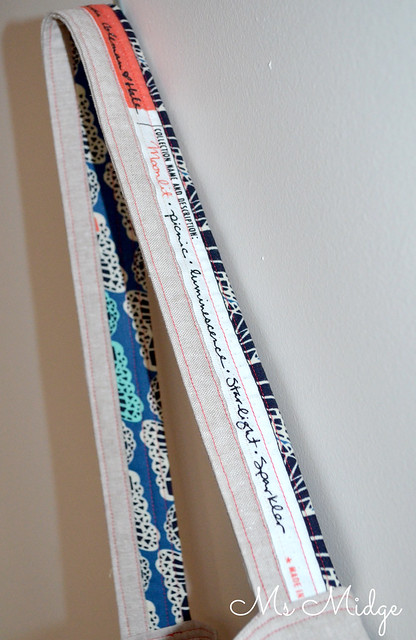
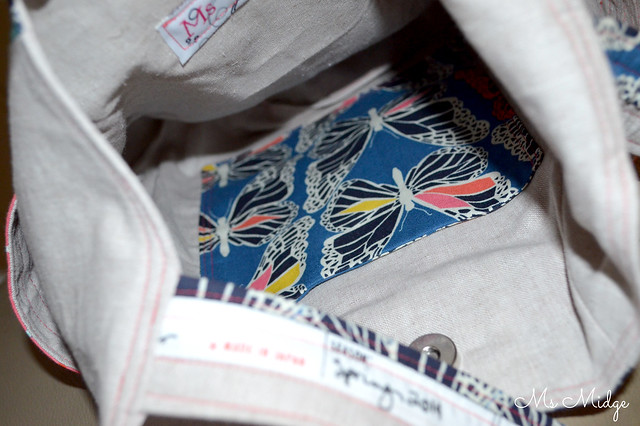
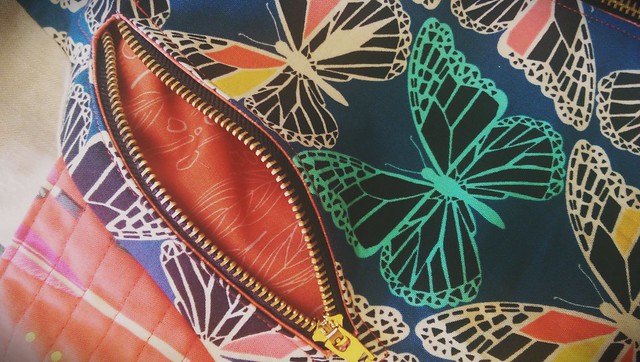
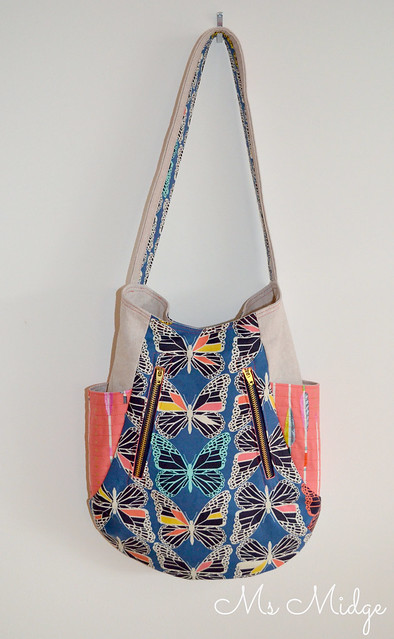
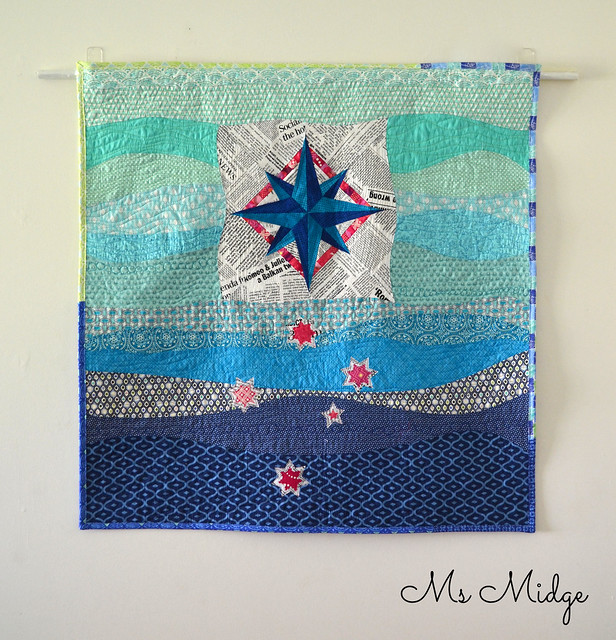
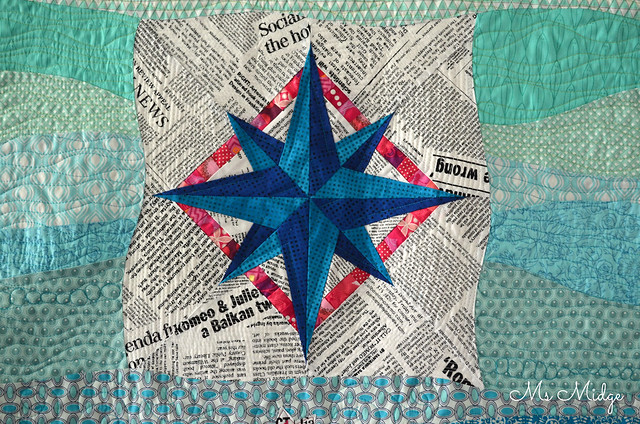
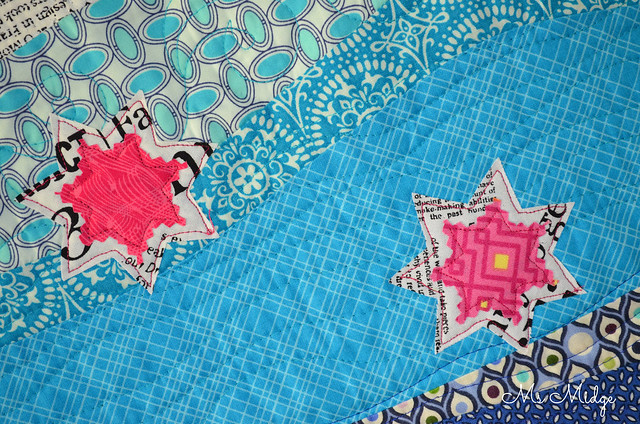
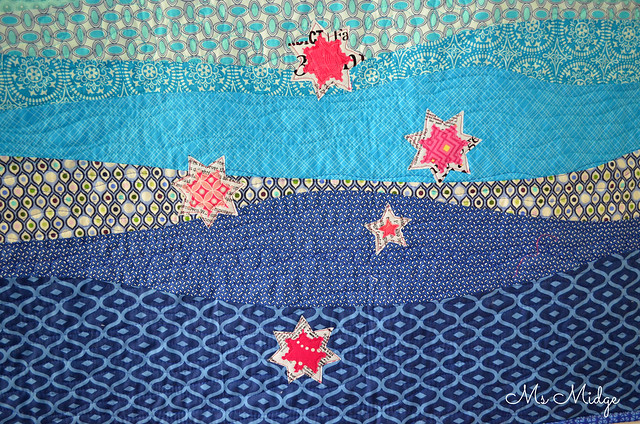
So I decided on my project, completed it and sent some delightful photos to the team.  Just so excited to be a part of something so fabulous, and it turns out they liked my project so much - they asked if they could feature it on THE COVER!!!  Whattttt????


Make Modern Magazine Cover - With my quilt on the front!

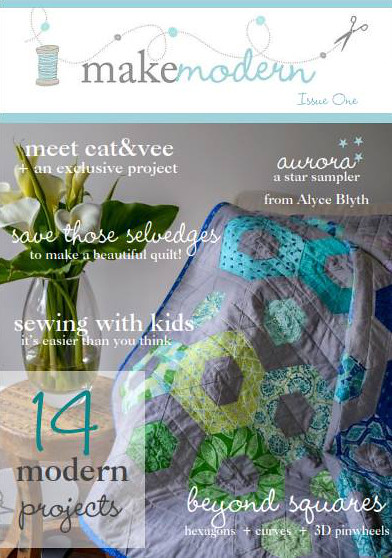
Needless to say, I answered with a resounding YES.  I was so excited, I nearly wet my pants when they released the cover photo last week.

The Make Modern team released a preview of the magazine today, to entice you with its fabulousness before it's big debut tomorrow.  You can check it out HERE.

Now, given I have just confessed to NOT reading quilting magazines (OK, I bought one a few weeks ago, and actually read it from cover to cover. But it was because I had a little spot in it with artist trading cards!) why would I be gushing about a quilting magazine and telling you all how much I love it?  Well, I'm an "online quilter".  I have learnt to quilt through the online community.  I share my quilting through this here blog.  I spend a hell of a lot of my time online.  It is only fitting that my first magazine feature and quilt pattern would be in an online magazine!  Yes?  

As you can tell, by all of my babble, I am incredibly excited.  I am incredibly proud.  And I am incredibly terrified!  There are so many amazing and talented artists in the first edition, you HAVE to get yourself a copy and share in the excitement.

Make Modern have a wonderful Blog Hop lined up to celebrate the release, and I will be sharing more about my quilt and the pattern with you on the 23rd of September.  Be sure to subscribe to their newsletter, so you can stay up to speed with all things MM.

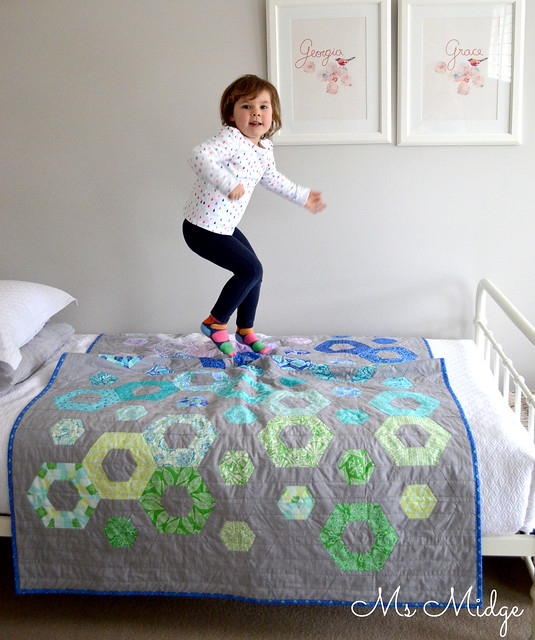
And just because I love you all so much - here's a little out take from the photo shoot I did.  This gorgeous girl was ever SO helpful during the process ;)

mmblog2

I'm linking up - You can too!

Molli Sparkles

Thursday, August 28, 2014

T.G.I.F.F. - Bijoux Metro Twist - Sew Kind Of Wonderful Blog Hop!

I have the pleasure of hosting T.G.I.F.F. today!  And do I have a finish for you....

QCRbloghopbutton

 When Laura from Quokka Quilts asked if I'd like to take part in the Sew Kind Of Wonderful Blog Hop, I said I'd love to, but would probably only manage a few blocks.  Fail.  The Quick Curve Ruler had me at Hello.  The lovely Jenny generously sent me a couple of patterns to choose from, and I was instantly drawn to the Metro Twist.  Firstly - it looked like the easier of the two, and secondly - it looked like the easier of the two!

Anyway, needless to say - I finished the whole quilt....

Metro Twist

I felt the pattern leading me towards rich, yummy fabrics.  I had been holding on to Bari J's Bijoux for what seems like forever, and promptly de-shelved them for the event.  When it came to a background, I had just received Essex linen in Flax, and it was a perfect fit!  The textural differences between the linen and the Art Gallery are amazing!

Metro Twist

The blocks went together relatively quickly.  The pattern is written VERY well, with loads of diagrams and mathematics that makes sense.  Which is good, given my lack of mathematical ability.  Cutting the curves with the ruler was easy - although that first cut is very nerve-wracking!  The only tricky bit I found was because I used the linen - which is hard to determine a front from a back - so I resorted to labeling my piles of cut fabric "front facing downwards" and "back facing downwards".  This helped immensely!

Metro Twist

I think the biggest thing I have learnt from this first foray in to  these patterns (oh yes, there will be more!) is that even though it looks like all your curved pieces are cut exactly the same, they aren't necessarily.  That is, if the angle of your ruler isn't EXACTLY the same each time, your little curves will be different in the slightest little angle.  You don't notice it until you are sewing your blocks together, and your background diamonds are just slightly different in shape.  Clearly - this is not a massive deal!

Metro Twist

When it came to quilting this beauty, I wanted to keep it pretty simple.  Apart from the fact that this plan lead to a tonne of thread burying, I think it worked.  I used my free motion quilting foot to echo quilt the diamonds - from outside-in.  They are far from straight lines - very "organic" indeed.  And I was second guessing myself after the first few - but I really love them.  I haven't quilted on the prints at all.  And on the borders, I just echoed the curves using my walking foot, which I adore the look of.  All of the piecing and quilting was done with Aurifil #2000 50wt, which is such a beautiful golden thread it looks stunning with the linen.  


The backing, as you can see, is my go-to Ikea print.  This fabric seriously works with just about any quilt!

  Metro Twist

I also added a border to the quilt.  The finished size of the pattern is 40" x 55", which is a little on the smaller side of throw size for me - so I added 5" to each side and end, which brought the final size up to 49" x 64".

I also took a couple of little videos of myself sewing curves, and put them on Instagram.  If you want to have a little look, you can find them HERE and HERE.  I was trying to demonstrate curves not being as difficult as we think!  If you're willing to take your time and practice, I promise you can do it!

If you want to make the Metro Twist yourself, you will find the pattern HERE.  If you're in Australia and looking for a Quick Curve Ruler stockist, you can find a list HERE

 Please go and check out Jenny’s blog and shop. You can also join the Sew Kind of Wonderful mailing list to get news of any new patterns or promotions. There is going to be a linky party on the Sew Kind of Wonderful blog on Friday 29 through 31 August – you can link up any quilt or block made using the Quick Curve Ruler. If you haven’t tried a QCR project yet, never fear, there’s a chance to win a ruler during the bloghop and have a go. You can find plenty of inspiration on the bloghop so please go and check out the other participants!

Monday 18 August http://quokkaquilts.com
Tuesday 19 August www.cluckclucksew.com
Wednesday 20 August www.fromthebluechair.com
Thursday 21 August liveacolorfullife.net
Friday 22 August www.happyquiltingmelissa.com
Monday 25 August www.greenfairyquiltsblog.com
Tuesday 26 August http://blog.sewbittersweetdesigns.com
Wednesday 27 August www.pleasant-home.com
Thursday 28 August http://www.lucymade.wordpress.com AND http://msmidge.blogspot.com.au
Friday 29 August www.dontcallmebetsy.com

The bloghop is going to be followed by a 'Curve it up' Challenge Quilt-a-long on the Sew Kind of Wonderful blog starting in September, so join in the bloghop, get inspired and get ready to Curve It Up!  

CurveItUpQALbutton

Now it's your turn to show me your fabulous finishes this week!  Be sure to pop them in the linky below!  Have a wonderful weekend!


Tuesday, August 26, 2014

My Super Tote!

In keeping with the 2014 theme of "throw lots of balls up in the air and juggle them", I started yet another project the other day, and finished it at late-o'clock last night!  It's my Super Tote!  Now, to be honest, I'd worked myself up a bit about the Super Tote.  I had put it in the "this is going to be difficult" basket and was a little bit scared.  But I'm here to tell you - it's actually relatively easy!  Once you get past all. the. cutting. out.

Cotton + Steel Supertote

As you can see, I used my beautiful Cotton + Steel canvas for the outer sections.  I adore the tones in it, the green is actually a really subtle shade.  I kept changing my mind about what to use for the main sections - I had some shot cotton that was in the running, but in the end I went with denim.  I found a few metres of it in the bottom of my shelves, and when I got it out and looked at how dark it was, I remembered a tip from one of the girls at the Sit n Sew day I went to!  Emma from For My Little Monster uses her denim INSIDE OUT!!!!  Bingo!  This front section is also a big old pocket - with another magnetic snap!

Cotton + Steel Supertote

Once I sorted those main parts out, I had to work out which prints to use for the million other sections!  This bag pattern is proof that you don't necessarily need to order fat quarter bundles or larger of fabric collections.  You see, I have a fat eighth bundle of Cotton + Steel (in two of the ranges), and from a fat eighth you can get the recessed zipper pieces and the inner pocket pieces!  Yeh!  So I chose my favourite colour for the recessed zipper - coral.  LOVE this print.  The zipper was super easy to do - except for the part where I chose to use a chunky metal zipper.  Please note - metal zipper + hot iron = ouch.  Angie from GnomeAngel had told me of this before, and I was being reallllly careful, but no.  Ouch.  Anyway, I got it done!

Cotton + Steel Supertote

The lining of the bag is the Butterfly print I used for my 241 Tote.

Cotton + Steel Supertote

And the gorgeous little pockets on either sides are yummy turquoise prints.  I'm not sure if you have picked the little mistake I have made with the gusset?  Hmmmmmm.......... well, when I was pulling the bag all the way back out the right way, I realised I had sewn the gusset lining in with the dark side of the denim!  Whoops!  Moving right along.......  Constructing the bag was relatively straight forward.  If you've made any sort of lined bag before, you will be able to work it out - promise.  If you haven't made a bag before, you may want to read the instructions through a few times and really wrap your head around them.  When I was attaching the lining to the recessed zipper sections, it took me a few minutes to realise why it's called "recessed"...... derrrr.....because it sits lower in to the bag!

Cotton + Steel Supertote

And the handles.  Sigh.  I would be devastated to know if people are actually NOT using the selvedges from these fabric ranges!  They are really something special, with gorgeous little quotes on them  "Leap and the net will appear".  Love!

So, a review of sorts.  I freakin love this pattern!  For the interfacing I used a reasonably heavy weight iron on wadding from Spotlight.  It is not a stiff interfacing - because I don't like my bags to be stiff.  But having said that, I think next time I make one, I will put a slightly stiffer interfacing on the gusset, to give the sides and bottom of the bag a little extra oomph.  Stitching the final topstitching around the top of the bag was a little bit of an effort.  The thickness, especially at the sides of the bag, was reasonably tricky to get through the machine.

I used my walking foot through the entire process (except for the zipper installation).  This made sewing through the layers a little easier.  I used a regular machine needle, because I didn't have a denim one, but I'm thinking next time I shall invest in a denim needle :)  I also used Aurifil 50 weight thread in #2000 - a beautiful golden colour.  I'm thinking a 40 weight thread would be good in future.

All in all - the big thumbs up from me!  I can see many, many more of these in my future.  You can buy the Super Tote pattern by Noodlehead HERE.

I'm linking up - You can too!


Sew Cute Tuesday

PS. This is sort of kind of me sewing along with Sewvivor.  You HAVE to head over to see all the fabulous entries this week for the bag challenge HERE.  And if you're feeling patriotic - remember to vote for our two Aussie girls - Angie and Crystal!

Sunday, August 24, 2014

Sunday Stash & Dash - The "I have a tax return and I aint afraid to spend it" Edition!

In what will now be known as "the best fabric delivery week ever", I had two of the best fabric deliveries ever!  Let me get straight to the point.....

And my most fabulous fabric order from @intrepidthread finally got the canvas I needed and was very restrained in gathering colours I needed for the stash as well as a few I just really wanted!!

Exhibit A - When Julie at The Intrepid Thread sends me an email to say she has stacked her sale section AND halved her international shipping for a week - who am I to argue????  I hot-footed it over there and filled that shopping cart like there was no tomorrow.  I think I showed considerable restraint - you know, given I'm on a fabric ban and all Oh, who am I kidding - I may be going to Tokyo, but there is still fabric to be purchased before then.....

So, what's in there?  Well, I got the Cotton + Steel canvas I needed (and it's already cut up and half made in to a bag), then there's a few new Far Far Away prints to go with all the old school HR I have.  And the rest of this bundle is from the amaze-balls clearance section.  Some fab stash stackers in there.  I never seem to have enough yellow and orange, so I made a point of throwing them in the cart.  Oh, and the Emmy Grace prints - perfection.

Now just because I believe in sharing the love, I'm happy to tell you that Julie has decided to keep her international shipping reduced!  Check it out:

"Due to the overwhelming reception that you gave our shipping discount sale we have decided to change our shipping prices for the foreseeable future, things could change if the prices go up again but for now.... In the US Shipping is never more than $5 no matter how much you buy and free over $90. International shipping is half price if you spend over $70. Here is the breakdown:

YARDAGE SHIPPING VIA USPS TO USA/CANADA/EVERYWHERE ELSE

Up to $10 quilting weight fabric, First Class Mail is $3.75 / $12.95 / $14.95
$10 - $70 Priority Flat Rate Envelope $5 / $19.95 / $23.95
$70 - $90 Priority Flat Rate Envelope $5/$9.98/$11.98

$90 and up 2 Priority Flat Rate Envelopes or Priority Medium Flat Rate Box $0 / $20 / $30"

Ps. This is NOT a sponsored post!  Although I'm beginning to think I should hit Julie up! Hahahah.  Seriously, head over there and get you some goodness!

I think we shall name this week the #bestfabricdeliveryweekever this is my (first) #massdrop purchase! @alisonglass yummies!

Exhibit B - I'm going to call this one an experiment.  You see, Quilt Jane lovingly shared a link on FB a couple of weeks ago to a website called Massdrop.  My inquisitive self got the better of me, and I clicked on said link and somehow or another managed to then click on BUY.  Oops.  Turns out I bought myself these two fabulous Alison Glass bundles!  If you haven't seen or heard of Massdrop before, go give it a looksy.  The shipping is ridiculously cheap to Australia.  I have no idea what I'll use these beauties for, but I'm sure I'll work it out!

Ok.  Bed time.  I hope you've all had a lovely week, and have an even better one ahead of you!

I'm linking up - You can too!


Molli Sparkles

Friday, August 22, 2014

T.G.I.F.F. - This And That

I have achieved quite a lot this week.  I finished off my quilt top for the Sew Kind Of Wonderful Blog Hop (you will have to be patient and wait until my stop on the hop next Friday), got all my bee blocks for QCA Bee #5 up to date, and am now a month ahead AND today whipped up this gorgeous cushion cover for an upcoming showcase at Tilda & Birdie on FB.

Sleeping Beauty Cushion

When I saw there was a Heather Ross Showcase coming up, I had to put my hand up.  I've been collecting HR for a little while now, and like a good showcase to make me think outside the box.  Well, clearly not too far out of the box - given it's another cushion cover - but colour palette wise, this is different for me!  I cut a gorgeous little charm of Sleeping Beauty from my original Far Far Away linen blend and then worked my way outwards.  I used my 9" Economy Block tutorial for the centre, and then added a couple more borders to bring it up to size.

Sleeping Beauty Cushion

I love the back of the cushion.  This Briar Rose print is one of the cutest ever!  And I even managed to match the print so well it doesn't look like it has been cut!  There IS a zipper in there :)

Sleeping Beauty Cushion

I kept the quilting simple.  Nice little straight lines of Aurifil #2024 on the white sections - giving it a gorgeous texture.  The pink print has a little buzzy bee meandering pattern.

And just because it's TGIFF, here are those bee blocks, care of my IG feed.....

Playing catch up on bee blocks today! First cab off the rack.... #qcabee5

Simple little butterfly blocks.

One epic 18" blocks for @bendigolioness had to use my brain for this one! #qcabee5

This not-so-simple maze block!  It did my head in for a little bit, but I do love the end result - even if it is rather "busy".  You can find the tutorial for it HERE.

Final block for today just finished!! A sort of kind of #nestedchurndash for #qcabee5

And a very late night pic of the solids block for Carlie.  I'm not a solids kind of girl, and the only two solids I have in my stash that I really actually like were the pink and gold Art Gallery fabrics.  Carlie requested a sampler block.  So I browsed Pinterest and came up with nothing I really loved.  Instead, I started out with Quilt Jane's Nested Churndash, making it up to the 8.5" size, and then added a couple of borders to bring it up to 12.5".  A friend called it a "framed churndash".  Sounds good to me!

Anyway, that's it for this week.  Another busy week ahead.  I hope you all have a lovely weekend!

I'm linking up - You can too!


Tuesday, August 19, 2014

Personalised Zipper Pouches - Tutorial

Another week, another birthday party!  My three youngest children are in the midst of a birthday party bonanza at present.  And buying a million birthday presents for kids I barely know is not my idea of fun!  So I've actually been making them all presents.  This weekend's birthday girl is turning 12, and my daughter told me she likes Owls and purple.  O. K. then.

I popped in to Spotlight this morning for a few bits and pieces, and grabbed 20cm of a very cute owl print, and then remembered the amazing purple hexagon Saffron Craig print I picked up a couple of months ago - at SPOTLIGHT?!?!?  What the!  And this is what I made....

pouch10 

A very cute, VERY purple, personalised pouch.  Now as you can see, the birthday girl has a slightly unusual name - Abaset.  Odds are on that she doesn't get much personalised stuff in her life, so I thought it would be lovely to pop her name on it.  I free motioned her name and fit it in amongst the owls.  I used bright purple Aurifil #2545 and my trusty white #2420.  The front and back panels are quilted to give the pouch some body.  And would you believe that today I did my first ever Y Seam!?!?!?  I wanted to use a hexagon, so headed to Youtube and found this great little video below.


Now - on to a little tutorial for you all.

pouch1 

What you will need:

2 x quilted panels.  The size is completely up to you, but these are approximately 10.5" x 9".  My zip is 9" and then you need 2 x Lining panels.  

pouch2 

You will also need 2 little squares/rectangles on your coordinating fabric, as shown above, to cover the ends of your zip.  Press a little seam length ways on your zip covers as seen below.

pouch3 

1. Take one panel, right side facing upwards.  Centre your zipper length ways along the edge, with your little zip cover pieces at the ends.  Then take a piece of lining and place over the top, right side facing downwards and pin all together.  

pouch5 

2.  Using a zipper foot, sew along the edge to join all pieces together.  It will look like the above photo when joined.  Pull the lining back underneath so panels are wrong sides together and press.  Top Stitch alongside the zipper.

pouch6 

3.  Take your second panel, and place right side upwards.  Lay your first panel on top, right side down, aligning the edges of both pieces.  Trim off your zipper covers.  Place your second lining piece over the top and pin together, then sew together the same way you did previously.

pouch7

4.  Press and top stitch again.  When you have done so, your will end up with a layout like above.  Trim around to make everything neat and even in size.

pouch8 

5.  Open your zipper a few inches, then take both quilted panels right sides together, and both lining pieces right sides together.  Pin them all around, leaving a 3" gap in the bottom of your lining pieces.

pouch9 

6.  Line up the top seam of your quilted panels, and have the zipper cover folded up towards the lining as demonstrated above.  Now sew all the way around, leaving the gap open at the bottom of the lining, backstitching on both sides.  Trim all four corners.  Reach through the gap in the lining and pull the pouch through, the right way out.  To get your corners nice and neat, you can use a chopstick or something similar to push them out nicely.  Pull your lining out and neatly machine sew the gap closed.

pouch13 

And you will have a delightful little gift!  I plaited four shades of Aurifil thread to make a cute little zipper pull!

pouch11 

The best thing about these pouches is you can fill them with whatever you like!  I asked my daughter when she got home whether she'd like to put beauty products, lollies or pencils etc in it?  She chose the smelly stuff!

pouch12

I have made a tonne of pouches, so I hope this helps you out for some fun little gifts in future!

I'm linking up - You can too!


Sew Cute Tuesday

Saturday, August 16, 2014

Moonlit 241 Tote

A few weeks back, I asked my IG peeps for bag pattern suggestions.  There was an overwhelming majority happy to recommend both the 241 Tote and Super Tote by Noodlehead.  A few days ago, I finally bit the bullet and bought BOTH patterns!  I then also stopped past Spotlight and got some extra bag making supplies and was ready to rumble!

I'm pleased to say I have finished the 241 Tote today!  And I'm a very happy camper....

Moonlit 241 Tote 

Even though I was expecting a canvas butterfly print from Cotton + Steel's new range, I still went ahead and used the quilting cotton that arrived.  And I'm so glad I did!  I love the combination of the denim blue butterflies and coral arrows.  Yummo!

Moonlit 241 Tote 

The side panels and lining throughout the bag are Essex Linen.  It contrasts perfectly with the other prints.  I purchased chunky metal jean zippers for the front.....a first here.  What I didn't think about was the fact you can't cut the ends off if you want to make them a bit shorter, like regular dress zips.  Whoops!  So I had to sew a wider berth around the top and bottom of each zip.  I love the look of them.

Moonlit 241 Tote 

I used Aurifil #5002 - a beautiful shade of coral - for all of the top stitching.  You know coral is my favourite colour right?

Moonlit 241 Tote 

And probably my favourite part of the bag - the handle.  I don't know how anyone could bare to part with these fabulous selvedges?  I couldn't!  The instructions direct you to cut a piece of fabric 6" x 26" for the handle, so I cut the selvedge off at 2.5", then 4.5" of the linen.  Cut the linen in half length ways and inserted the selvedge between them.  I had to sew the edge of the selvedge on TOP of the linen on one side, so as not to lose any of the text.  I freakin love it!

Moonlit 241 Tote 

Another first - magnetic snaps!  Never used them before, but I can now see them becoming a regular fixture on my bags!  So easy!?!?!?  I also love the little slip pocket on the inside - you can never have too many pockets in a bag.

2014-08-16_04-34-53 

Speaking of pockets..... The leaf print from Wee Wander co-ordinates divinely with the arrows.  Winning.

Moonlit 241 Tote

So - overall a very fabulous bag!  The only thing I WILL do differently when I make my next one (and undoubtedly many more after that) would be to upsize the pattern a little.  But for me, it's actually the perfect handbag size.  

Great, easy to follow pattern, with plenty of instructions.  I used a dressmaking interfacing - sort of like spiderweb weave - and it was enough structure as I don't like "stiff" bags.  I think if you added some batting to it, it would be ok also.

Next stop - the Super Tote!  You can find the 241 Tote Pattern HERE.

Tuesday, August 12, 2014

Sewing Along With Sewvivor - Nautical Challenge

Once I got over the pain and devastation of not being voted on to the island, I had to re-group and decide what to do. I'd already started my Nautical Challenge piece, but sort of just wanted to fold it up and put it away forever!  Instead, I pulled it out and got on with the job.  And today, well, I finished it!

Sewvivor Sew Along - Nautical Challenge

When nautical came to mind, I thought of the sea (derrrrr), and instantly started searching for a Mariner's Compass.  My husband has three nautical stars tattooed on to his forearm representing our three children together!  I could not find one I loved, so I went to my fabulous friend Kristy over at Quiet Play and asked if she could come up with something fabulous for me?  She came to the party!

Sewvivor Sew Along - Nautical Challenge

I ummed and ahhed over fabric selection, wanting it to be strong and definite in its purpose, but also not wanting it to be predictably nautical in its colours.  I think the newsprint works very well as a background too.

Sewvivor Sew Along - Nautical Challenge 

Next step was attacking my blue and green stash.  I have plenty of both, but not many that are bigger than fat quarters!  I took my improvised curve cutting skills and worked it baby.  Every single row of colour is cut differently, and very improvised indeed!  I wanted the colours to work together but also against each other if that makes sense?  Like all the different currents in the ocean.  I did all the blue rows first, then had to figure out how to work around the compass block.  I used shorter lengths of fabric, improv curved them, then slashed them in half.  Curve cut the sides of the PP block and attached the side curves, then did the same with the top and bottom.  Phew.

Sewvivor Sew Along - Nautical Challenge

The quilting was quite fun. Lots and lots and LOTS of free motion wavey lines!  There is one section of waves on the aqua pebble fabric and there are some little pebbles in between the lines in sections.  I used a range of Aurifil threads in blue and green.  And of course, some hot pink for the stars.

Sewvivor Sew Along - Nautical Challenge

The final steps were completed today.  The Southern Cross.  I hand cut out all these little stars, which range in size from around 2" across to that teeny little one in the middle of the five point star, which is about 1/2"!  Fiddly.com.  They have been attached using Vlisoflex and then appliqued on with my free motion foot.  I then attached the hanging sleeve and binding - Finished!

Sewvivor Sew-along

I was quite out of love with this a week ago.  But today is a different story.  I know we all second guess ourselves in our artistic efforts, and we are forever comparing ourselves - but finishing this was a great confidence booster for me.  The vision I had at the beginning, of the finished product, actually worked!

I'm still undecided what I will do with this little baby.  I had thought of perhaps sending it off to a friend whose husband is in the Navy, but am unsure whether hanging a quilt in her home would be her "thing"!  So I'll just think a bit longer.  The best part about finishing it?  When I showed it to my husband tonight, he really liked it and used the words "wow" and "cool".  Pick me up off the floor......

A few little stats for you:

Size - 34" x 34"
Fabrics - All from my stash, binding is leftover Horizon jelly roll strips.
Thread - Aurifil , Aurifil and Aurifil
Backing - Ikea print

Now - if you want to go and back some sure favourites in the "real" Sewvivor challenge - then you best head over to Family Ever After.  And if you are an Aussie like me - then you best be voting for my two friends - Angie and Crystal!  Their entries are fabulous!  GO!
Related Posts Plugin for WordPress, Blogger...