Monday, March 18, 2013

A Bag From Numbers - Tutorial (of sorts!)

Whilst I was in Queensland last month, I had to pleasure of catching up with my Tokyo BFF, and her lovely family.  Lucky for me, her gorgeous little girl also just happens to be my God Daughter!  Anyway, at the end of our weekend, after she had handed over the MOTHER LOAD of fabric, she got out her notepad and pen and wrote a little list of things her little boy required for Kindergarten.
It's been living in my handbag pocket, and survived a near death experience via Chloe's pen.....

The last time I made bags for these gorgeous kiddies, I looked up tutorials, and it was actually quite time consuming trying to find a tutorial that had the same measurements etc that I was looking for.  This time, I thought I would dive straight in and just make it up as I went.  Given my lack of mathematical ability, this could have turned out a disaster.  But I'm happy to say - it didn't!  Here's how I made a bag from numbers.......

I got my scrap piece of paper out and searched the house high and low for a pen.  Once found, I took the numbers from my little note and drew some very technical diagrams.  I basically worked out that I needed four sides to the bag, which are the two top drawings above, and then guesstimated how long the handles needed to be for a three year old to carry. I also needed a bottom for the bag, which I initially was going to cut another "pattern" piece, the bottom diagram.  But I sacked that idea and just went with a longer single piece of fabric, which was made up of the two main pieces and the bottom piece.  Are you still with me???

I picked out this gorgeous Japanese train print!
And these are all the pieces cut out ready to go.  Main piece 15.5 inches wide x 26.5 inches long.  The sides were 11.5inches x 3.5 inches (two).  And the handles were 11.5inches x 4inches (two).  I cut two strips of heavy iron on interfacing, 1inch wide.  And also replicated all of the pattern pieces in a navy blue poplin for lining.

I took the fabric for the handles, ironed them in half lengthways, and then folded the sides in to the middle and ironed again, making them into a large sized binding.

Popped the strip of interfacing in and ironed it on, to give it some added strength.  Then ran four lines of stitching through it to give it more strength and stability.

I was going to use batting for the main section (as my friend said these particular bags are usually quilted - who was I to argue?), however found some fusible wadding.  Fab.  Cut a piece of the same width and length and ironed that baby on!

I then found a lovely scrap piece of homespun and made myself a quilt sandwich, and used some basting pins to keep it all secure.
Then got my free motion quilting on!  I love this, so much fun just whizzing around!

Once I had the quilting sorted, I then needed to work out how on earth I would put it all together.  Possibly something I should have done earlier?  I decided to measure half way on the length, and pinned it, then took the side pieces (which I failed to note also have some heavy weight interfacing ironed on, and then ran a few rows of stitching through them) and at their centre mark, matched it up with the pin marking the centre of the quilted piece.  I secured the sections together about 1/4" in.

I then brought the sides of the bag up flush with the length of the side piece, and pinned them together.


Right on the corners, I just squished them flat, and stitched from one end through to the other.

And then repeated it on the other three lengths.

This is how the sides of the bag ended up looking.
I measured the centre top of the bag to work out where to place the handles.  Got out my trusty quilting ruler and spaced them four inches apart.  Then stitched them on.  A bit of backstitching was required here.

And this is what it looked like! Don't mind the mighty overhang prior to trimming the side pieces!

And I was happy when I turned it right side out and it looked like a bag!

Time for the lining!  I put the lining pieces together exactly the same way as the main bag.  Then with RIGHT SIDES TOGETHER, I popped the bag inside the lining and pinned it all together, matching the side seams, and making sure the handles are sitting between the lining and outer bag.


And sewed all the way around the top of the bag, only leaving a few inches, backstitching at both ends.
Like so!

Time to wrestle!  Anyone who has ever turned a bag or anything out the right way will tell you that there will be a few moments of doubt, when you wonder if you will actually succeed in pulling it all out without ripping it to pieces?  It's a game of slowly, slowly.  And I promise it will end well.....

And you will exhale when you end up with this!
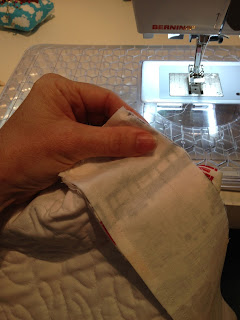
Push the lining inside the bag and finger press (ok, it took me a while to figure out what that meant - use your fingers like an iron!) the layers together, so your seams match beautifully and pin them.  Then sew all around the top edge of the bag, making sure the opening you used for your wrestling is tucked in nicely.

And BAM!  You have a bag!

Phew.  I hope this makes some resemblance of sense and that you have learnt even the tiniest bit from it?  I know I did, hence why I wanted to try and share!  The moral to this story is - anything can be made from next to nothing - even when all you have is numbers!
And just in case you were wondering - here are the other two requested bags!  The Japanese teachers requested thick cord so they can teach the kids how to tie bows!  Great idea!
I'm linking up today with

Plum and June

Being hosted by the lovely Jamie Lee over at Busy Bee Quilts!

7 comments:

  1. What a gorgeous bag, thank you for the tutorial! What a lucky friend having you to whip things up for her children :-)

    ReplyDelete
  2. Ooh fancy!!! I've just got my froend's shoes bag to go. And then start again for MY son!

    ReplyDelete
  3. Love those trains. Great bags all around.

    ReplyDelete
  4. What cute bags! Thanks for the tutorial :)

    ReplyDelete
  5. I love what you said about wondering will you be able to turn it out...I've had that thought nearly every time I've made a bag:) All three bags turned out great!

    I didn't know you had a poodle. That is my daughter Esther's nickname. I'm not sure how she got it though. I thought you got a kitten recently? Thanks for linking up!

    ReplyDelete
  6. What a cute little bag ... will try it out ... thanks. Found your lovely blog via the "Lets get Acquainted link up" at Busy Bee Quilts. Have joined so I can follow your blog :-)

    ReplyDelete

Thanks for taking the time to leave me a comment - I read each and every one of them! xx

Related Posts Plugin for WordPress, Blogger...