
Welcome to week two of the Modern Medallion Quilt Along! I'm here to help you through the next couple of steps. By now, you should have your New York Beauty Contest done and dusted, and looking to get your plain Jane border and drunken geese on. Now, I'll be perfectly honest here, and tell you that I just couldn't figure out how to do the wrap around method for the plain Jane border! I read the pattern multiple times, but it just wouldn't click. So I did a regular border. BUT, I did figure it out eventually, and attached my drunken geese border wrap around style! So I will share a quick tutorial for that method tomorrow.
For now - let's make some geese - NO WASTE style! I decided to figure out the no waste method for these little blocks, basically because I started hyperventilating about wasting lots of my precious AMH fabric. After some searching of the net and desperate search for the mathematical part of my brain, I came up with this...
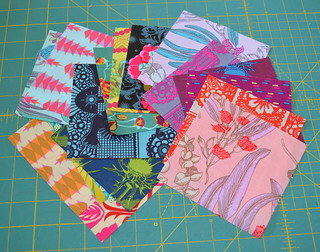
Cut yourself 20 Large squares of your coloured fabrics - 4 3/4". These will become your triangles (geese).
For now - let's make some geese - NO WASTE style! I decided to figure out the no waste method for these little blocks, basically because I started hyperventilating about wasting lots of my precious AMH fabric. After some searching of the net and desperate search for the mathematical part of my brain, I came up with this...
Cut yourself 20 Large squares of your coloured fabrics - 4 3/4". These will become your triangles (geese).
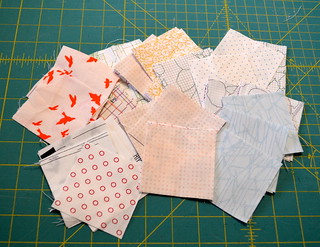
Then attack your low volume stash and cut out 80 Small squares - 2 5/8" (these become the outers of your geese).
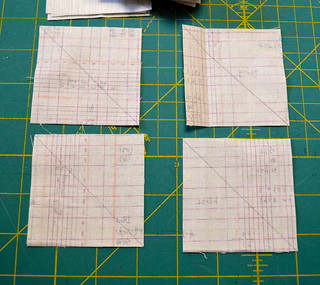
Draw a line diagonally on every single low volume square.
Draw a line diagonally on every single low volume square.
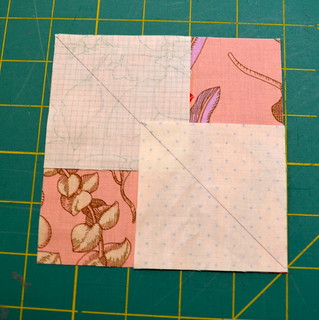
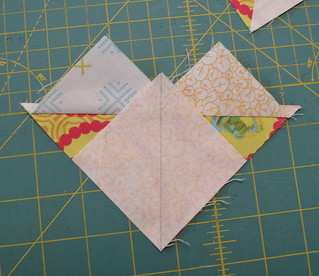
Place two of your low volume squares over your large square like so. Making sure your diagonal lines match up with your corners and eachother.
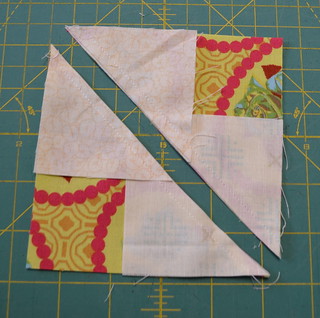
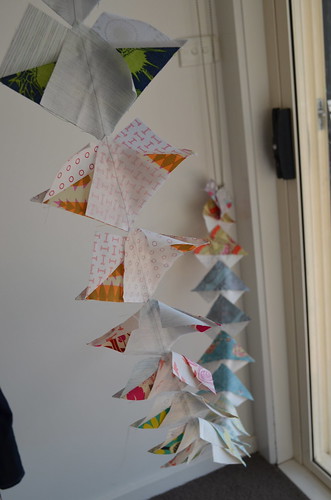
Sew 1/4" on either side of your diagonal line (chain piecing works wonderfully with this technique and saves a whole lot of time! And makes some literal flying geese - see below!). Then cut straight through the middle on the drawn line.
Press them to the side like above.
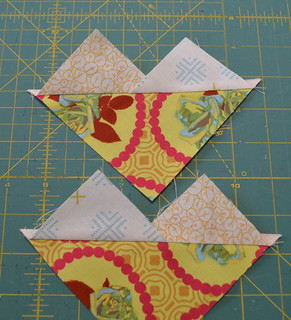
Take another low vol square and place it on top like above. Once again lining up your diagonal line. Sew 1/4" on either side of your line, and then cut through the middle again.
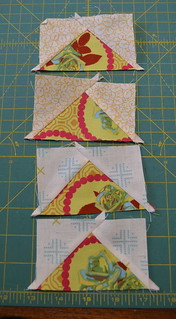
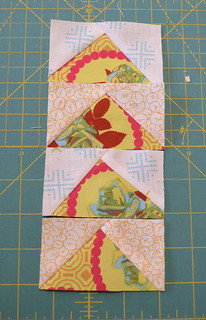
And once pressed - you will have four flying geese from each block! Now to make them wonky....
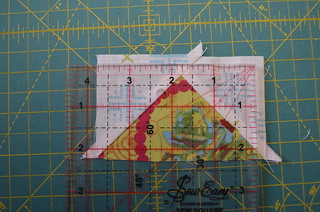
As you can see, your geese end up 4" x 2.5". We want them to end up a finished size of 2" x 3.5", so you have a little room to work with. Take your ruler - the smaller the better, this is a 4.5" square - and position it on top of your block. If you want to keep the points of your geese intact, ensure you have a 1/4" above the point.
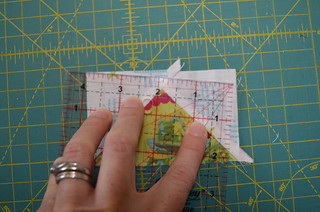
Then turn your ruler in any direction you wish - as long as you have 4" in width and 2" in height. Trim these two sides.
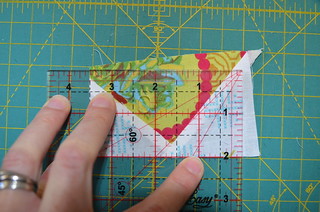
Flip your goose around and then square it up, lining up the two sides you have already trimmed with your finished size on your ruler. Now trim the other two sides.
And HELLO wonky geese! This tutorial will yield 80 of these suckers for you! And I can tell you I had all 80 geese done and dusted within a day. Winning!
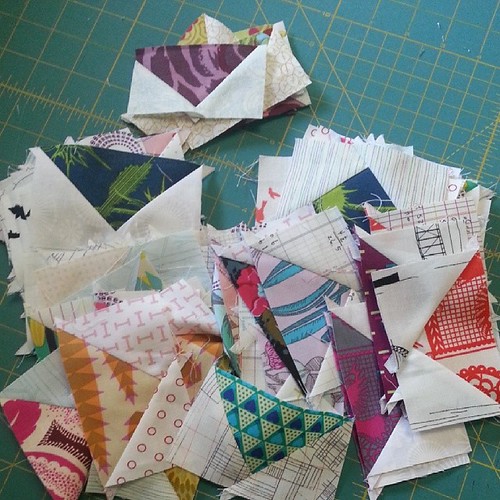
I hope you found this helpful and look forward to seeing a whole lot of drunk geese getting around! Remember to check back in a couple of days, when I share the wrap around border tutorial!
Great tutorial ms midge.well done
ReplyDeleteGreat tutorial ms midge.well done
ReplyDeleteGreat tute ... loved it ... pinned it :)
ReplyDeleteVery nice and clear - thank you! I love that fabric from the top picture with the gum leaves and flowers on it! I'll have to hunt it down now!!!
ReplyDelete