Wednesday, July 2, 2014

Schnitzel & Boo Mini Quilt Swap

A couple of months ago, I signed up to join in the fun of Schnitzel & Boo's Mini Quilt Swap!  It was one of those - I have no idea what I'm doing but it sounds good - kind of deals.  Once I wrapped my head around what it involved, I knew exactly which mini quilt I wanted to make, and waited for instructions about my partner who I'd be making it for!

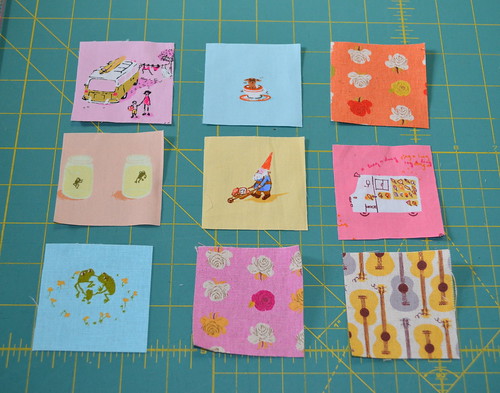
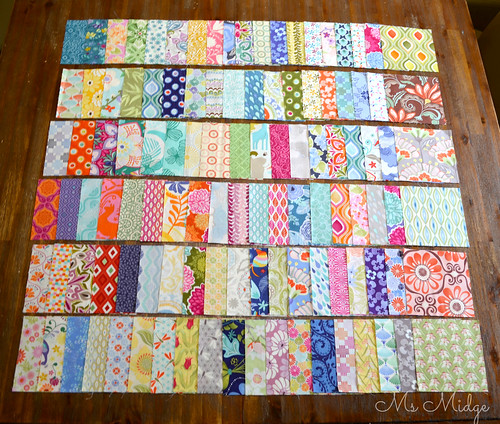
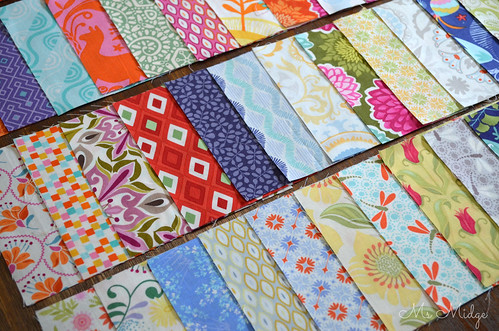
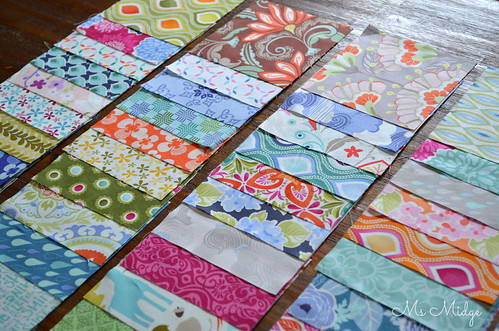
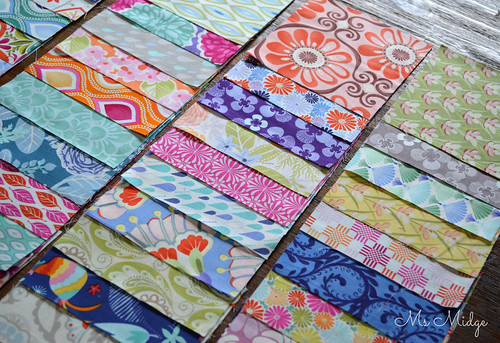
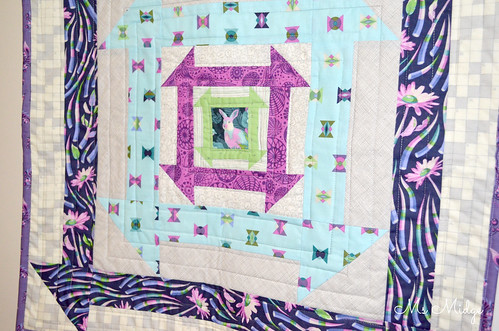
I was hoping to get a social media hog like myself, so I would be able to stalk his/her accounts in all forms, but alas, I only had one social media site to stalk, and even then - did not get much to go on!  The only clues I got was via my information email which stated they liked amongst other things "muted colours" and a handful of designers, including Tula Pink.  With that little snippet of insight on hand, I raided my stash.  I completely forgot I had a bundle of Acacia hidden amongst the shelves, so that was a little jackpot in itself!  This was as "muted" as my colour palette gets.  And the rest, as they say, is now history.....

Schnitzel & Boo Mini Quilt Swap 

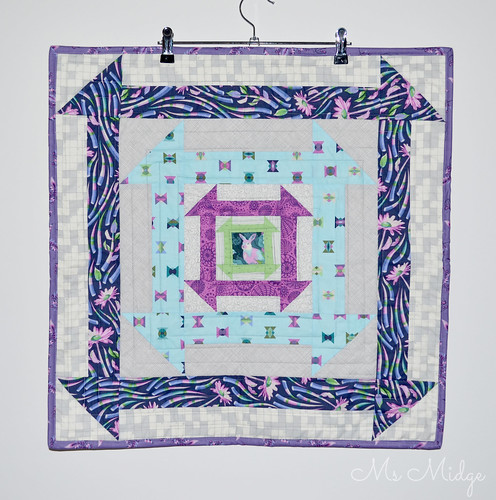
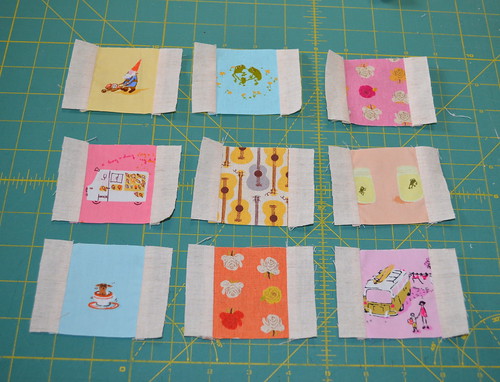
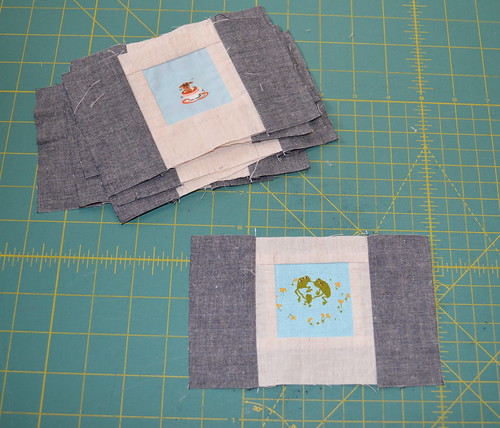
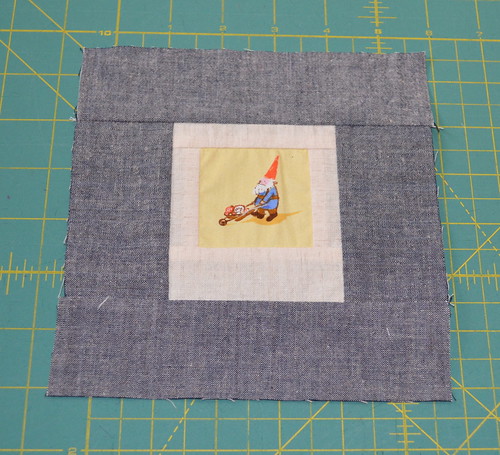
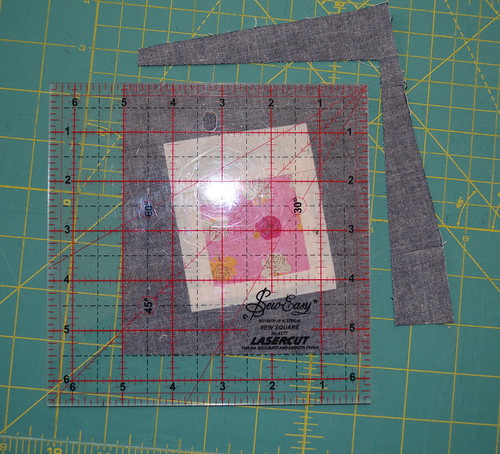
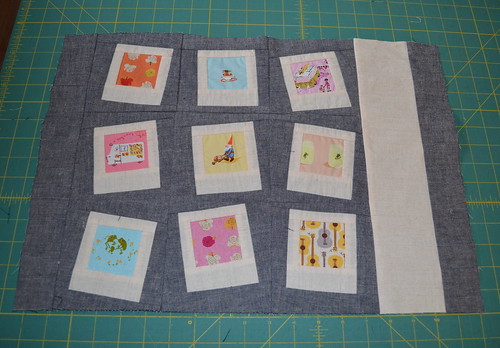
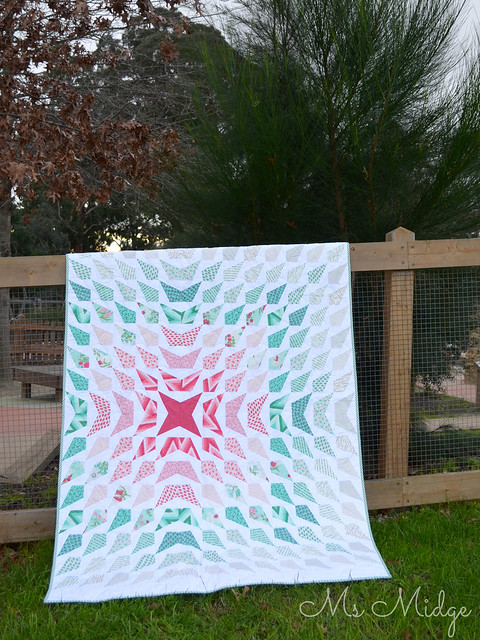
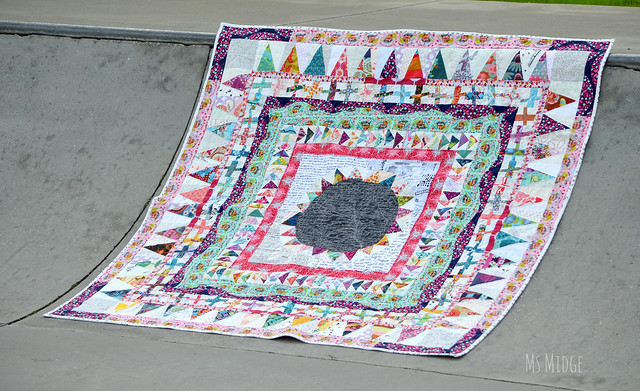
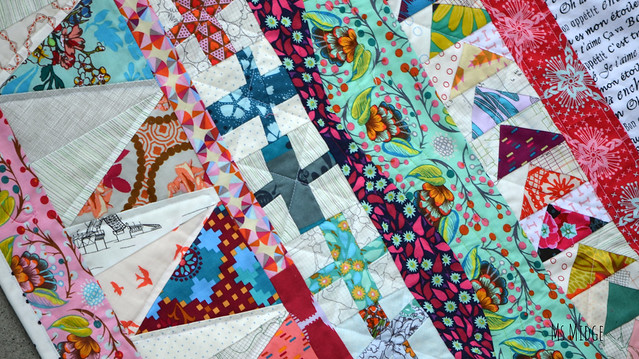
The pattern I planned to use was perfect!  Quilt Jane's Nested Churndash is an awesome pattern, and is so super duper easy it's not even funny!  You can buy it HERE!

Schnitzel & Boo Mini Quilt Swap 

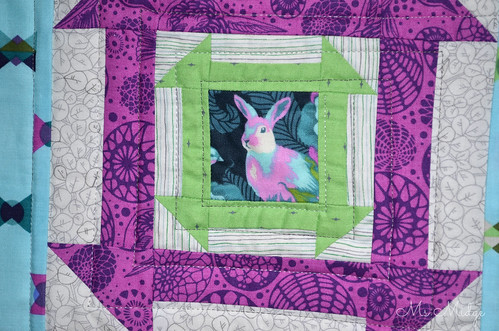
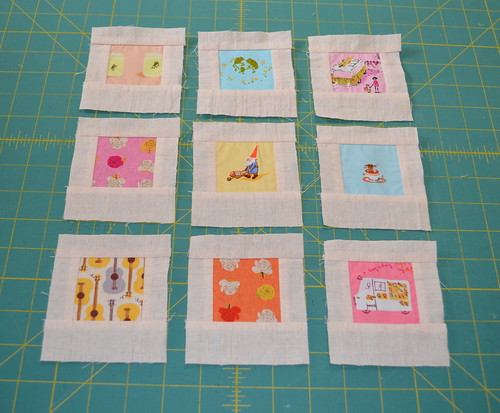
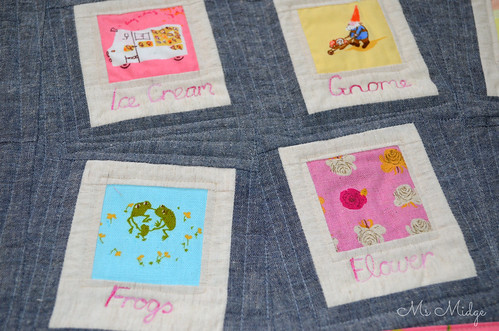
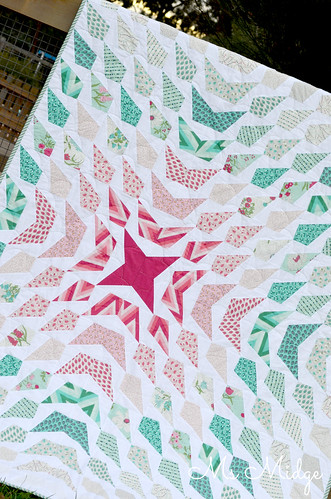
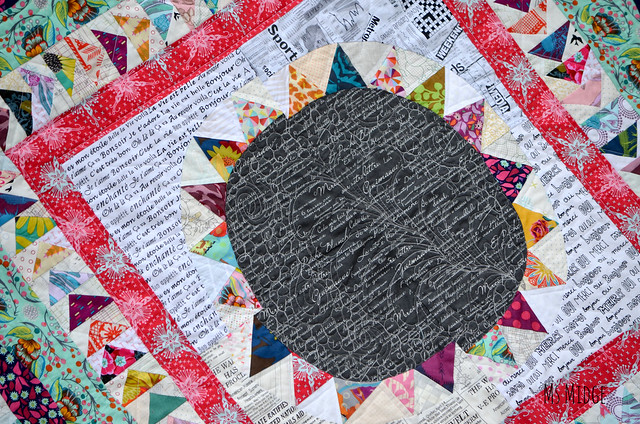
I wanted the perfect little fussy cut for the centre block, so ripped open my Foxfield charm packs and found this little bunny!  Fabulous!  And even better, both fabric lines go perfectly together!  Winning!

Schnitzel & Boo Mini Quilt Swap 

My partner also likes Low Volume prints, bonus.

Schnitzel & Boo Mini Quilt Swap 

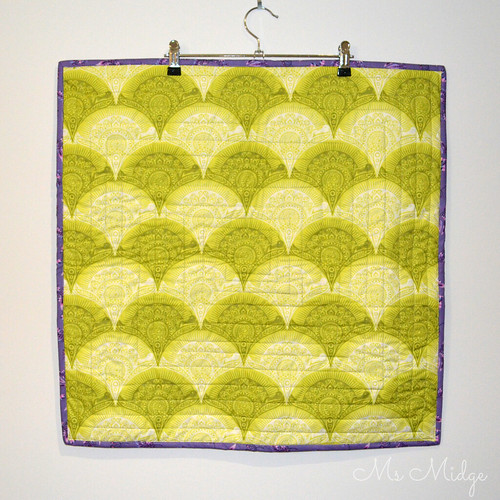
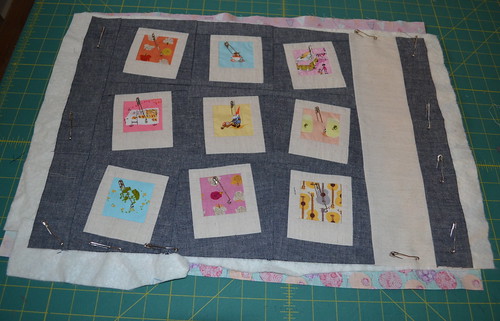
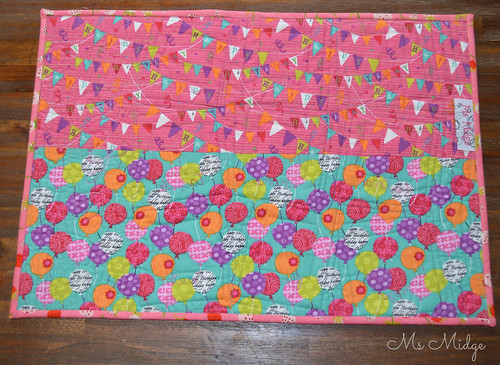
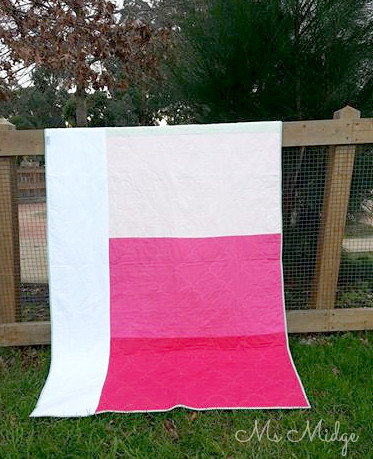
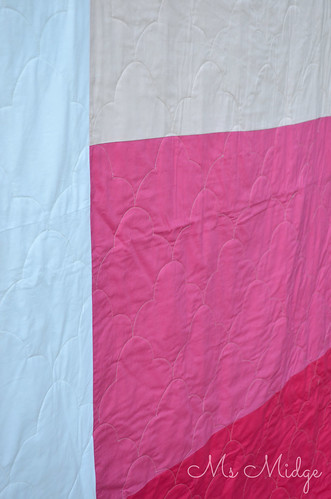
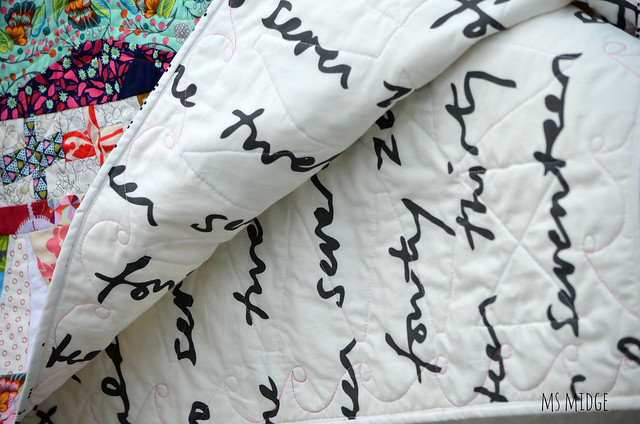
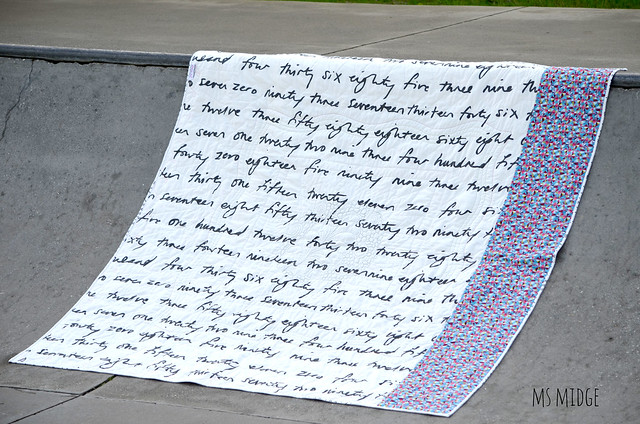
A little Tula Prince Charming for the back, and I was done!

Schnitzel & Boo Mini Quilt Swap 

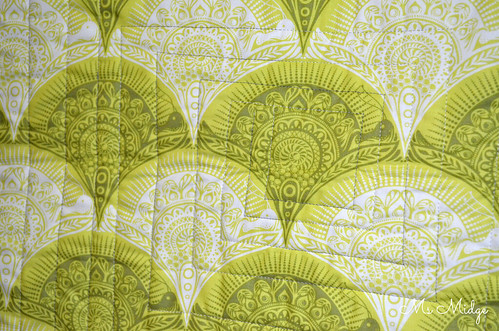
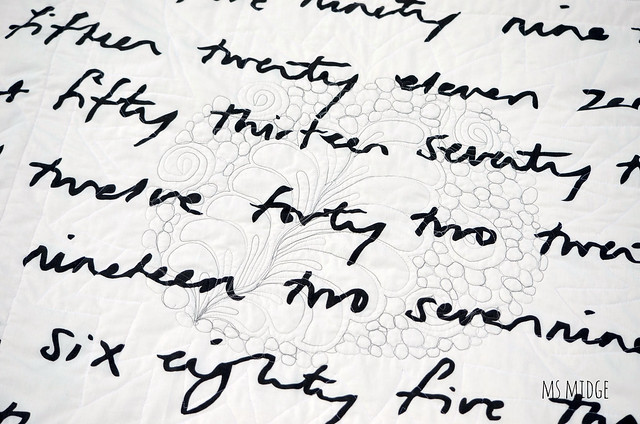
I chose a fairly simple quilting pattern - just some straight lines going around in "circles" from the centre.  I used a variegated 40wt Aurifil thread - grey #4670.

Dear swap partner. .... I am NOT a hand sewing pro! But I just did my first ever blanket stitch...... and whilst it's far from perfect and took me forever, it was done with love! This will be on its way tomorrow!  #schnitzelandboominiquiltswap #makeaquilt

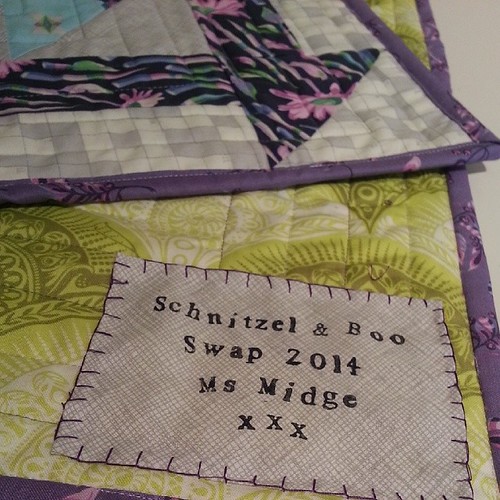
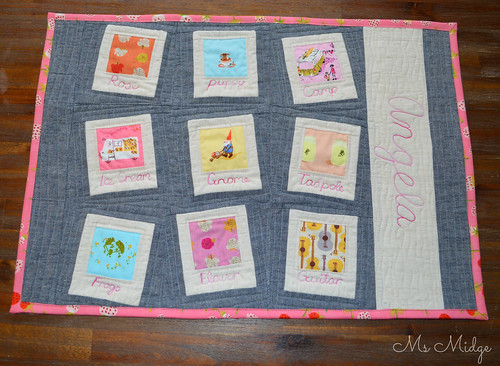
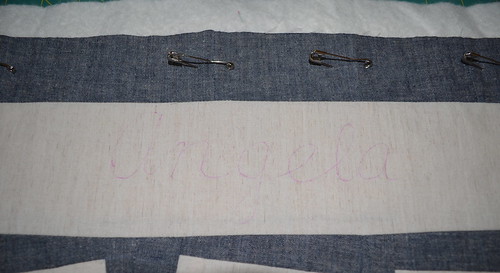
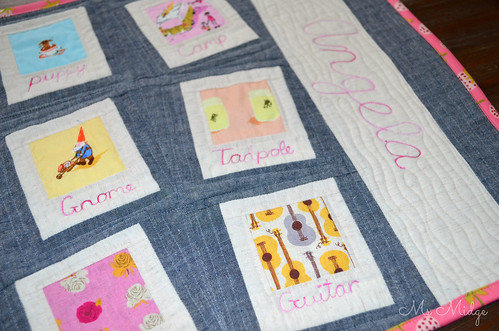
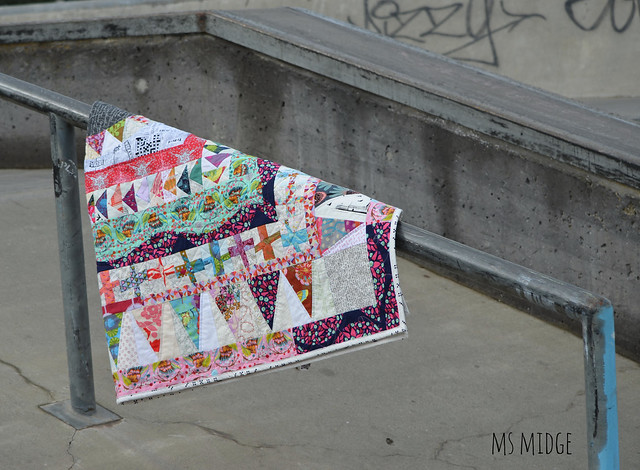
And in breaking news - I HAND SEWED A QUILT LABEL ON!!!!  Yes, I had to google how to do a blanket stitch by hand.  And yes, I had to continually watch the You Tube video as I sewed.  And no, it's not perfect!  BUT - I was quite chuffed and proud of myself.....

A bit of sustenance for my partner!  #schnitzelandboominiquiltswap #makeaquiltmakeafriend on its way now!

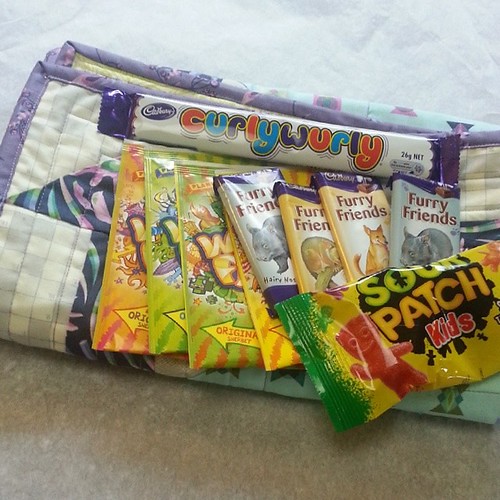
And on Monday, these yummy little treats were wrapped up with the little mini and sent far far away across the sea!  I am hoping and praying that my partner likes what I have done, and likes the Aussie treats I've included.

Now - on to the other exciting part of this swap.....

My Received Gift from Tara 

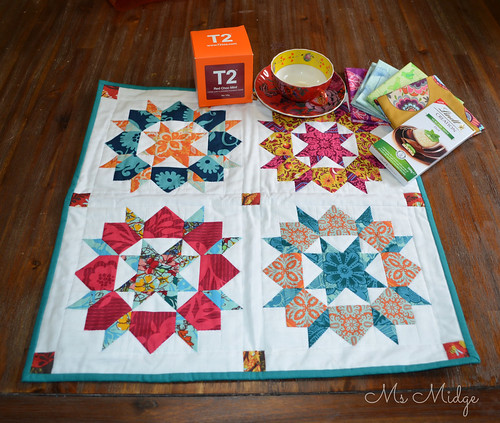
Yesterday, a package of amazing-ness was delivered to my doorstep!!!!  After I finished hyperventilating and Instagramming my excitement, I took a photo for you all!  My fabulous secret partner was Tara in Brisbane.  Now Tara has gone way beyond any of my expectations and packed a box FULL of everything quintessentially ME.  Either I sent my personal information way too in depth to the organisers, or Tara has successfully managed to stalk all of my social media and find out everything I love in life?  I'm guessing the second is more correct.....

My Received Gift from Tara 

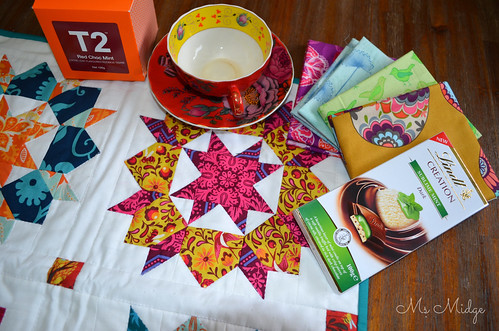
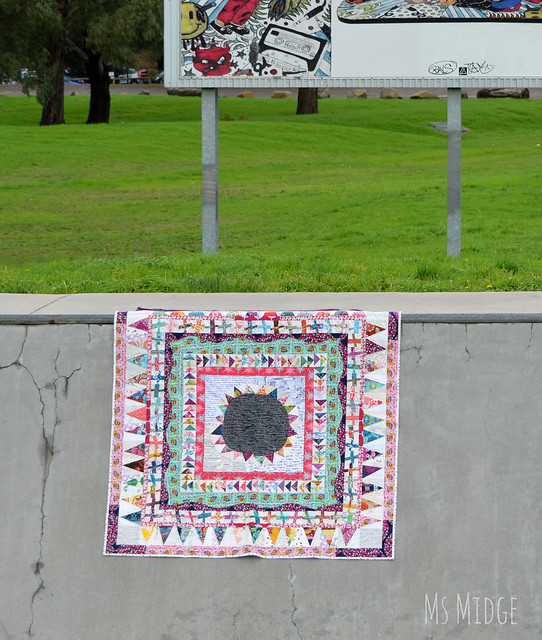
A mini Swoon quilt made with Anna maria Horner prints - I die.  Uh-mazing Valori Wells fat quarters - I die again.  Mint Lindt......Stopped breathing.  AND a freakin tea cup and tea - I'm gone.  Seriously - SOOOO generous and SOOOOO nailed it.

My Received Gift from Tara

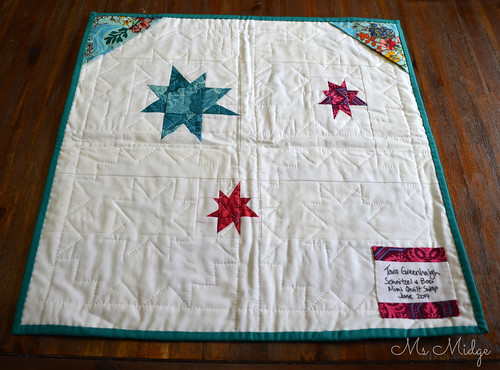
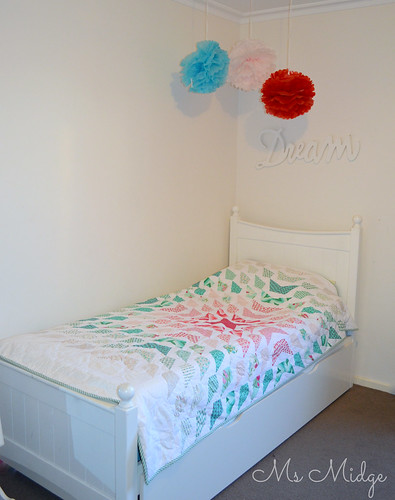
Oh, and can't leave the back out of the limelight!  I need to get to Bunnings for some dowel - as I've found THE perfect little spot on my wall!

I feel so completely overwhelmed with Tara's generosity, and so thankful that once again, the handmade community has shown just how wonderful it is!  So - next time you see a sign up for a swap you might like to join - DO IT!  You may just make a new friend - or 10!


schniztel & boo Mini Quilt Swap, round 1

Tuesday, July 1, 2014

Quilted Placemat Tutorial

Do you have special little people in your life - you know, the ones that you've basically made almost everything under the sun for?  So that when it comes around to their birthday, you're left wondering what on earth to make?  Well, that's where I found myself this week!  My youngest God-daughter lives in Tokyo, and she has a multitude of handmade goodies, including cushions, wall hangings and clothing!  I have a quilt in mind to make for her when she moves in to her big girl's bed, but the postage to Tokyo is a killer, so I'm hoping to get it done for Christmas, and hoping even more to make it over there to hand deliver it - but that's a whole other blog post!

Soooooo........yesterday I decided I would make a personalised placemat for her.  Ummmm, how?  I threw some questions to my homegals/guy over in QCA, and they gave me the encouragement to go forth with my idea.  So I did.  

Quilted Heather Ross Placemat

I was so excited to get out my Heather Ross stash, and knew it would be super special, so thought I would take some photos in case I could make a tutorial from it.  And well, what do you know - here's a tutorial!

WONKY POLAROID QUILTED PLACEMAT

DSC_0363

Find yourself nine fussy cut prints, and cut out 2.5" squares.

DSC_0364

Cut out your side pieces at 1" x 2.5".  You will need 18 of these.  I have used a natural looking linen - sort of gives it an aged polaroid look!  Sew them on with a 1/4" seam allowance and press.

DSC_0366

Next up, cut nine strips for the top at 1" x 3.5".  And nine strips for the bottom at 1.5" x 3.5".  Sew them on and press again.  You will then have your little polaroid rectangles.

DSC_0367

You now need a darker fabric for the framing of the polaroids.  I have used a blue/charcoal linen.  Cut out 18 strips at 2"x1.5" and sew on to the sides and press.

DSC_0369

And 18 strips of 2"x7" for the top and bottom.  Sew on and press.  You will now have nine finished polaroid blocks.

DSC_0370

To make your blocks wonky, place your ruler (a square one is perfect) over the top of the block and then turn to one side as above.  You want your wonky block to finish at 5" square, so when lining the ruler up, make sure you have at least 3/4" away from the polaroid on each of the sides.  Trim.

DSC_0371

Then turn your block around and square it up with your ruler again.  (Take no notice of the fact that I have it lined up at 5.5" above!!!!!!  It should be 5"!).  Trim again.

DSC_0372

Alter the direction you turn your ruler, so your blocks are all kinds of wonky!  Sew these nine blocks together.

DSC_0373

You can then begin to add strips of fabric for personalising.  I chose to add a 2" strip to the left hand side, and then a cream strips 3.5" to the right, followed by another 1.5" strip of dark.

DSC_0374

Make yourself a quilt sandwich and baste ready for quilting.  And yes - I do have a batting jigsaw puzzle down there on the bottom!  Use up scraps of your batting - you don't have to sew it together, just pin it down and the quilting will sort it out.

DSC_0375

When doing large lettering on items, I sometimes use an erasable marker for an outline to follow.  I know lots of clever quilting peeps who like to hand embroider, but you all know me by now yes?  So it's free motion quilted lettering here!

Quilted Heather Ross Placemat

I chose a variegated Aurifil 40wt - Pink Taffy - for the words.  I love how it looks!  All of the little words under the polaroids are completely free handed.  Hence, they are not perfectly centred.  But it looks more like they have been written on.  I also used a 50wt #2000, which is a beautiful cream/gold thread, for the outline of the fussy cut and the wavey lines through the cream linen.

Quilted Heather Ross Placemat

It was suggested to me that placemats need to be quilted quite densely in order for them to sit flat enough.  I chose #2610 Silver/grey and started outlining the blocks, and just kept going and going until I was certain there were enough to give it stability.  I LOVE the end result!

Quilted Heather Ross Placemat

A couple of cute birthday prints on the back making it perfect to flip over for birthday celebrations!  I completed it with a Briar Rose print for the binding.

Quilted Heather Ross Placemat

I'm pretty damn chuffed with the end result!  The finished size is 19.5" x 13.5".  As you can see - a great size for a little one.

I've used a cotton batting, you could add insulbrite if you were wanting to make them a little more heat resistant, however, for a three year old, I thought the odds of her having a burning hot meal were pretty low :)

So there you have it - a quick and easy gift!  This took me a few hours to whip up!

I'm linking up - You can too!


Sew Cute Tuesday

Thursday, June 26, 2014

It's A Wrap - Kate Spain Aussie Charm Swap!

My "little" idea to put together a "little" charm swap here in Australia got off the ground and sort of turned in to something BIG!  Thanks to the generosity of the lovely Michele from Quilts From My Crayon Box, who kindly shared all her charm swap tips and information with me - I was able to run the swap relatively smoothly!  All up, there were 48 of us involved (with 8 lucky people taking 2 spots each).  112 different Kate Spain fabrics were sent from all corners of Australia, and the end result is this:

Kate Spain Aussie Charm Swap Collection

Is that not THE most divine display of colour you have ever seen?  I am very pleased to say we have 11 fabric lines represented.....


Kate Spain Aussie Charm Swap Collection

Central Park; Cuzco; Daydreams; Fandango & Flurry.........

Kate Spain Aussie Charm Swap Collection 

Good Fortune; Honey Honey & Serenade........

Kate Spain Aussie Charm Swap Collection

Sunnyside; Terrain & Verna......

What I love best about this "little" exercise is that each of us have received a VERY limited edition charm park!  Only 56 of them exist in the whole wide world!  And THAT my friends is fabulous!

So, now that we have our pretty little packages - what shall we do with them?  Well, I suggest we GET CREATING!  Our group of charm swappers have been madly pinning ideas on the Charm Square LOVE Pinterest board.  And I'm really looking forward to seeing what everyone comes up with.  In the meantime - I'm putting together a little old quilt along of sorts, and in around six weeks or so, I'd love to see some results!  WATCH THIS SPACE!

Where to now?  What will I do with all of my spare time - now I'm not sorting thousands of 5" squares, I have my sewing space back and my poor postman has no parcels to deliver to me?  Well - I start thinking of the next Aussie Charm Swap of course!?!?  Yes - I'm bonkers.  Give me a few weeks, and I'll be back with another one!

Until then - Ciao for now!
xxx

Saturday, June 21, 2014

Coloured Happy - Wavelength Finish

You know when you see a quilt somewhere on social media and you think "I have to make that"?  Well, that happened when I first saw Lee's Wavelength quilt - her latest Freshly Pieced pattern.  I bought it on the spot and then pondered how I would make it mine?  The answer came a few days later when a new parcel of acquired fabrics arrived on my doorstep!  A divine little fat 1/8th's bundle of V and Co's Color Me Happy would do the trick....... And it did!

Wavelength Quilt 

I started with the brightest print in the range - the hottish pink - and went from there.  Stuck with my love for radiating colour, moving outwards from pink to green, and then after much arguing with myself - chose to use the low volume prints in the range and then some white on white prints for the last couple of rows.  I was pretty damn happy with the outcome!
Lee's pattern is for a throw/lap size quilt, but I wanted to make it larger, so actually did some maths and added a few more rows here and there. So it now sits at a full single size!

Wavelength Quilt

The backing is made up of three shades of pink and one shade of green, along with a big strip of white down the side.  I love this too.  Well, I love everything about this quilt!

Wavelength Quilt 

The pattern gives you the option to either paper piece or template piece.  Strangely enough, I chose to use templates!  I didn't fancy printing off a million paper piecing patterns!  The templates were very easy to use - I actually printed mine out and then pasted it on to two layers of cereal box cardboard, then cut around the templates when the paste had dried.  Perfect!

Wavelength Quilt 

When it came to quilting, I had a complete anxiety attack!  It was soooo big, and there were soooo many seams and intersections, that just the thought of wrangling it through my Bernina gave me a conniption!  Instead, I sent it off to one of my long time friends, who just happens to have her own longarm business.  Debbie has just started a blog - Quilts from Nana's Trunk - but has been quilting ever since I met her.  And that was wayyyyy back in circa 1991 just after moving to Melbourne!   Debbie uses pantographs for her quilting designs, so after a quick lesson on how on earth a pantograph works, I chose this gorgeous design.  It's sort of a cross between a clam shell and a cloud?!!  I wanted a design with curves in it, to sort of play off the sharpness of the hundreds of pointed blocks in the quilt top.  And I'm VERY pleased with how it has turned out!

Wavelength Quilt

And this, my friends, is how beautiful it looks on a bed!

What I like most about this quilt is that you can take a pattern, which looks SO amazing, and change it ONLY by the fabrics used, and it can look SO different!

IN THE DETAILS:

SIZE - 81" x 55"
PATTERN - Wavelength by Freshly Pieced
FABRIC - Color Me Happy & Homespun white and solids.  Binding - April Showers
THREAD - Pieced by Me using 50wt Aurifil #2024
Quilted by Debbie using 40wt Aurifil

I'm linking up - Because I can!  You can too!


stitch by stitch


Sew Cute Tuesday

Monday, June 16, 2014

Catching Up - Block by Block

With all the quilt finishing I have achieved, I have been lacking a little on the bee block side of life!  I did however catch up the week before last.....


QCA Bee #5 - For Rachael.  Her request was for more "sombre" fabrics, but with sparkle?!  I was a little flustered, because A. I don't subscribe to sombre and B. Sparkle with sombre???  Anywho, as usual, my quilty friends came to the rescue and reminded me there were some Botanics prints with sparkle.  And I think the dark green in the range is as sombre as I can get!  I actually quite like the final result.


Another Mondrian block for Kathryn.  She requested the same block last year, so I'm thinking she has one big quilt on her horizon!


And this delightful little circle of geese is for the equally as delightful Gina!  G gave us links to her Colour Inspiration Pinterest board and another with arrows!  I LOVED her colour scheme, and had a wonderful time pulling fabrics.  I'm a little bummed that the third Coral print looks more like the pale pink, but am happy overall with the block.


And last but not least, June's Aurifil Designer of the Month block. I'm loving putting all my Terrain fabrics together for this BOM, and am on the countdown now that I have half the blocks done!  I would show you a photo of all six blocks together, but then I'd have to kill you the photos I took are shocking and now it's too dark to take more!  So you'll all have to hold your breath until July!

That's it for tonight - I'm linking up - You can too!

stitch by stitch

Friday, June 13, 2014

Modern Medallion Finish!

It is my day to wrap up this week on the Modern Medallion Quilt Along.  I got it stuck in my head a week or so ago that I would get it finished to show you all - and I meant, you know, a quilt top.  BUT - my "focus" (as my Wombat Stew friends so graciously call it) kicked in yesterday, and I put in a marathon effort.  I had it basted by lunchtime, and then put my foot down at 12.30pm.  Quilted by 5.15pm (bloody basketball training) and then did the binding at 10pm!  

I am SOOOOO absolutely thrilled with the end result, and am so glad that I took this project on.  I was really questioning my sanity on the first day - and many days through the process - but it has taught me a lot about my quilty self.  Firstly - I am not really an "improv" kinda gal.  I'm also not a "wonky" chick.  BUT - I am adaptable!

Without further ado, here my lovely friends, is my Modern Medallion Quilt - Anna Maria Horner style...

Modern Medallion

Isn't she beautiful?  ALL of the prints are Anna Maria Horner.  I think there are six fabric collections in total used.  And a good majority of the low volume prints are from Carolyn Friedlander's Architextures and Botanics ranges.  The finished size is 66" or 167cm square.  Backing fabric from Ikea & Field Study by AMH.  All pieced and quilted using Aurifil threads.

Modern Medallion 

As per usual, I had no idea how I was going to quilt it, until the time came to quilt it.  I quite literally basted it all over the show, with no purpose other than to keep it together.  Then I rolled it up and sat at my machine.  And started with the centre medallion.  I used a beautiful variegated grey Aurifil 40wt thread, which you obviously can't see here, but will see later down the photo call.  One giant feather (well my feathers still look a bit like palm prongs!) and lots of little pebbles with swirls.  I will tell you now, it is FAR from perfect, but given the size of this giant, I tried my hardest to go slowly and to persevere.  I was NOT giving up on my FMQ dreams for this little lady.

On the outer points of the NYB triangles, I changed to my favourite #2024 white thread and free motioned straight-ish lines.  I've never FMQ'd straight-ish lines, but thought given the improv-ness (is that even a word!?!?) of the quilt, it would fit in well.  And it does!

Modern Medallion

Each border has a different quilting finish.  The red border has straight lines, wonky geese have a giant zip-zag.  My curved borders are divine.  The green has a yummy bright green Aurifil, echoing the curves.  And the blue has a hot pink doing the same.  It's much more fabulous from the back!  The wonky crosses got some cross-hatched action and the triangles, some more FMQ straight-ish lines.  And last but not least, the outside border is done using a variegated pink Aurifil, with some swirls.

Modern Medallion 

A little close up of the quilting on the back.  As I said - far from perfect, but imperfectly perfect in my eyes.

Modern Medallion

Just hanging around.....  I loved photographing this!  I stopped at the local skate park - lunchtime Friday - and there was a lone teenager sullenly watching me climbing up and down skate bowls and ramps in a dress, tights and boots!  I just kept wondering why he wasn't at school.....  Anyway - the binding......  I had another AMH print pencilled in for the binding, but when I asked my husband last night what he thought, he said it was too busy and his eyes couldn't focus!?  And suggested black & white.  I sulked, because I had no yardage of black and white.  Or did I?  I remembered I had some Waterfront Park domino dots, and quickly chopped it up and put it to work.  I LOVE it!

Modern Medallion

I love that the back fits in with the low volume scheme of things.  But am petrified at how grubby it will get whilst being used and loved!

Modern Medallion

And the glorious backside.  I had grand GRAND plans of using an amazing OOP AMH fabric.  But when I laid it all out - I didn't have enough!!!  Cue more sulking.  Then cue plan B....which entailed a quick trip to Ikea, solely for the purpose of this numbers print.  And in breaking news - I walked out of there ONLY with the fabric!  Unheard of.  Back to the backing......  I love the blue pinwheels down the side.  Love.  Have I said Love enough?

Modern Medallion

Le sigh.  I'd like to take this opportunity to thank Crystal for making her quilt and putting the call out for bloggers to join in the hop.  This quilt tested ALL of my quilting skills and patience - but I'm glad I persevered!  And I'd also like to thank Angie from Gnome Angel for making me laugh throughout!  And last but not least - I'd like to thank my husband!  Who, for the first time in my quilting history, had more to say about this quilt than any other.  And he used actual adjectives - lots of them!  This quilt is now His.  Well - Ours.

Now it's your turn to link up your progress! There's a linky down the bottom there for you to join up.  Make sure you drop in and leave a comment on everyone's blogs!  Encouragement is a quilter's best friend!


Thursday, June 12, 2014

Wordless WIP Wednesday.....On A Thursday

Almost..... This was cut out and placed on my design floor Saturday night.  And pieced together Sunday afternoon.  Can't. Wait. To. Quilt. It.

Koi Crossing 

Koi Crossing 

Koi Crossing


I'm linking up with Freshly Pieced - You can too!


Related Posts Plugin for WordPress, Blogger...