Showing posts with label Bee. Show all posts

Saturday, November 8, 2014

London Calling!

It's finished!  

I feel like this quilt has taken me FOREVER, but in reality, it's just been a process of patience and lots of love.  It all started in April, when it was my turn to be Queen in our paper piecing Wombat Stew bee.  I knew I had lots of quilts to make for 40th birthdays in the coming 12 months, so tried to think of one in particular that could use some paper piecing blocks.  It didn't take me long to propose London themed blocks, and the lovely Kristy designed some amazing patterns for us to use, as well as Alyce designing her own Big Ben block!
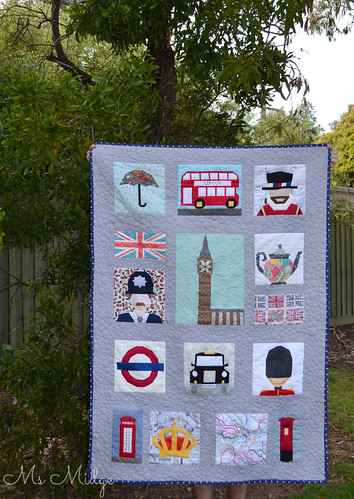
London Calling Quilt 

The finished blocks started arriving and I was gobsmacked at how fabulous they were!  I received seven in total, so then just had to make up the rest myself.  I ended up with 13 paper pieced blocks, and added two fabric blocks to make up the numbers.  The lovely Deborah Gun on Instagram sent me a fat quarter of London subway fabric - it's amazing!  Putting the quilt top together was painstaking......literally, my brain was in pain with all the maths required.  Nine of the blocks were the same size, the others were all over the show!

So I just sat on my loungeroom floor with a calculator, pen and paper, and worked out how big each row of sashing needed to be between every single block, in order to end  up with a balanced quilt top.  I'm incredibly proud of myself for making it work!
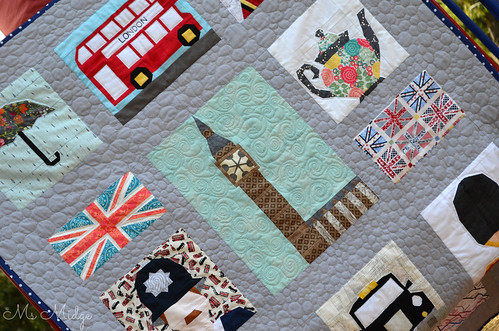
London Calling Quilt 

When it came time to quilt, I really had no idea where to begin.  I threw it open on Instagram for suggestions, and I believe it was Melanie Sim who mentioned cobblestones.......  When I sat down at my first ever Melbourne MQG day, I thought I'd give it a go.  If you ask the ladies I was sitting with how much I enjoyed the pebbling process, I think you would hear a few expletives.  I think in total, the pebbling over the entire quilt top took me about seven hours.  I tried really hard to make the majority of them largish, so as to cut down the time - but really, who was I kidding?!?!?  I am very glad I stuck with it though, because I love the texture and character it has given the quilt.  I used a gorgeous variegated Aurifil thread #4060 - which is creamy/mossy/grey tones.
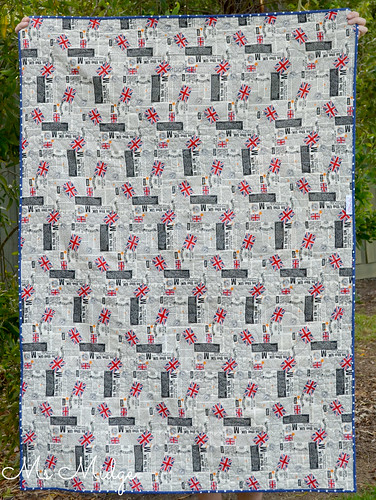
London Calling Quilt 

The backing I actually picked up at the beginning of the year!  I was at a Spotlight sale and this Union Jack/British newspaper print was reduced to $3 a metre!  I bought a few metres and stashed it away for the quilt I knew I'd make.  I did THE BEST print joining on the seam - you can't even notice it's two pieces of fabric!

Now - let me just take you through each block, because they're all so special!

London Calling Quilt 

I knew I had rain drop fabric stashed away for good reason.... Kristy upsized her umbrella pattern for me!

London Calling Quilt 

Marieka made this super cute Bus!  I free motion quilted the LONDON on!
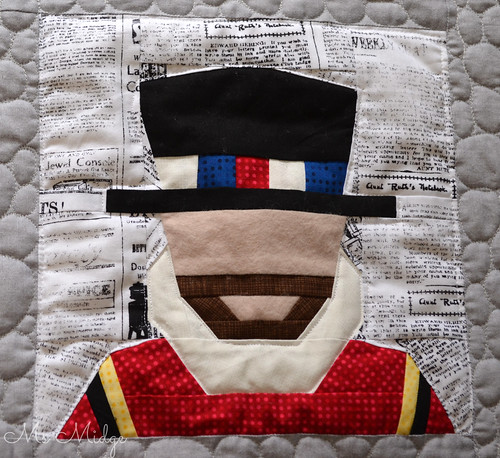
London Calling Quilt 

I pulled out my stash of these dots for the Beef Eater, and was able to use the same prints throughout the quilt.  I also use felt for faces in paper piecing - it adds a great texture!
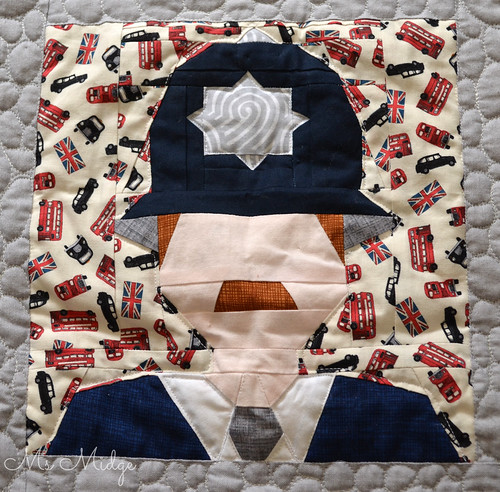
London Calling Quilt 

Gina sent me my London Bobby!  Isn't he fabulous!?
London Calling Quilt

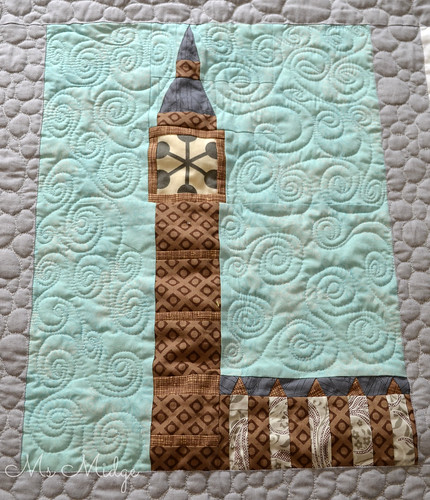
Alyce's fabulous Big Ben block!  The fussy cutting of the Comma fabric is spot on.
London Calling Quilt 

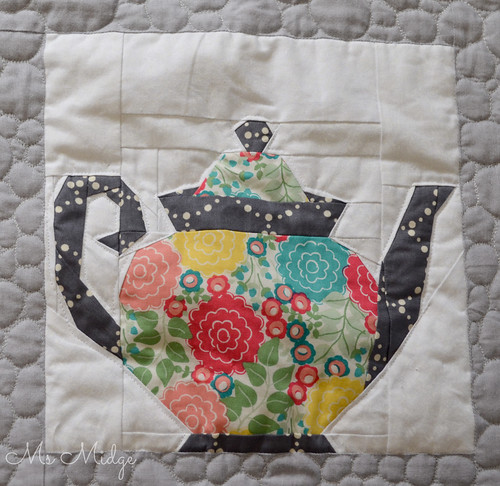
I also added the teapot. Another Quiet Play pattern.  It's actually one of my favourites blocks in the quilt.
London Calling Quilt 

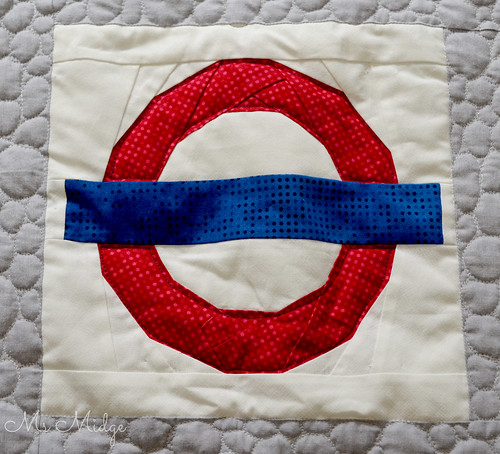
A very simple but great Underground sign.
London Calling Quilt 

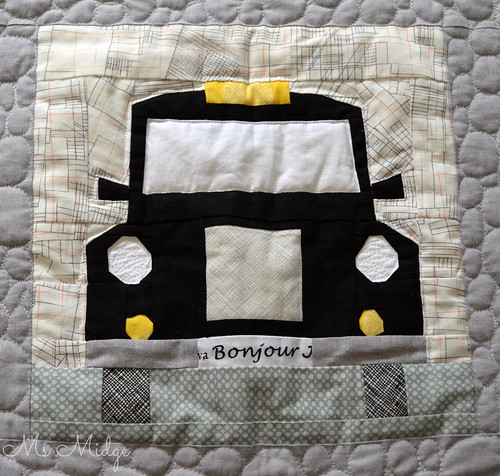
And my London Cab.  I wish I had "London" on fabric to use for the bumper bar, but thought French would work!
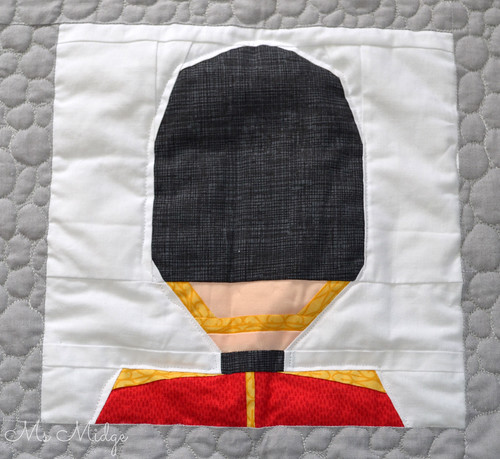
London Calling Quilt 

Kristy made the Guard block, and her fabric choices just make it pop!
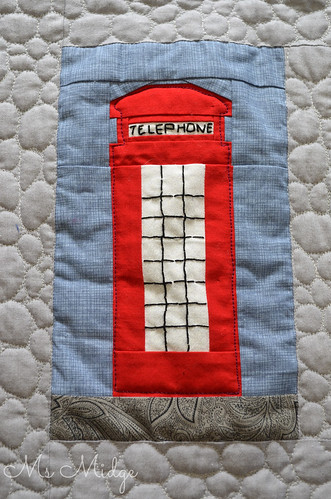
London Calling Quilt 

Jane made the telephone booth and embroidered all the details.  Love it!
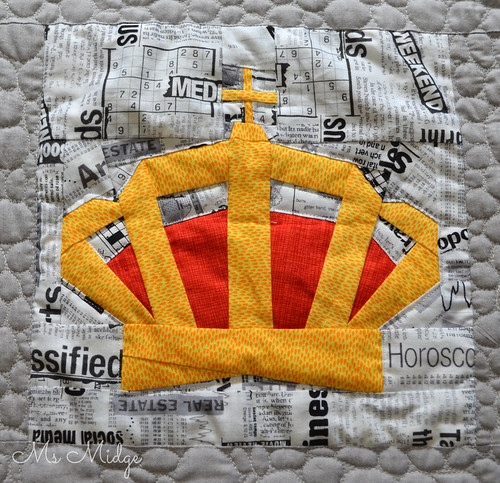
London Calling Quilt 

And Lara's crown block is awesome!

London Calling Quilt 

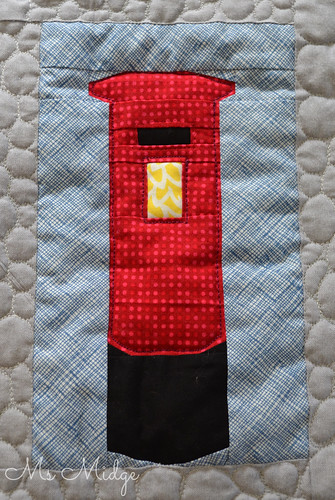
When I was one block short, Kristy just "whipped" up this post box block for me - she's amazing!
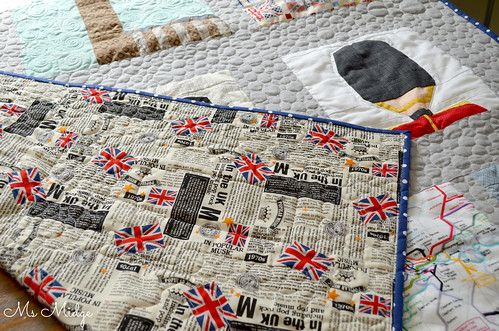
London Calling Quilt

So - there you have it!  I finished it all off with a lovely navy and white spot for the binding, which I think works beautifully.  I am reallllllly looking forward to handing this over to one of my best friends tonight, she's receiving this as it is being published!

The Stats:

Size:  61" x 44" - Lap Size
Fabrics:  A cast of millions!
Thread: Aurifil #4060 40wt
Batting: Wool/cotton blend - it's fabulous!
Recipient:  Karen - who just happened to live in London up until 18 months ago, when she returned to Melbourne!

I'm linking up - This was ready to post yesterday, but I didn't want the recipient to see!

Friday, August 22, 2014

T.G.I.F.F. - This And That

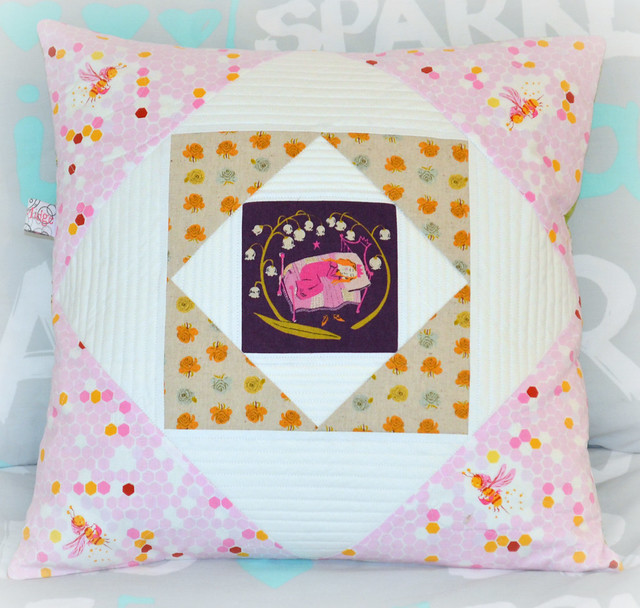
I have achieved quite a lot this week.  I finished off my quilt top for the Sew Kind Of Wonderful Blog Hop (you will have to be patient and wait until my stop on the hop next Friday), got all my bee blocks for QCA Bee #5 up to date, and am now a month ahead AND today whipped up this gorgeous cushion cover for an upcoming showcase at Tilda & Birdie on FB.

Sleeping Beauty Cushion

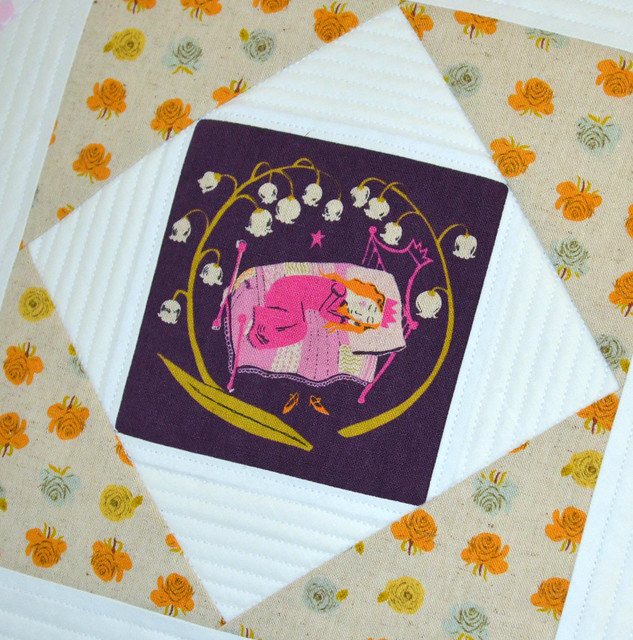
When I saw there was a Heather Ross Showcase coming up, I had to put my hand up.  I've been collecting HR for a little while now, and like a good showcase to make me think outside the box.  Well, clearly not too far out of the box - given it's another cushion cover - but colour palette wise, this is different for me!  I cut a gorgeous little charm of Sleeping Beauty from my original Far Far Away linen blend and then worked my way outwards.  I used my 9" Economy Block tutorial for the centre, and then added a couple more borders to bring it up to size.

Sleeping Beauty Cushion

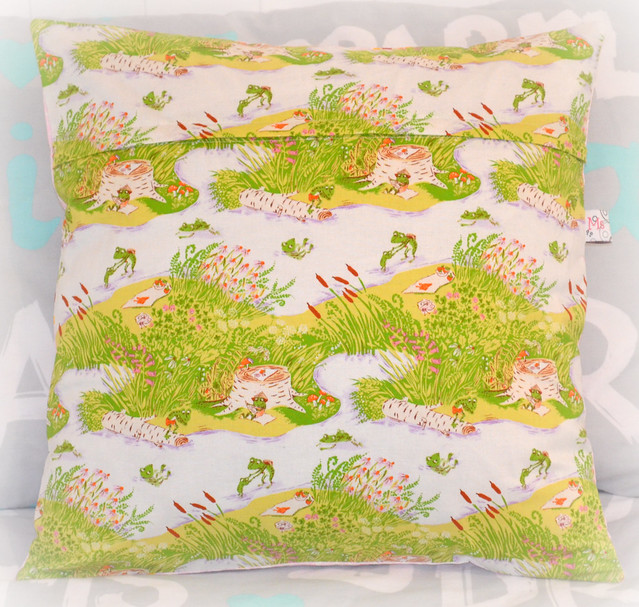
I love the back of the cushion.  This Briar Rose print is one of the cutest ever!  And I even managed to match the print so well it doesn't look like it has been cut!  There IS a zipper in there :)
Sleeping Beauty Cushion

I kept the quilting simple.  Nice little straight lines of Aurifil #2024 on the white sections - giving it a gorgeous texture.  The pink print has a little buzzy bee meandering pattern.

And just because it's TGIFF, here are those bee blocks, care of my IG feed.....

Playing catch up on bee blocks today! First cab off the rack.... #qcabee5

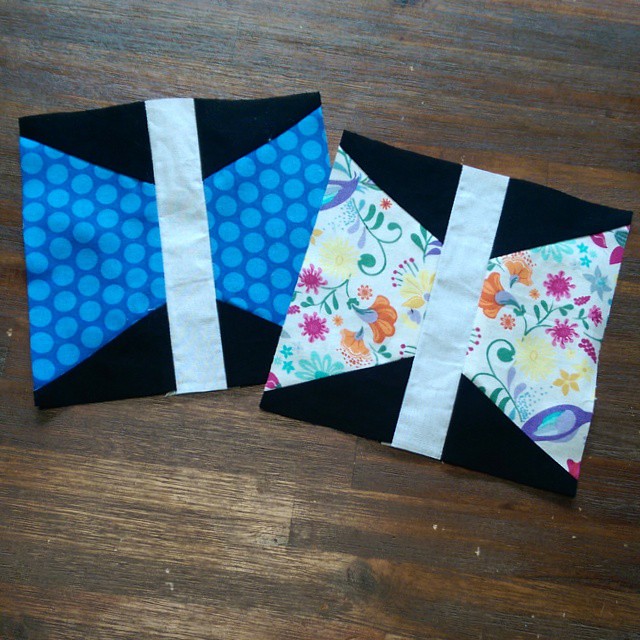
Simple little butterfly blocks.

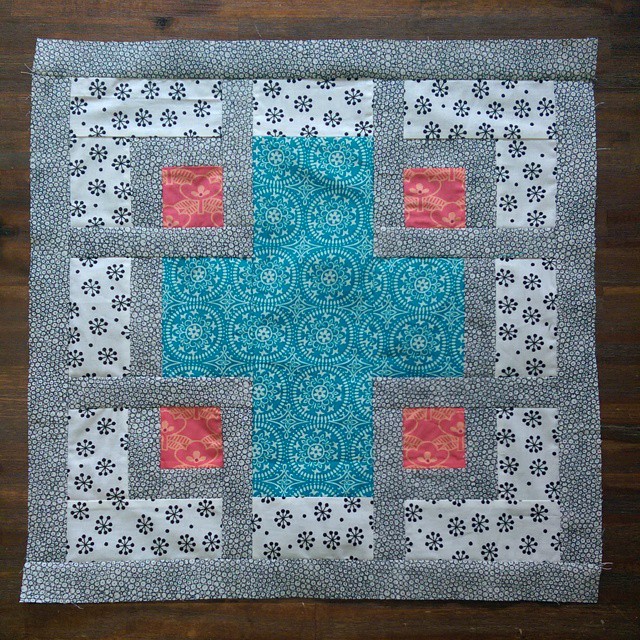
One epic 18" blocks for @bendigolioness had to use my brain for this one! #qcabee5

This not-so-simple maze block!  It did my head in for a little bit, but I do love the end result - even if it is rather "busy".  You can find the tutorial for it HERE.

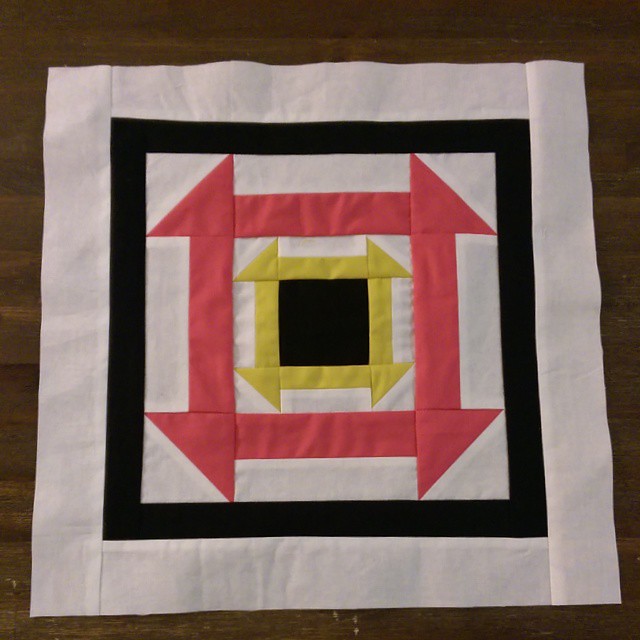
Final block for today just finished!! A sort of kind of #nestedchurndash for #qcabee5

And a very late night pic of the solids block for Carlie.  I'm not a solids kind of girl, and the only two solids I have in my stash that I really actually like were the pink and gold Art Gallery fabrics.  Carlie requested a sampler block.  So I browsed Pinterest and came up with nothing I really loved.  Instead, I started out with Quilt Jane's Nested Churndash, making it up to the 8.5" size, and then added a couple of borders to bring it up to 12.5".  A friend called it a "framed churndash".  Sounds good to me!

Anyway, that's it for this week.  Another busy week ahead.  I hope you all have a lovely weekend!

I'm linking up - You can too!


Monday, June 16, 2014

Catching Up - Block by Block

With all the quilt finishing I have achieved, I have been lacking a little on the bee block side of life!  I did however catch up the week before last.....


QCA Bee #5 - For Rachael.  Her request was for more "sombre" fabrics, but with sparkle?!  I was a little flustered, because A. I don't subscribe to sombre and B. Sparkle with sombre???  Anywho, as usual, my quilty friends came to the rescue and reminded me there were some Botanics prints with sparkle.  And I think the dark green in the range is as sombre as I can get!  I actually quite like the final result.


Another Mondrian block for Kathryn.  She requested the same block last year, so I'm thinking she has one big quilt on her horizon!


And this delightful little circle of geese is for the equally as delightful Gina!  G gave us links to her Colour Inspiration Pinterest board and another with arrows!  I LOVED her colour scheme, and had a wonderful time pulling fabrics.  I'm a little bummed that the third Coral print looks more like the pale pink, but am happy overall with the block.


And last but not least, June's Aurifil Designer of the Month block. I'm loving putting all my Terrain fabrics together for this BOM, and am on the countdown now that I have half the blocks done!  I would show you a photo of all six blocks together, but then I'd have to kill you the photos I took are shocking and now it's too dark to take more!  So you'll all have to hold your breath until July!

That's it for tonight - I'm linking up - You can too!

stitch by stitch

Saturday, May 31, 2014

Radiating Sparklers - A Tutorial

Many months ago, I promised you all a tutorial for a little block I like to call "Radiating Sparkler".  Well, today is the day!

I first came across this block whilst doing the Fat Quarter Shop Designer Mystery Block of The Month.  And instantly fell in love with it!

May as we'll keep going! @fatquartershop #mysterybom block by @katespain


When it came to thinking about which block I would like my QCA Bee #5 to make for me back in March, I kept coming back to this block.  After an extensive search on the interwebs, with no results, I ended up emailing Kate Spain, who is the fabulous designer of this block, and asked her permission to share her tutorial with my Bee.  Kate very graciously replied and gave me the thumbs up!

I finished my experiment @katespain

I got cracking and made up my "radiating colour" version of the block to see if it would actually work!  And it did!  So here is my twist on Kate Spain's "Sparklers" block design.  I hope you like it!

Let's go!

DSC_0092 

The first task is finding five fabrics in the same colour, but different shades.  You want a good progression from light to dark/bright.  You don't need much fabric for each block, a fat eighth is plenty big.  You also need a background fabric, for my blocks, I am using white.

LETTERS

Then it's time to cut:

Screen Shot 2014-02-12 at 4.33.41 PM

Now let's get sewing!  Use a scant 1/4" seam.

DSC_0096

Draw a diagonal line on the wrong side of the fabric L squares and Fabric F squares.  

DSC_0097

With right sides facing, layer a fabric L square on the left end of a fabric I rectangle.

DSC_0098

Stitch on the drawn line and trim 1/3" away from the seam.  (This is how you will trim the other blocks that ask for same instructions).

DSC_0099

Press to one side.  Then take your fabric F square and place on the other end of the rectangle, sewing along the marked line.

DSC_0100

Trim and press.  This gives you your first two blocks.  They should measure 2 1/2" x 4 1/2".  Put to one side.

DSC_0101

Draw a diagonal line on your H fabric squares and right sides facing, lay on to a Fabric K square and Fabric D square.

DSC_0102

Stitch 1/4" on either side of the marked line to make four HST's.

DSC_0103

Cut down the middle on the marked line and press.  These blocks should measure 2 1/2" x 2 1/2".

DSC_0104

Assemble your F/I/L block and your D/H block as shown on the left.  Then take your K/H blocks and attach to your M square as shown on the right.

DSC_0105

Assemble those three blocks together as shown above.  Put to one side.

DSC_0106

Draw a diagonal line on the wrong sides of the fabric C squares.

DSC_0107

Place them on top of the right sides of your fabric E rectangles, with the line facing as shown above.  Stitch on the drawn line.

DSC_0108

Draw a diagonal line on your fabric G squares, then place on top of your fabric A rectangles as shown above.  Stitch on the drawn line.

DSC_0109

Trim and press as show above.  These should measure 2 1/2" x 3 1/2".

DSC_0110

Trim and press as above.  These should measure 3 1/2" x 4 1/2".

DSC_0111

Draw a diagonal line on your fabric J squares.  Place on top of your G/A blocks as shown above and stitch on the line.

DSC_0112

Trim and press as shown above.

DSC_0113

Assemble the last two blocks together as shown above.  These should measure 3 1/2" x 6 1/2".

DSC_0114

Take all of your finished blocks and assemble them as shown above, adding in your fabric B squares.  I sew my the top three, middle three and bottom three together, and then sew the three rows together.

DSC_0115

And you're finished!  The finished block should measure 12 1/2" square!

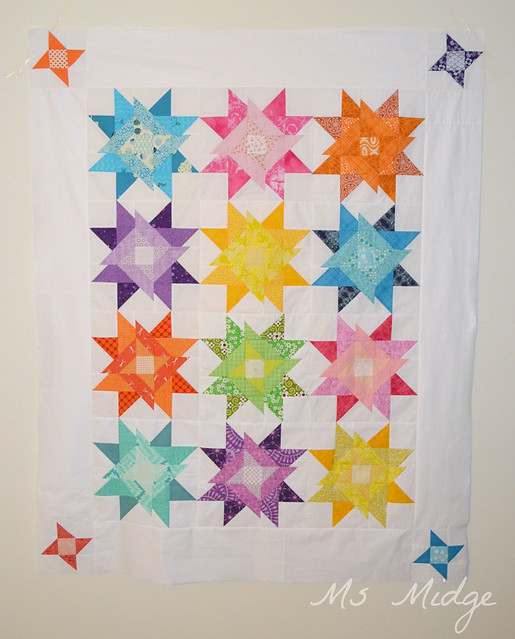
Radiating Sparkler Quilt Top

And when you receive all your bee blocks, and throw in a few mini sparklers - you get this!  I will have a little old tutorial for the mini sparklers in a couple of days for you!

So - what do you think?  Will you be making some radiating sparklers for yourself??  If you do, then be sure to show me!  Use the hashtag #radiatingsparkler on IG and FB!

Have a wonderful weekend! xx

I'm linking up - You can too!
stitch by stitch
Related Posts Plugin for WordPress, Blogger...