Showing posts with label Needle & Thread Thursday. Show all posts

Thursday, June 5, 2014

I Quilt - Party Over Here!

Truth be told - I'm feeling like a bit of a blog-hosting-hussy of late!  But a blog friend has to do what a blog friend has to do......  And tonight, Ms Gemma from Pretty Bobbins is feeling rather poorly, so the I Quilt party is being held here!  Go throw your quilts in the air and shake em like you just don't care!  Ok, maybe not.....

I Quilt @ Pretty Bobbins

Lucky for you I managed to stop off at the local park this afternoon, dodged the rain and froze my butt off - but got some lurvely photos of my latest finish.


Vintage Modern Pinwheel Quilt

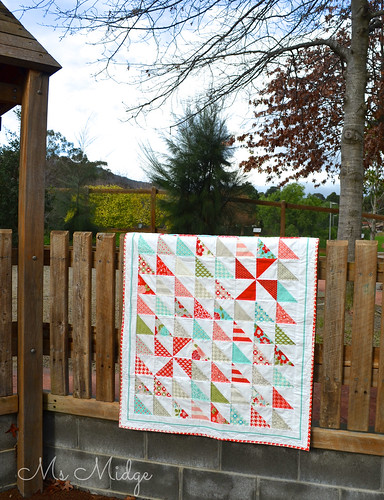
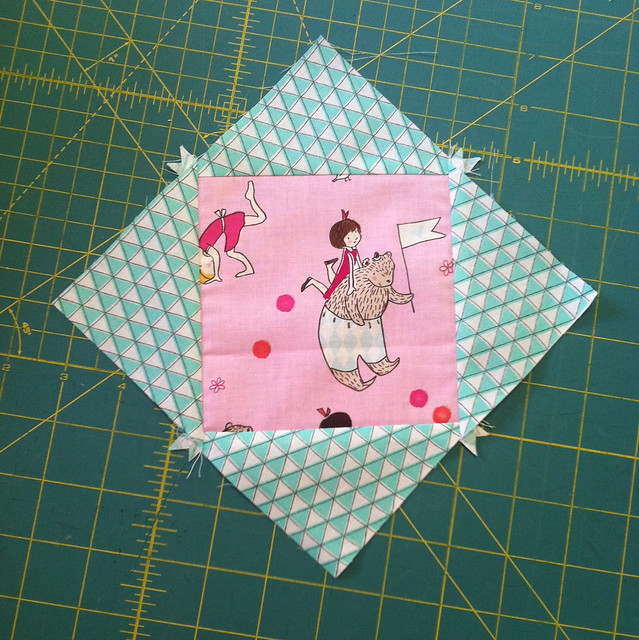
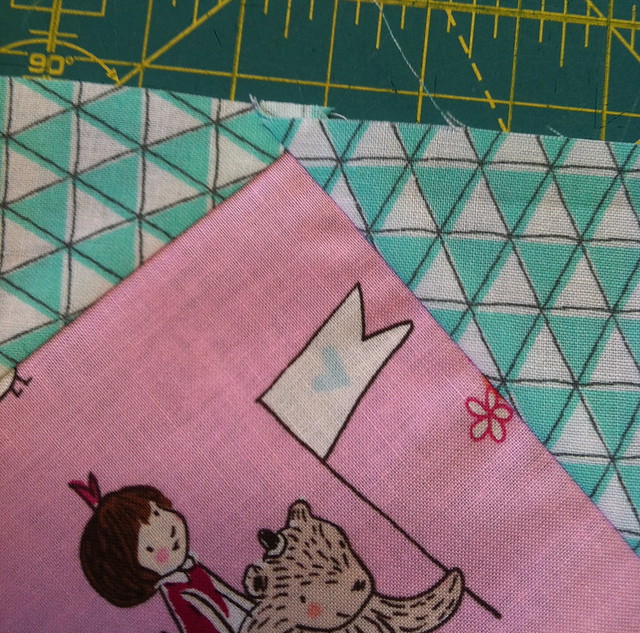
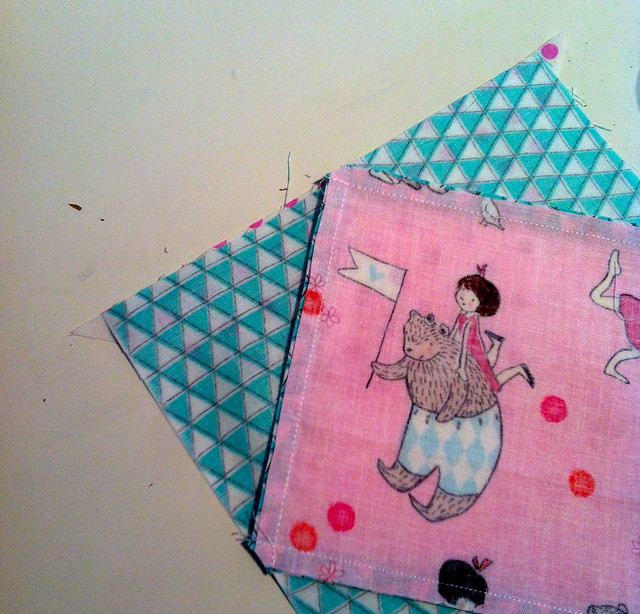
I found a Vintage Modern charm pack amongst my stash a few weeks ago, and thought it would be perfect for the upcoming "I See Red" Showcase over at Harley Barley on FB.

Vintage Modern Pinwheel Quilt

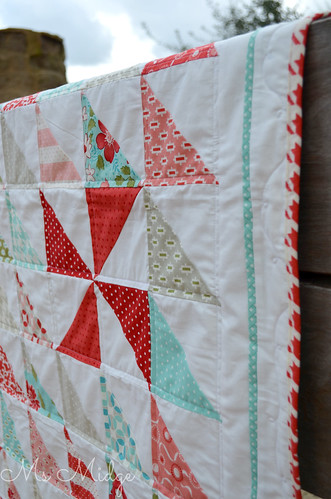
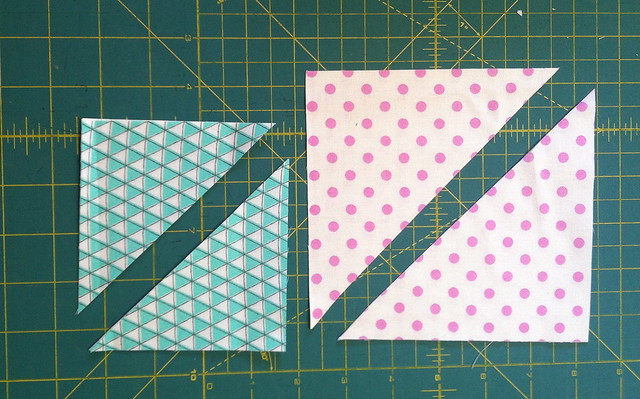
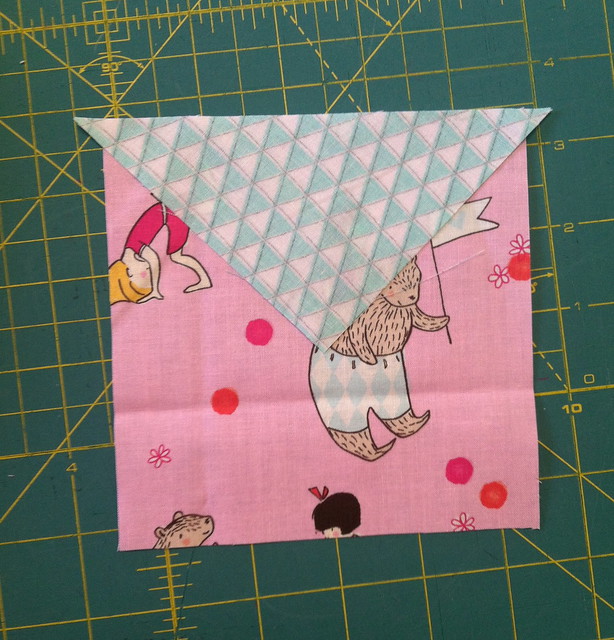
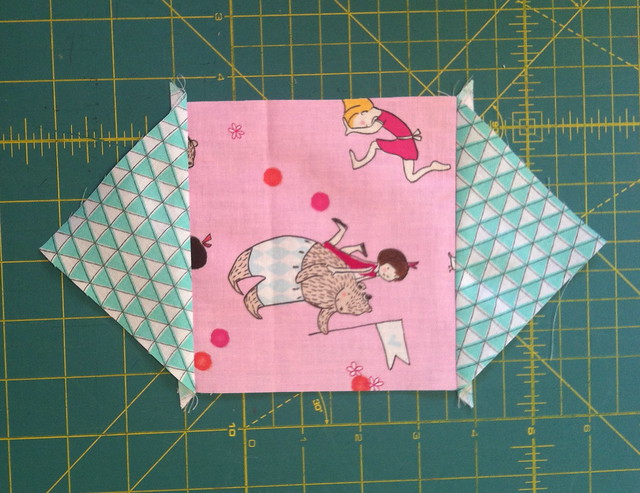
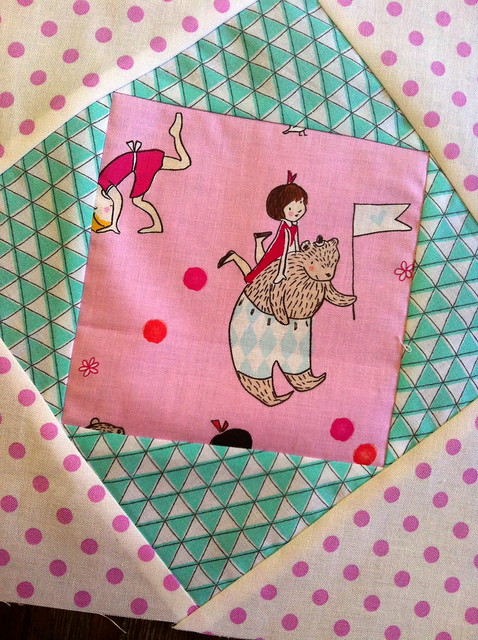
It is a VERY simple design - all HST's laid out in a simple row, with a couple of red pinwheels thrown in the mix for added interest!  The little peep border is a first for me, and I just love what it brings to the quilt.


Vintage Modern Pinwheel Quilt

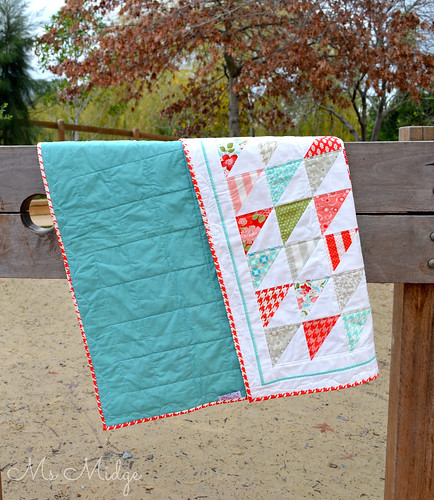
I've backed it in a green homespun I had here on my shelf - and I promise it's not all puckered and bunched up!  It had been folded for a week or two, and I didn't think to iron it before heading out!

Vintage Modern Pinwheel Quilt

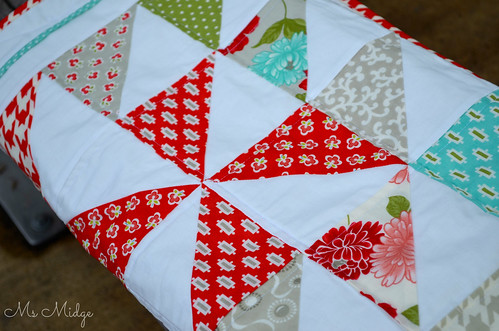
I really love that a simple 42 piece charm pack can be turned in to something so beautiful.  My Aussie Charm Swap mates and I are pinning ourselves silly at the moment on my Charm Square LOVE Pinterest board.  Pop by and have a look!

Vintage Modern Pinwheel Quilt

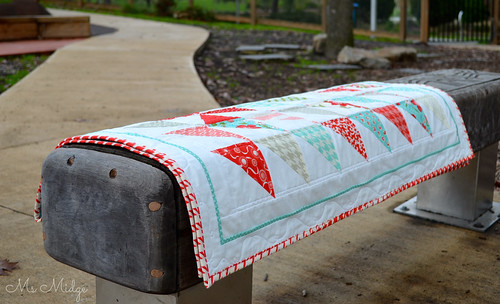
This quilt has a finished size of 40" x 46" - perfect for a cot/toddlers quilt or a child's lap quilt.  It will be available to purchase on the 18th of June!

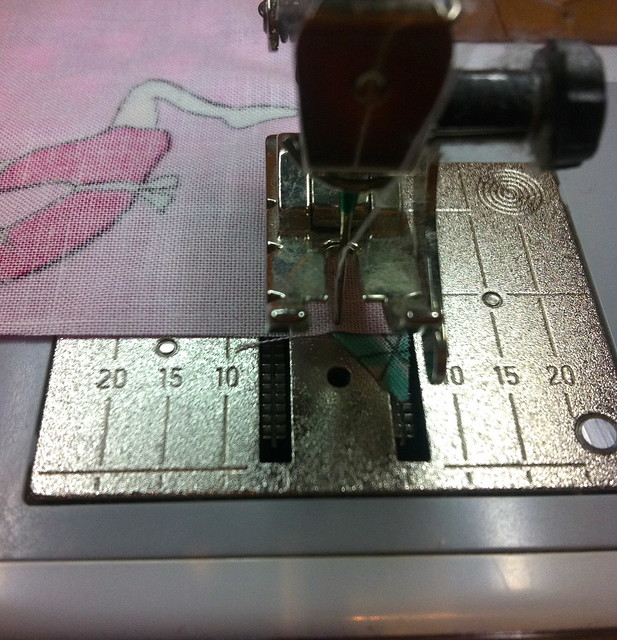
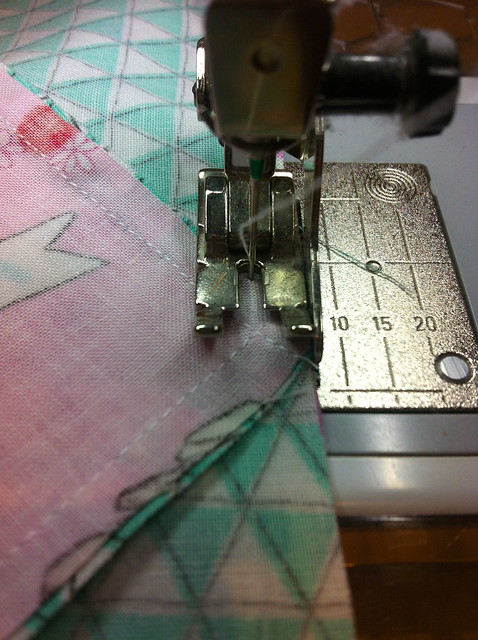
Now - I mentioned last week that I had lost my FMQ-jo.  This little project was the one that lead me to that conclusion.  I was so sad.  I wanted to free motion to heck out of it, but just couldn't get myself together, and instead went with some straight lines through the blocks.  I did manage to do a little swirly pattern around the outer border, which I think is darling and suits this pretty little quilt.  And I used my favourite Aurifil #2024 50wt thread to both piece and quilt.

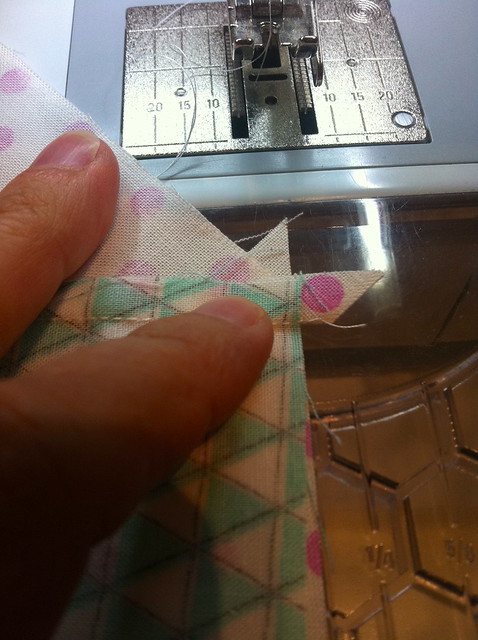
Since then, I have purchased myself an extension table for my Bernina.  I've set it up and have had it in place whilst piecing a few blocks this past week, but am finding it strange to get used to.  I'm hoping with time, it will become part of my regular setup and will make quilting SOOOO much easier!?  Time will definitely tell - as I have two quilts tops ready to baste and quilt!

So tell me - how do you get your sew-jo or FMQ-jo back when it's gone on hiatus??  And have you changed your quilting set up in order to help?  Did it take a while to get used to?

SPILL!

Please link your quilty process below and visit three other linkers - it's always nice to share the love!

P.S.  Anyone notice anything different around here?? ;)


Thursday, March 27, 2014

Boho Cat Bag - Yes, I said Boho Cat Bag!

No other name really fits.....

Boho Cat Bag

I have had this divine Jolie Pomme fabric sitting on my shelf for over a year.  It came straight from Tokyo in The Great Fabric Haul of 2013.  And today, it was plucked off said shelf for project "make a gift for my 16 year old God-daughter".  I used THIS tutorial by Thimble - it was very straight forward and dare I say - simple!

Boho Cat Bag

The quirky detail in the fabric is just amazing.  Dancing cats and bunnies wearing scarves - Love!

Boho Cat Bag

I popped in to Spotlight this morning and grabbed some of their $1 Fat Quarters - this bag used almost two FQ's of the green chevron for the handles and top part and about 2/3 yard of outer fabric and lining fabric.  The lining is a gorgeous stripe that was also at Spotlight in the $4 clearance quilting fabric pile!  I think it may even be a little on the "organic" side.  Winning.

Boho Cat Bag

I added a little zipper pocket on the inside using my tutorial HERE, instead of the pocket included in the Thimble tutorial.  The thread is a divine Aurifil Green #5017  I picked up last time I was there.  It was one of those "jump out and grab you" kind of colours, that I really had no plans for - but it was PERFECT for today!  Here's hoping the teenager loves this bag as much as I do!

I'm linking up - You can too!


Thursday, February 27, 2014

9" Economy Block Tutorial

This week has me economising, and as I showed you YESTERDAY, I'm making 9" blocks, opposed to the 5" paper pieced version by Red Pepper Quilts.  As promised, I have a tutorial for you!  And as usual, I have lots of photos to hopefully make it easy to follow.

Now I didn't make these measurements up!  My tutorial is an adaptation of one I followed a couple of years ago by The Oz Material Girls - so thank you Louise!  They have a charity FB page called "Do Your Block", gathering blocks from quilters and making them in to quilts to donate to people in need.

On to the tutorial.........  These measurements make a 9.5" finished block - 9" when sewn together.

IMG_2169

First things first, you need to choose your fabrics.  You don't necessarily have to have "fussy cut" prints like I have chosen, you can get out your favourite prints and use them as centrepieces to highlight them.  You will need a 5" centre square (fussy cut in this instance).  2 x 4" squares for inside triangles (green) and 2 x 5 3/8"(pink spot) squares for outer triangles.

IMG_2170

Take your outer squares and cut diagonally to make the triangles.

IMG_2171

Lay your pieces out together to be sure you like the combination.  This is especially important when you cut out a million squares/triangles at once ready to chain piece 12-24 blocks in a day!  I ended up with some very interesting colour/pattern combinations that I would never normally have paired up together - but I must say, it has worked beautifully!

IMG_2172

Take your 5" square and place one of the smaller triangles over one edge, centred.  I have shown you above as an example, but as you will see throughout this tutorial, I sew all of the pieces with the triangle pieces on the bottom.

IMG_2174

You will have two little "dogs ears" poking out on either side of your squares, when you start to sew them, you want them to almost line up with your 1/4" point - ie. my needle.

IMG_2175

Sew right along the side, making sure you still have your little dogs ear sticking out at the other end.  As you can see above, the needle/stitching finishes at the same/similar point to where the dogs ear is.

IMG_2176

Repeat on the other side, so you end up with the above.

IMG_2177

Press your triangle outwards.

IMG_2178

Then repeat on the other two edges of your square.

IMG_2179

This time round you will have two dogs ears sticking out!

IMG_2180

Press the triangles outwards again, and you should have a relatively square block.  Trim off your dogs ears.........

IMG_2181

But only trim back to the edge of the seam furtherest from your points.

IMG_2182

Because when you take your large triangles to join to this square block, you may have some uneven seams as above.  Line up your triangle with dogs ears sticking out the sides again, and sew with your 1/4" seam.......

IMG_2183

Take your time, and when you get to the intersection where your points are, make sure your needle is lined up just a smidge above the point intersection - as above.  This is how you can ensure your fussy cut square will have four perfect little corners/points!

IMG_2184

Repeat on the other side and press the triangles to the side.

IMG_2185

Now take your last two triangles and line them up as you did for the inner triangles.

IMG_2186

And your last intersections!

IMG_2187

Press your final triangles outwards and you're finished!  In theory, you should have a 1/4"to spare around your block, so that when you piece your blocks together, you will have your points intact from your inner triangles!

IMG_2188

I really hope this makes sense!  The most important part of constructing these blocks is having your points intact, and as you can see above, this block's points are fab!  If you've been around long enough, you would know I am not a "nit-picker", and as long as the end result is good, it doesn't "really" matter how you got there!  Miraculously, I've now made 30 of these blocks, and they are all almost perfectly measuring 9.5"!  And I haven't lost a point on any of the squares - so if I can do it - anyone can!


IMG_2189

And just to show you - you can chain piece these blocks like there's no tomorrow!!  Yesterday, I pieced 12 blocks at a time - I only had six left to do today, and this is how I rolled!

So - who's going to economise with me?!?!!

9" Economy Blocks

I'm linking up - You can too!


Wednesday, January 29, 2014

A Pram Quilt

The end of 2013 heralded the arrival of a new baby boy!  My husband's cousin had her little man a few weeks early, a few days before Christmas.  So I pulled every single blue fabric I owned off the shelf and then edited myself.  I also grabbed a couple of divine Bella & Boo prints (the pirates, indians and cowboys), and made a very simple patchwork quilt.  This is pram/bassinet size, and I can't remember the dimensions!  I also forgot to take photos of it before I took it around to deliver to little Archie!  So I have to give cudos to his clever Mummy, Larissa, for these fabulous photos!


Pram Quilt


Pram Quilt

I backed it in these gorgeous little blue elephants.  They came all the way from Japan from my Tokyo BFF.

Pram Quilt

I kept with the simple look by quilting it 1/4" either side of the seams using Aurifil 50wt #2810 which is a divine bright turquoise/aqua.  And possibly my favourite part of this quilt is the binding and the few grey/white squares used.  I got out the scraps of Paloma from my Isosceles Triangle quilt - because this little man is the brother of Georgia, who sleeps under the triangle quilt!  Make sense?  Hahah....

So this was my final finish for 2013 - and today heralds the start of the school year - for 3 out of 4 kids anyway.  My littlest starts tomorrow - boohooo!  Which heralds the start of new quilts and the finishing of WIP's!  Hoorah!

I'm linking up wherever they will have me - You can too!


Sew Cute Tuesday


Fresh Poppy Design


Sunday, January 12, 2014

Weekly Round Up

We are nearly half way through the Summer school holidays here.  And this week - Summer arrived!  We've had a very unseasonally cool few weeks, so we have taken advantage of the sun and heat and spent some time outdoors.  I thought I would share some evidence of such frivolity.....

Finally a great day for the beach!

We don't get to the beach much, it's a minimum 30 minute drive, but one of my best friends lives down near the sea, so we traipsed down there!  It was brilliant!

A bit of cool relief! #summerisherefinally

Chloe received this sprinkler fun set for Christmas.  Now up until a year or so ago, my kids had no idea what a sprinkler was!  You see, for many years we were on water restrictions here in Melbourne, so no sprinklers allowed!  We've had plenty of rain this year - so it's fun for everyone!

Taking a break and taking in fresh air.... And laughing at cadyns water boy enthusiasm! #hescricketobsessed

My husband plays cricket every Summer.  Yawwwwnnnnnnnnn.  I try really hard to make a concerted effort to get down and watch him every now and then, but really, I have sewing to do.  Anyway, my youngest son goes with his Dad every week, and is sort of like a club mascot.  He has his own club shirt etc, and is water boy for the team.  He takes this very seriously.  I don't.  This photo was taken yesterday, when I took the girls down for an hour or so, and I was laughing at Cadyn's enthusiasm.  God love him.

Anyway, I wanted to show you how I've been spending my time and exhausting myself, and why I haven't been blogging!  So I'm putting all the pretty photos in to one post to display my week of sewing!

I've started my #sweetpouchswap Am experimenting so may be a disaster!

I'm taking part in the Sweet Pouch Swap, hosted by the lovely Ros from Sew Delicious.  I've missed out the first two rounds of the swap, so am very excited to be joining in this time round!  I've been partnered up with Barbara from Germany - you have to go and check out her blog HERE.  Click on translate or just enjoy the beautiful photos!  Given the deadline for posting our pouches is the end of this month, and I am working quite a bit and will be going away for a week - I deliberated for a few days on what I would make, and then got it all sorted the other day.

#sweetpouchswap #finished #sneakpeek ✔️

Here's a sneak peak at the finished product.  Now to fill it with sweets!  I will do a big reveal of it once it's arrived in Germany!

Trying to work out which fabrics to use for remaining blocks on this quilt is doing my head in! I want the colours balanced out hmphhhhh

The other project I've been working on is my Waterfront park quilt.  I finished another three blocks yesterday and then laid it all out to see what I needed to do colour wise for the remaining blocks.  It did my head in.

6 more finished! I think I need another 5...... #waterfrontpark @violetcraft

But I kept going and got another six blocks finished today!  Phew.

Phew! That was hard work! #paperpieced #wombatstew #starwars #r2d2

And last but certainly not least - I got my January block done for Fiona in our Wombat Stew paper piecing bee.  Now if you can't figure out what the theme of Fiona's blocks are, I'm in trouble!  This little beast was very fiddly, but I got through it!  It's another fabulous pattern by Kristy at Quiet Play.  All of her Star Wars Lego patterns are free - so head over and check them out!

And that's it.  I'm working the next few days, then have Thursday and Friday off before working all weekend - but am looking forward to then heading down to the beach the following week!  SO much to do - SO little time!

I'll be linking up with a bunch of peeps this week, when their linkies open up!


Sew Cute Tuesday

Related Posts Plugin for WordPress, Blogger...