Showing posts with label TGIFF. Show all posts

Tuesday, February 10, 2015

Sew Cute Tuesday - Back To My Regular Schedule

As I gently re-enter my regular routine, I've returned to gift sewing.  You see, I worked my proverbial butt off over January, doing what we call "sleepover shifts" during the school holidays, so I could be home with the kids.  Once the kids headed back to school, I had a glorious ten days off work to get this house, and my sewing, back in to order!  So today, I'm sharing a few goodies I managed to get sorted.....
2015-02-09_04-15-16

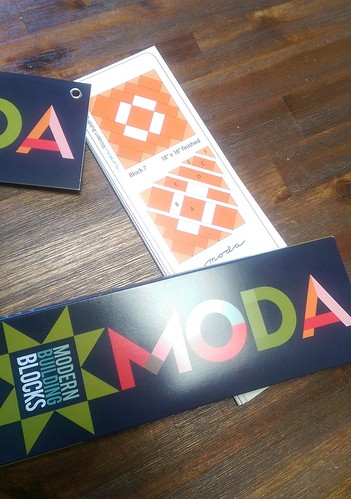
A few weeks ago, I got myself one of these fabulous Moda Modern Building Blocks sets.  I've seen some amazing quilts being made on Instagram (check out the hashtags #modabuildingblocks & #modamodernbuildingblocks) and was looking forward to making my own version.

When it came to making January's Handmade Birthday Club gift for Leonie, I pulled out my handy-dandy-block-set and found myself stopping at block number 7!  It's an 18" block, so the perfect size for a quilted cushion cover....
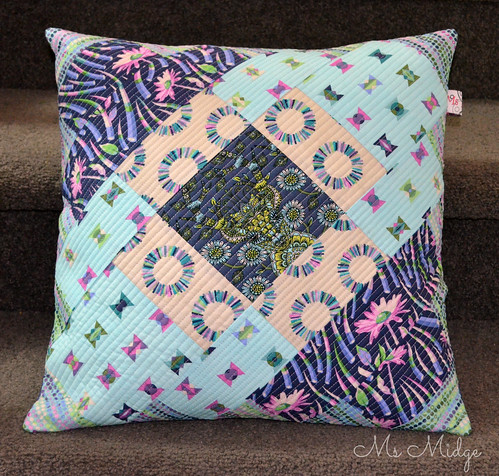
Tula Moda Building Blocks #7 Cushion

One of Leonie's many favourite fabric designers is Tula Pink.  So I rummaged through my stash and found some Acacia to pair with the most divine Deer print from her Moonshine range.  I was incredibly happy with the way the colours played together, and love the way one block can look many different ways....
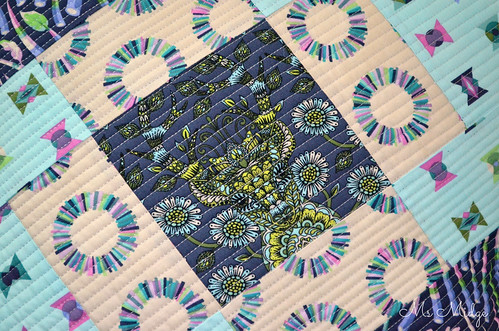
Tula Moda Building Blocks #7 Cushion

I used the gorgeous Dove Aurifil in 40wt for the quilting, and did a 1/4" version of matchstick quilting.  The textural finish is awesome.  Leonie received her gift yesterday and thankfully loved it!

Once I'd ticked that pressie off my to-do list, I moved on to something for me!  I have been in need of a new purse for a little while, but was baulking at spending a small fortune on something that wasn't perfect.  So I reached out to some of my crafting friends, and asked for a pattern recommendation.  It was a resounding response - the Necessary Clutch Wallet!  I would be lying if I told you I wasn't scared to death about tackling this pattern, but it was worth the fear.....
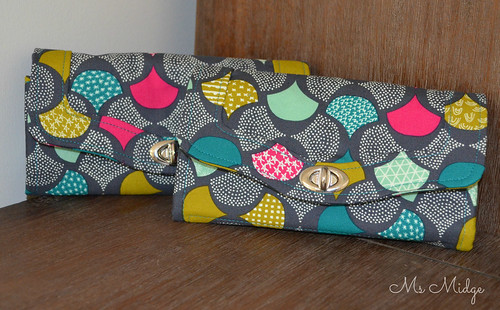
Necessary Clutch Purse

Because at the end of a day and a half of cutting, reading pattern, ironing, reading the pattern again and again and again, and sewing - I had these two divine purses!  Now, if you've been around these digs for a while, you will know I DON'T DO FIDDLY.  Until now.  Yes, they were a tad bit fiddly.  And yes, I had to be incredibly patient.  Especially with the installation of the clasp hardware.  But I got there in the end.
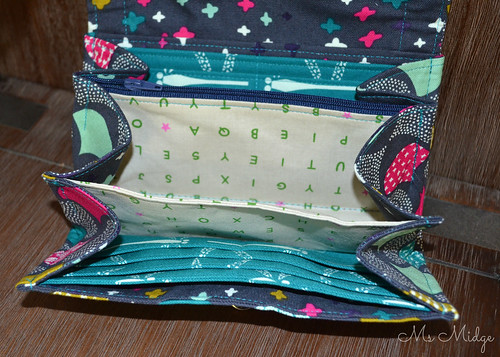
Necessary Clutch Purse

As you can see - there is plenty of space for cards, money, receipts etc - and there's a great amount of space in the centre section there, you could pop a phone or some lippy in too!  So my beautiful purse now lives in its co-ordinating handbag.  And the second one was grabbed up a friend who asked if she could purchase it. Win, win!
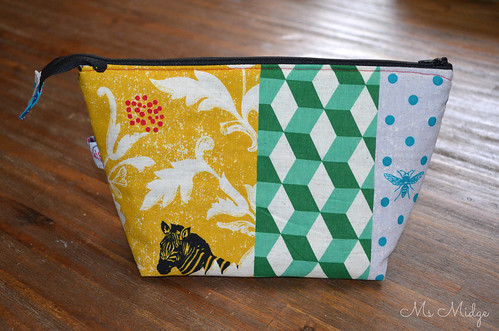
Enchino Make up bag

This little make up purse is for a family member as requested.  I'm being very brave of late, and am cracking open my Tokyo fabric purchases frequently.  This Enchino print is just so darn cute with its geometrics and the zebra!

Another family member's request - this time from my youngest son..... When in class last week, he announced to his teacher he needed a pencil case, said teacher asked him why didn't he ask his Mum?  (Said teacher received a pencil case from me for Christmas!)
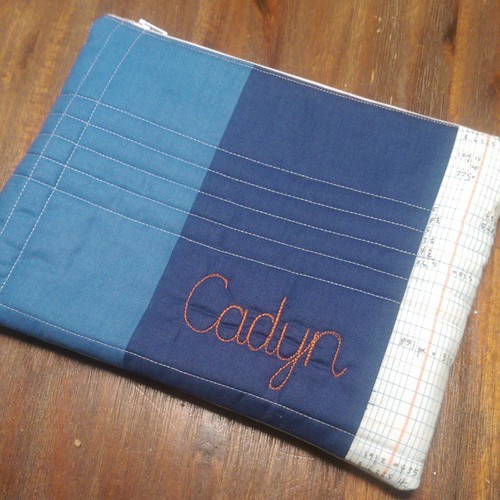
I think this is only the second time cadyn has asked me to make him something.... A quilt and now a pencilcase! #ifeelspecial

I whipped this pencil case up on Sunday, after a couple of days of him asking if I'd made it.  This is literally only the second time in history Cadyn has asked me to make him something!  His quilt was made a couple of years ago, so I thought I best strike whilst the iron was hot!  He very proudly took it to school on Monday and has his pencils stashed safely.

And that, my friends, is my past week of sewing....  What have you been up to this past week?

I'm linking up - You can too!


Sew Cute Tuesday

Friday, February 6, 2015

Star Crossed - Waterfront Park

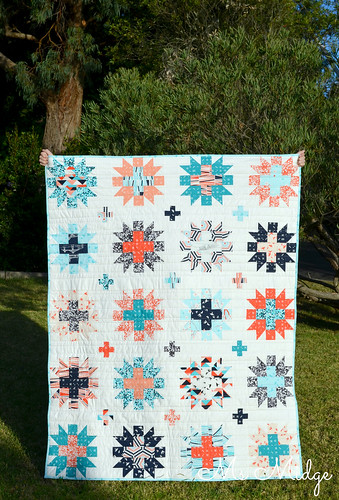
If you've been around these parts a while, you may remember I fell madly in love with Violetcraft's Waterfront Park last year?  I ordered my bundle, received it, and swiftly turned it in to a quilt top........ I even got halfway through making the quilt back.  But for some reason (known to me - the quilt top was a tad wonky) it languished in my WIP pile for far too long.

Fast forward to this week.  

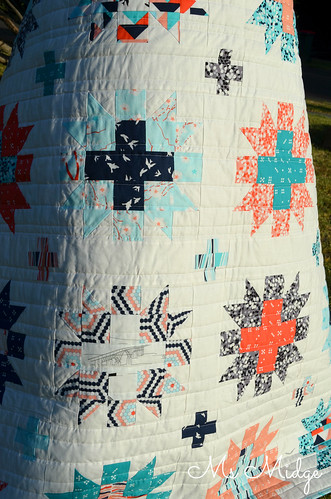
Star Crossed Waterfront Park 

And she is complete!  I am still utterly in love with it, and am quite torn about giving it away.  When I showed my Mum today, and told her I was a little sad to see it go, she told me to keep it.  But I've got to come to terms that I just cannot keep every. single. quilt. I. make.

Star Crossed Waterfront Park 

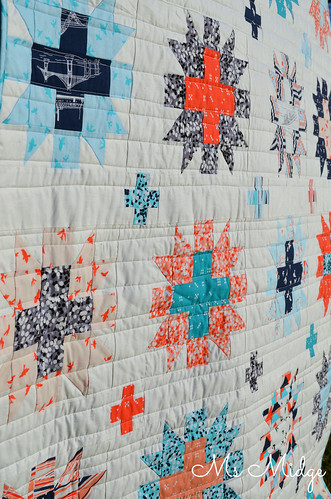
I had this baby basted quite quickly, and then sat in front of it wondering how on earth I was going to quilt it?  I had a migraine last week (the first in about a year) and the headache hangover still had not shifted, so needed to quilt quite minimally.  And because of its slight wonkiness, I needed something that would not make the wonkiness scream!  I ended up going with some pretty organic straight line quilting......  Organic because I did not measure the spaces because the lines.  I just winged it.  I used my very trusty Aurifil #2024 in 40wt for the quilting, and it didn't let me down.  When you get close up, the shimmer is divine.

Star Crossed Waterfront Park 

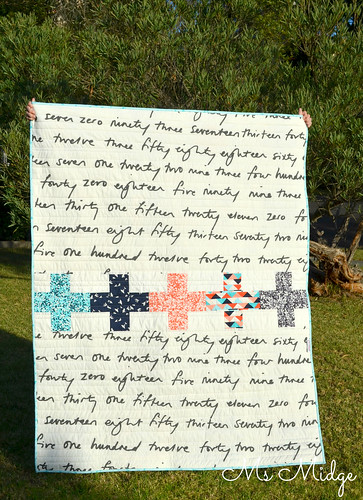
And love the end result.  I even love the wonky backing!  It is actually quite squared up.....but the writing on a slant doesn't help!

Star Crossed Waterfront Park 

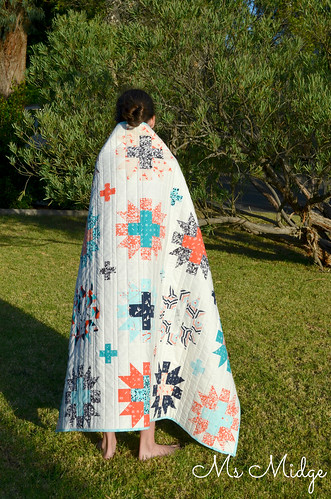
I envisioned a beautiful photo shoot down at the beach for this quilt.  Clearly, that vision did not come to fruition - so I had to settle for the front yard and help from my three youngest children.  My gorgeous Chelsea wrapped herself up at the end and I couldn't help but keep snapping.....

Star Crossed Waterfront Park

If you wish to make your own version of this quilt, I used a free tutorial for the star crossed blocks by Don't Call Me Betsy.  They're a fun block to make, with endless possibilities for fabric selection.   I then just whipped up some simple cross blocks for the cornerstones, to match the width of my sashing.

And just for a laugh, I thought I'd show you this......

Working with Children....

Whilst photographing yesterday, my youngest (who is currently nicknamed "devil-child") was being a fool.  It wasn't until I uploaded the photos today that I spotted something flying through the air in the very first shot!  Pretty good (or bad) timing really!

So - this throw sized pretty will be off to its new owner and I will be crying in the corner.  Nah, i'll be happy to make someone else happy!

THE STATS:

Size: 43" x 61.5"
Fabric: Waterfront Park by Violet Craft
Backing: Ikea Numbers
Thread: Aurifil #2024 40wt

Another WIP bites the dust!


Friday, December 19, 2014

T.G.I.F.F. - 2014 Quilt Finale

2014 has been a big year for me - quilting and otherwise.  As the year closes, I have my last two quilt finishes to share with you!  I count myself very lucky to be chosen to make something, as special as a quilt, for others.  The fact that people put their faith in me is really lovely.  Both of the quilts I'm sharing today are for repeat customers.  So I guess that says something about my product!

You may remember my Isosceles on Point quilt from last year?  Well, it now has a brother!

Custom quilt for Archie 

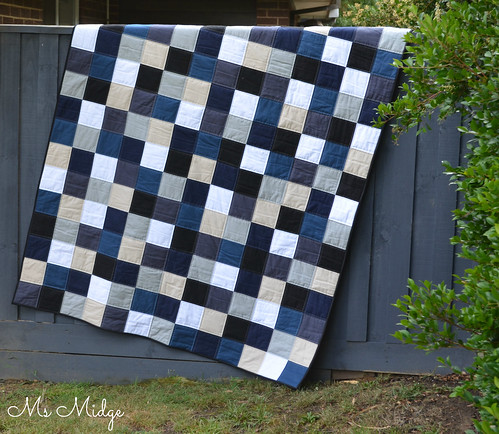
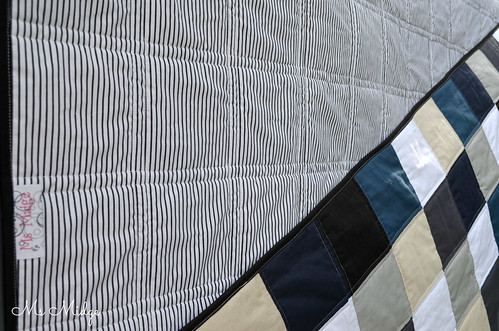
This divine king single quilt is made up of 5" squares in a range of beautiful blue and grey, mixed with black, white and taupe.  It is a colour palette I wouldn't necessarily have thought to put together, but Larissa always has a great eye for colour, and chose them all herself - then delivered them to me.  It was my job to make her vision come alive.

Custom quilt for Archie 

I placed all 221 squares quite randomly, only making sure there weren't pools of the same colour together.  Once quilted with a variegated Aurifil thread #4060 - which is a silvery/moss mix - it really popped.

Custom quilt for Archie

Larissa chose this great striped backing.  It's actually a sheeting fabric, which is super wide and made basting super easy.  This quilt is going to wash up so beautifully, and will keep its little recipient snug as a bug!  It was delivered today, just in time for a birthday!

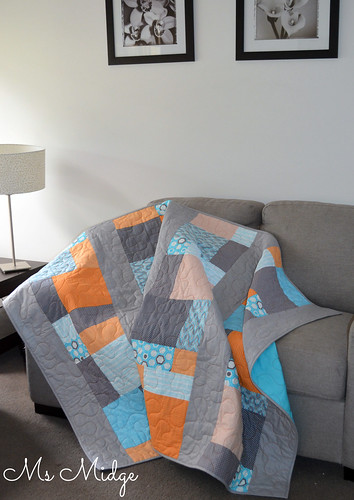
Next up is the third quilt for a family.  The youngest of three boys needed a quilt to call his own, after his big brothers received theirs last year.  Cass left the colour and fabric selection to me, and was in no rush, so earlier this year I bought a fabulous bundle from Pink Castle Fabrics.  Greys, turquoise and orange were the winning palette and man, do they work well together.....

Custom quilt for Brodie 

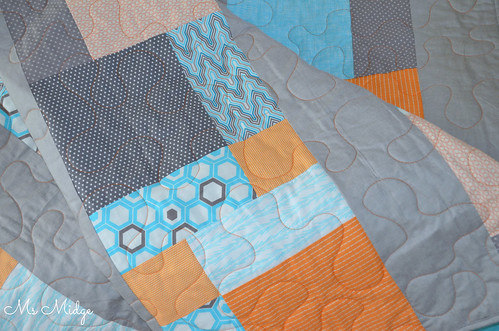
The design is a basic disappearing nine patch, using 9" squares.  I love the random placement you are left with when you cut up a nine patch!  I also used a grey shot cotton from Spotlight for the solid mixer.  If you ever get the chance to use the shot cotton, do it, it's actually really lovely.

Custom quilt for Brodie

I quilted using a meandering free motion pattern, which I think looks a little jigsaw like.  I used a vibrant orange Aurifil #2150.

So, there you have it.  No more quilts for 2014!  But plenty of WIP's awaiting attention and new projects in line.....


I know I have been a slack blogger of late, and I have not replied to everyone's comments, but I've been flat out and am now dealing with some sort of weird virus, which comes with a delightfully itchy rash and a 6-8 week cycle.  Sooooo, thank you again for always taking the time to come and read my posts and please know I read all of your comments and really do have the intention of replying!!!
xxxx


Tuesday, December 2, 2014

Confetti Cannon

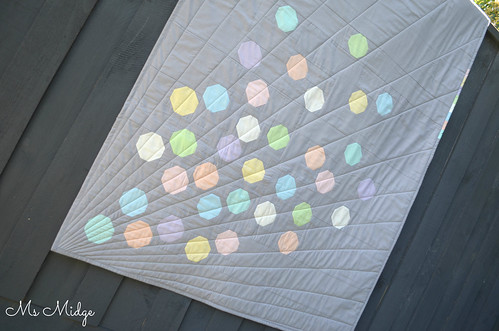
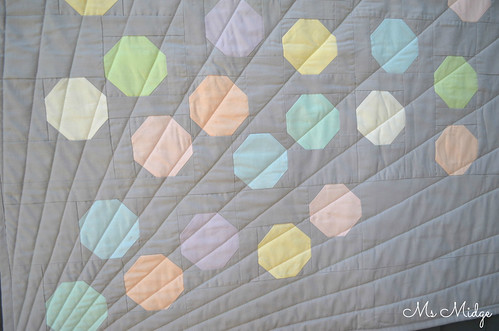
When the MQG sent out an email a few months ago, regarding the Quiltcon Michael Miller challenge, I very quickly signed up thinking "this will be fun!"  I received my little bundle of pastel cotton couture weeks later and thought "Ummmmmm".  I had no idea how to make the pastels work.  I mean, I've only ever used pastels a few times in my quilting life, so was left a bit deflated.  I took them out again not long after and just stared at them.  That was when I thought of Confetti.  The tiny little pieces of pastel paper, which are used in celebrations everywhere.  And that was my inspiration......

I went "old school" for the planning of this quilt.  After weeks of having confetti twirling around in my head, I got myself some grid paper and pencils, and literally just drew up what I'd been thinking of.  And the following day, made the entire quilt top.

Confetti Cannon

As per usual, I winged it a bit!  I made it up as I went along - literally dividing my design up in to blocks of squares of rectangles, however the little confetti spots would fit in.  The 3" snowball blocks were easy-peasy.  34 in total.  Because I wanted the confetti to be randomly scattered throughout the quilt top, it made the piecing rather, shall we say "interesting"?  It is probably what some Modern peeps would call "improvisational" - I just call it random!  But it worked - and that was the end result I was after...

Confetti Cannon 

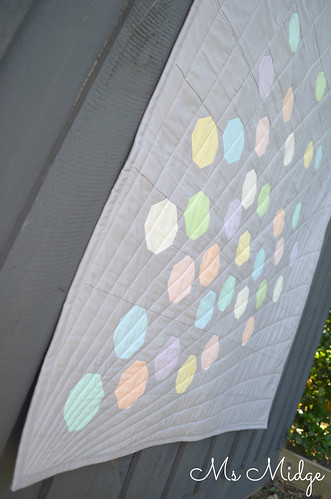
Once I had the top made, I thought and thought and thought about how on earth I was going to quilt it.  I had an idea in my head, but thankfully one of my lovely MQG friends - Katrina - cemented the idea and helped me visualise it!  I think the diagonal lines from the bottom corner help create movement and project the confetti up in to the air!

Confetti Cannon 

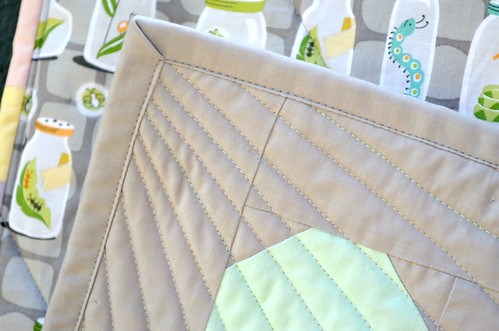
I mostly stuck with the grey for the binding, but also added a little pastel rainbow to the side.  I LOVE it!

Confetti Cannon 

This photo shows you a little more closely how the piecing has been done.  It's one very fiddly jigsaw puzzle!

Confetti Cannon 

The Michael Miller challenge rules are to use all Cotton Couture in the quilt top and then any Michael Miller fabric for the binding and backing.  I made a quick trip down to the large quilting store nearby and scoured their shelves for something to suit as backing.  This quilt was always going to be for a baby/child, so when I stumbled (literally, I stumbled over it) over this Backyard Baby print, I grabbed it!  It's SO perfect.

Confetti Cannon 

It's a little difficult to photograph, but I used several pastel shades of Aurifil in the quilting - re-threading my machine after every. single. row.  Was it time consuming?  Yes.  Was it worth it?  Yes!!

Confetti Cannon

I spent all day Saturday stressing about the photos to submit!  You see, I've never actually entered a quilt show!  And the rules state only two photographs to be sent in - one hanging on a wall and the other a close up.  So I moved furniture in my front room so as not to get any shadows and did my best!  I guess only time will tell.....

I have thoroughly enjoyed this challenge - because it really was a challenge!  Throw a girl some pastels and see what she can come up with!

The Stats:

Name:  Confetti Cannon
Size: 40" x 60"
Fabric: Michael Miller Cotton Couture pastels & Ozone.  
Backing:  Michael Miller Backyard Baby
Quilting:  By Me on my Bernina
Thread:  Aurifil 40wt Pastels

I'm linking up - You can too!
Sew Cute Tuesday

Fresh Poppy Design


Friday, September 19, 2014

Bonnie & Camille Aussie Charm Swap - It's A Wrap!

Well thank God it's finished Friday!  Here's a little eye candy for you!  The B & C Aussie Charm Swap has been completed, with all 55 bundles of yumminess sent on their way this week.  There are some very patient (and impatient!) ladies waiting around Australia and New Zealand for their new babies to arrive!


All in all, we ended up with 110 different B & C prints  - and they all look stunning together.


I'm pretty sure we covered all of the B & C fabrics lines, with a bit of everything!


A couple of my favourites - the raindrops and scallops.  I really cannot wait to put them all to good use - even though I am still yet to decide how!

In the coming week, I will be announcing the next Charm-along, with a few fabulous prizes to be shared amongst participants.  So if you have a bunch of B & C charms on your shelves, think of how you can put them together, and join in the fun!

In the meantime, I will be sleeping......

I'm linking up - You can too!

Thursday, August 28, 2014

T.G.I.F.F. - Bijoux Metro Twist - Sew Kind Of Wonderful Blog Hop!

I have the pleasure of hosting T.G.I.F.F. today!  And do I have a finish for you....

QCRbloghopbutton

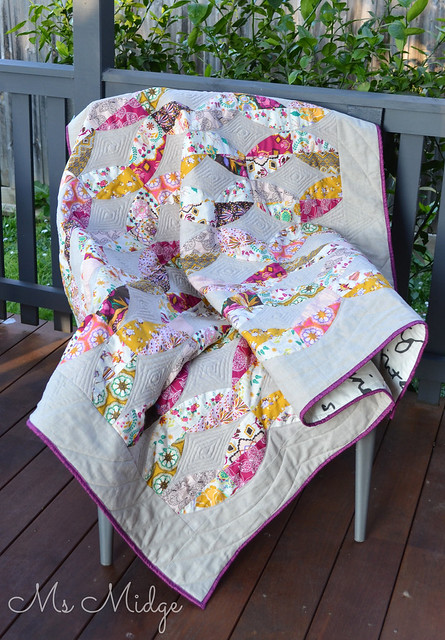
 When Laura from Quokka Quilts asked if I'd like to take part in the Sew Kind Of Wonderful Blog Hop, I said I'd love to, but would probably only manage a few blocks.  Fail.  The Quick Curve Ruler had me at Hello.  The lovely Jenny generously sent me a couple of patterns to choose from, and I was instantly drawn to the Metro Twist.  Firstly - it looked like the easier of the two, and secondly - it looked like the easier of the two!

Anyway, needless to say - I finished the whole quilt....

Metro Twist

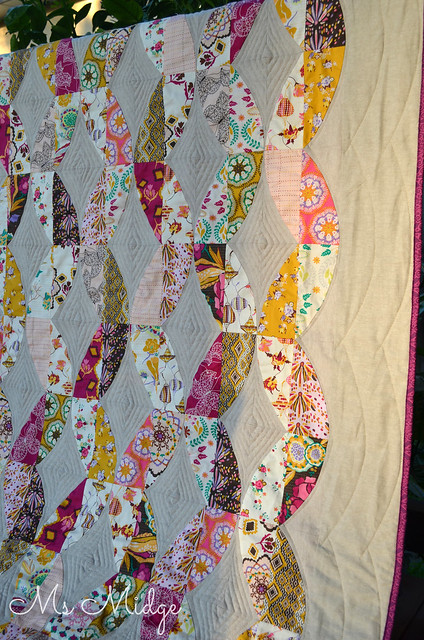
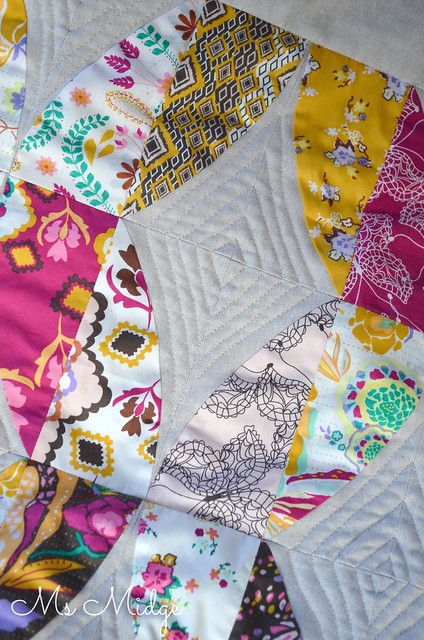
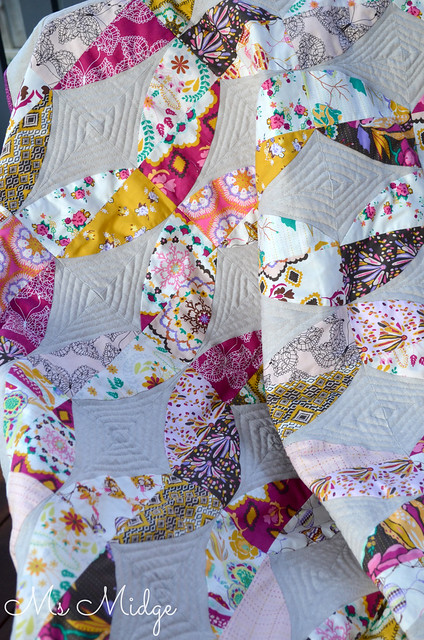
I felt the pattern leading me towards rich, yummy fabrics.  I had been holding on to Bari J's Bijoux for what seems like forever, and promptly de-shelved them for the event.  When it came to a background, I had just received Essex linen in Flax, and it was a perfect fit!  The textural differences between the linen and the Art Gallery are amazing!

Metro Twist

The blocks went together relatively quickly.  The pattern is written VERY well, with loads of diagrams and mathematics that makes sense.  Which is good, given my lack of mathematical ability.  Cutting the curves with the ruler was easy - although that first cut is very nerve-wracking!  The only tricky bit I found was because I used the linen - which is hard to determine a front from a back - so I resorted to labeling my piles of cut fabric "front facing downwards" and "back facing downwards".  This helped immensely!

Metro Twist

I think the biggest thing I have learnt from this first foray in to  these patterns (oh yes, there will be more!) is that even though it looks like all your curved pieces are cut exactly the same, they aren't necessarily.  That is, if the angle of your ruler isn't EXACTLY the same each time, your little curves will be different in the slightest little angle.  You don't notice it until you are sewing your blocks together, and your background diamonds are just slightly different in shape.  Clearly - this is not a massive deal!

Metro Twist

When it came to quilting this beauty, I wanted to keep it pretty simple.  Apart from the fact that this plan lead to a tonne of thread burying, I think it worked.  I used my free motion quilting foot to echo quilt the diamonds - from outside-in.  They are far from straight lines - very "organic" indeed.  And I was second guessing myself after the first few - but I really love them.  I haven't quilted on the prints at all.  And on the borders, I just echoed the curves using my walking foot, which I adore the look of.  All of the piecing and quilting was done with Aurifil #2000 50wt, which is such a beautiful golden thread it looks stunning with the linen.  


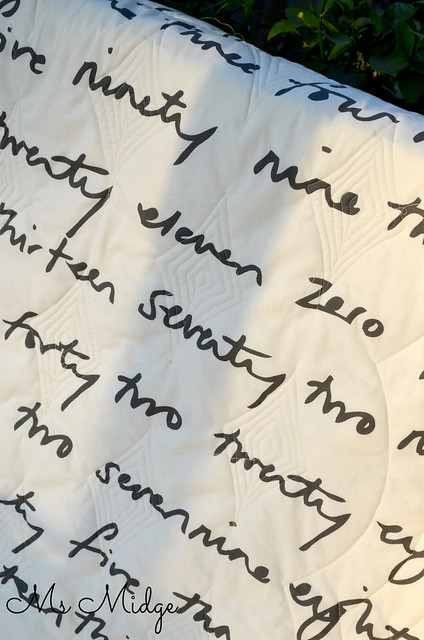
The backing, as you can see, is my go-to Ikea print.  This fabric seriously works with just about any quilt!

  Metro Twist

I also added a border to the quilt.  The finished size of the pattern is 40" x 55", which is a little on the smaller side of throw size for me - so I added 5" to each side and end, which brought the final size up to 49" x 64".

I also took a couple of little videos of myself sewing curves, and put them on Instagram.  If you want to have a little look, you can find them HERE and HERE.  I was trying to demonstrate curves not being as difficult as we think!  If you're willing to take your time and practice, I promise you can do it!

If you want to make the Metro Twist yourself, you will find the pattern HERE.  If you're in Australia and looking for a Quick Curve Ruler stockist, you can find a list HERE

 Please go and check out Jenny’s blog and shop. You can also join the Sew Kind of Wonderful mailing list to get news of any new patterns or promotions. There is going to be a linky party on the Sew Kind of Wonderful blog on Friday 29 through 31 August – you can link up any quilt or block made using the Quick Curve Ruler. If you haven’t tried a QCR project yet, never fear, there’s a chance to win a ruler during the bloghop and have a go. You can find plenty of inspiration on the bloghop so please go and check out the other participants!

Monday 18 August http://quokkaquilts.com
Tuesday 19 August www.cluckclucksew.com
Wednesday 20 August www.fromthebluechair.com
Thursday 21 August liveacolorfullife.net
Friday 22 August www.happyquiltingmelissa.com
Monday 25 August www.greenfairyquiltsblog.com
Tuesday 26 August http://blog.sewbittersweetdesigns.com
Wednesday 27 August www.pleasant-home.com
Thursday 28 August http://www.lucymade.wordpress.com AND http://msmidge.blogspot.com.au
Friday 29 August www.dontcallmebetsy.com

The bloghop is going to be followed by a 'Curve it up' Challenge Quilt-a-long on the Sew Kind of Wonderful blog starting in September, so join in the bloghop, get inspired and get ready to Curve It Up!  

CurveItUpQALbutton

Now it's your turn to show me your fabulous finishes this week!  Be sure to pop them in the linky below!  Have a wonderful weekend!


Friday, August 22, 2014

T.G.I.F.F. - This And That

I have achieved quite a lot this week.  I finished off my quilt top for the Sew Kind Of Wonderful Blog Hop (you will have to be patient and wait until my stop on the hop next Friday), got all my bee blocks for QCA Bee #5 up to date, and am now a month ahead AND today whipped up this gorgeous cushion cover for an upcoming showcase at Tilda & Birdie on FB.

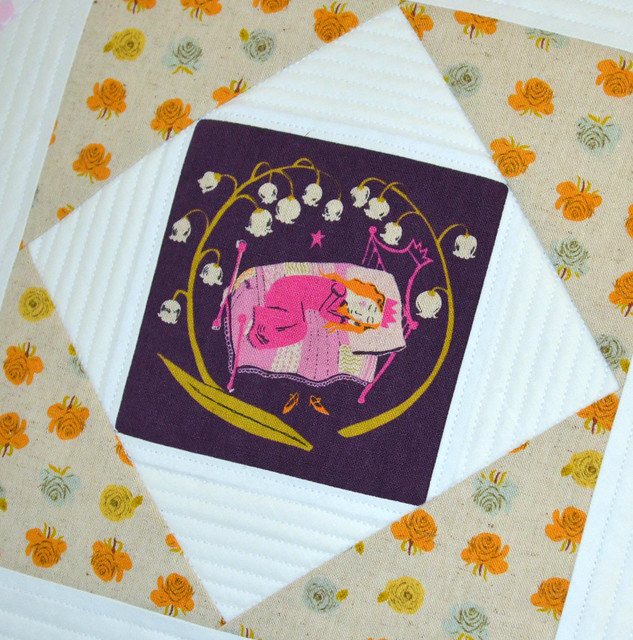
Sleeping Beauty Cushion

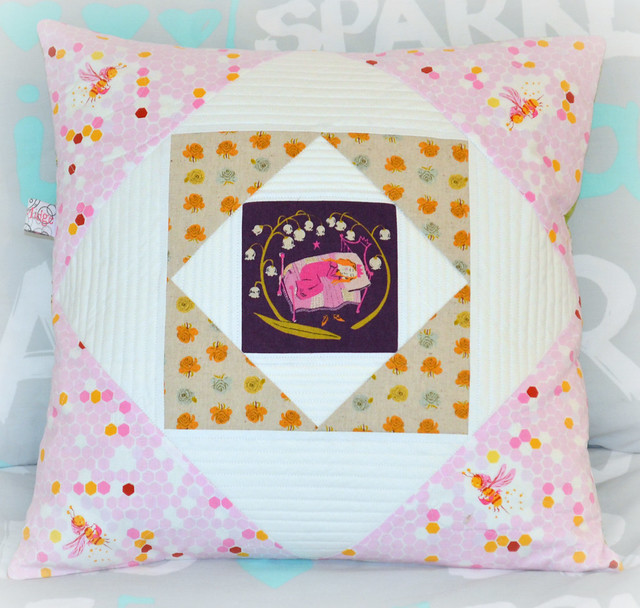
When I saw there was a Heather Ross Showcase coming up, I had to put my hand up.  I've been collecting HR for a little while now, and like a good showcase to make me think outside the box.  Well, clearly not too far out of the box - given it's another cushion cover - but colour palette wise, this is different for me!  I cut a gorgeous little charm of Sleeping Beauty from my original Far Far Away linen blend and then worked my way outwards.  I used my 9" Economy Block tutorial for the centre, and then added a couple more borders to bring it up to size.

Sleeping Beauty Cushion

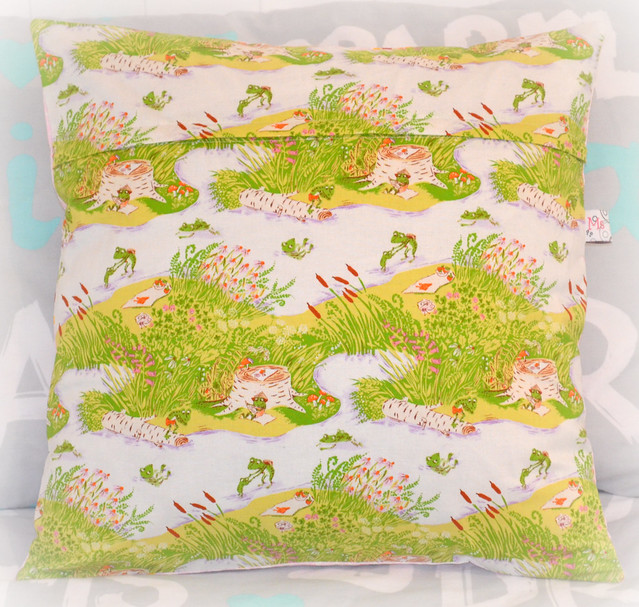
I love the back of the cushion.  This Briar Rose print is one of the cutest ever!  And I even managed to match the print so well it doesn't look like it has been cut!  There IS a zipper in there :)

Sleeping Beauty Cushion

I kept the quilting simple.  Nice little straight lines of Aurifil #2024 on the white sections - giving it a gorgeous texture.  The pink print has a little buzzy bee meandering pattern.

And just because it's TGIFF, here are those bee blocks, care of my IG feed.....

Playing catch up on bee blocks today! First cab off the rack.... #qcabee5

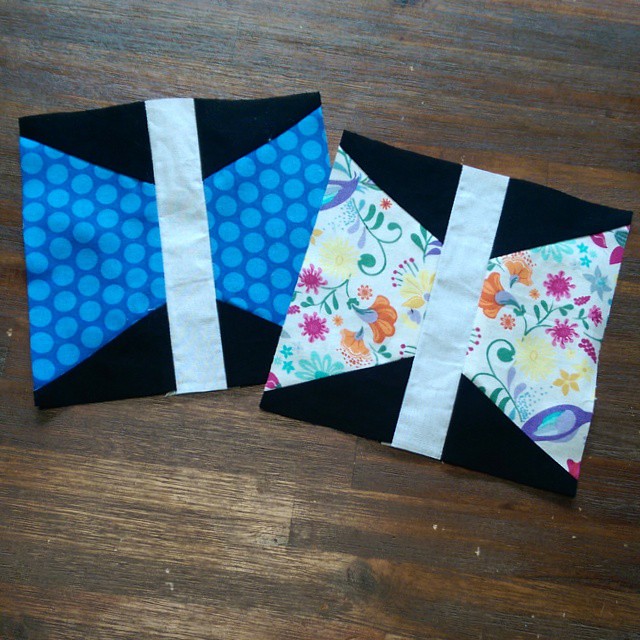
Simple little butterfly blocks.

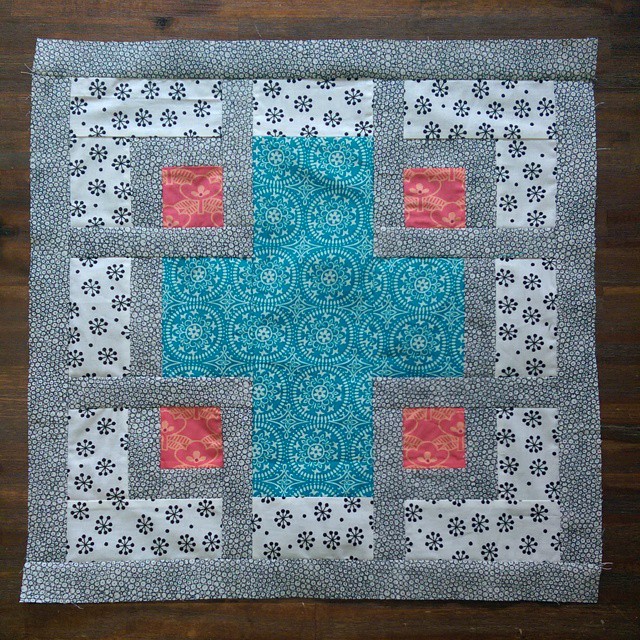
One epic 18" blocks for @bendigolioness had to use my brain for this one! #qcabee5

This not-so-simple maze block!  It did my head in for a little bit, but I do love the end result - even if it is rather "busy".  You can find the tutorial for it HERE.

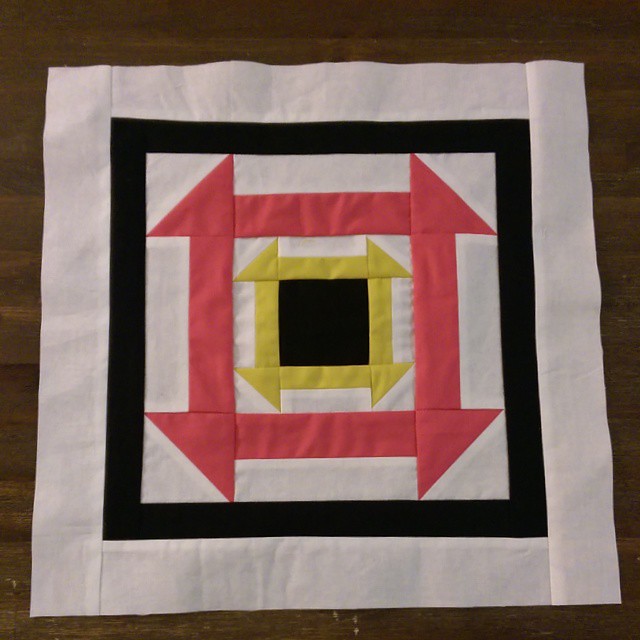
Final block for today just finished!! A sort of kind of #nestedchurndash for #qcabee5

And a very late night pic of the solids block for Carlie.  I'm not a solids kind of girl, and the only two solids I have in my stash that I really actually like were the pink and gold Art Gallery fabrics.  Carlie requested a sampler block.  So I browsed Pinterest and came up with nothing I really loved.  Instead, I started out with Quilt Jane's Nested Churndash, making it up to the 8.5" size, and then added a couple of borders to bring it up to 12.5".  A friend called it a "framed churndash".  Sounds good to me!

Anyway, that's it for this week.  Another busy week ahead.  I hope you all have a lovely weekend!

I'm linking up - You can too!

Related Posts Plugin for WordPress, Blogger...