Showing posts with label Economise. Show all posts

Saturday, March 29, 2014

T.G.I.F.F. - The Dream Weaver Quilt!

Good Saturday morning to you- or Friday somewhere else in the world!  I had every intention of posting this last night - however footy season is back in full swing, and I got a last minute seat at our first Melbourne game - Go Hawks!

Anyway, on to this week's big finish - my Economy Block Quilt - now to be known as the Dream Weaver Quilt!
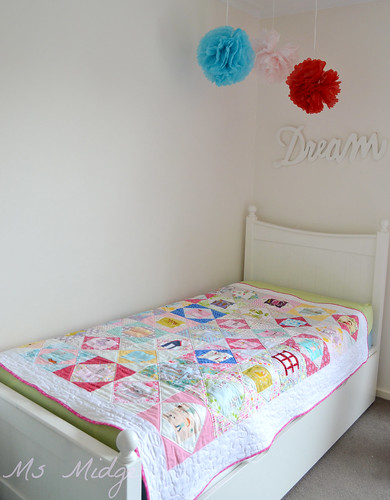
Economy Block Quilt 

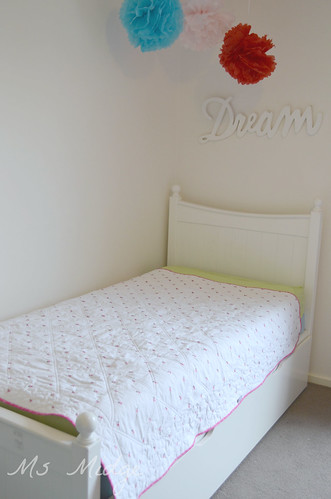
Isn't she pretty?  I had big dreams of photographing this at the local playground, however, Mother Nature intervened and threw some interesting weather at us!  Having said that - I love that these photos show the size of the quilt, and the little bit of sunlight shining through the windows plays on the amazing colours throughout it!
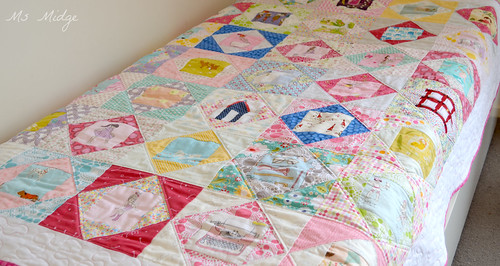
Economy Block Quilt 

My goodness it was a task to quilt!  So many seams!  I started and unpicked three times before finally deciding to just straight line less than 1/4" from the seams on the square.  I then ummed and ahhed about where to take it from there.......and decided to cross hatch.  It was a decision that almost undid me!  For as straight and well lined up the seams are across ways - the diagonal seams proved to be frustrating at times!  The main reason I persevered was due to the very pretty effect it gave the quilt back, which you can see further down in photos.
Economy Block Quilt 

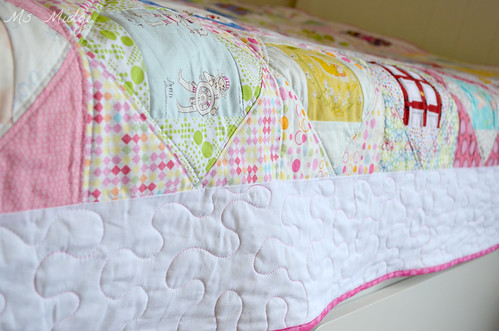
I used Aurifil thread #2024 white for the main quilted area and on my trip to Aurifil Australia Thursday, I grabbed a new beautiful variegated pink thread #4660.  It's very difficult to photograph, but the shades of pink are just divine.  This basic meandering pattern does the white borders of the quilt a nice subtle justice I think.
Economy Block Quilt 

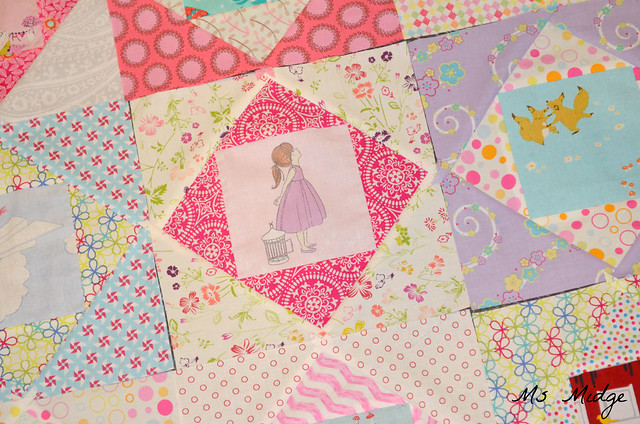
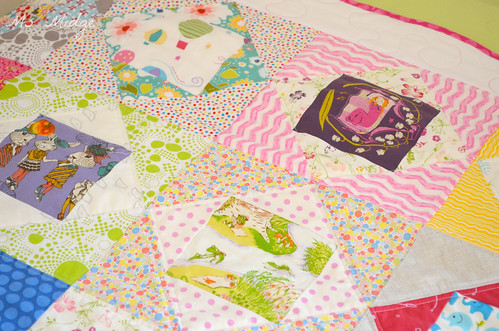
A few of my favourite blocks!  You can find my tutorial for these 9" blocks HERE.
Economy Block Quilt 

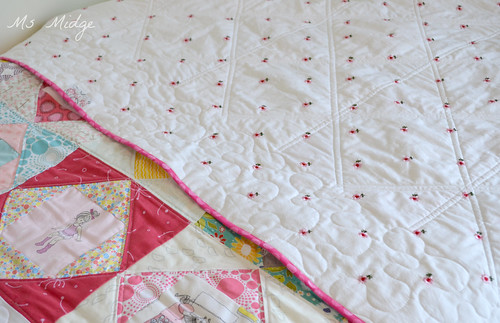
For the backing, I chose some vintage embroidered cotton, which feels like a poplin to me.  I was worried the embroidered flowers would give me trouble through the quilting process, but it was a breeze!  And it's like having two pretty quilts in one!
Economy Block Quilt

Sigh.  So pretty.

This one of a kind beauty will be up for sale later this afternoon and will be listed on my Facebook page.  I am more than happy to accept Lay-by terms for purchase upon enquiry.

I'm linking up - You can too!


Thursday, February 27, 2014

9" Economy Block Tutorial

This week has me economising, and as I showed you YESTERDAY, I'm making 9" blocks, opposed to the 5" paper pieced version by Red Pepper Quilts.  As promised, I have a tutorial for you!  And as usual, I have lots of photos to hopefully make it easy to follow.

Now I didn't make these measurements up!  My tutorial is an adaptation of one I followed a couple of years ago by The Oz Material Girls - so thank you Louise!  They have a charity FB page called "Do Your Block", gathering blocks from quilters and making them in to quilts to donate to people in need.

On to the tutorial.........  These measurements make a 9.5" finished block - 9" when sewn together.

IMG_2169

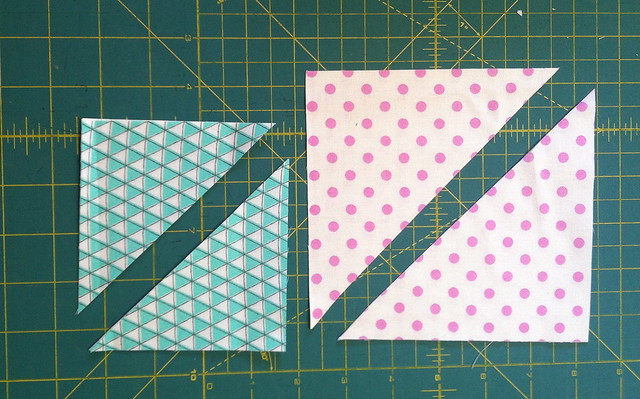
First things first, you need to choose your fabrics.  You don't necessarily have to have "fussy cut" prints like I have chosen, you can get out your favourite prints and use them as centrepieces to highlight them.  You will need a 5" centre square (fussy cut in this instance).  2 x 4" squares for inside triangles (green) and 2 x 5 3/8"(pink spot) squares for outer triangles.

IMG_2170

Take your outer squares and cut diagonally to make the triangles.

IMG_2171

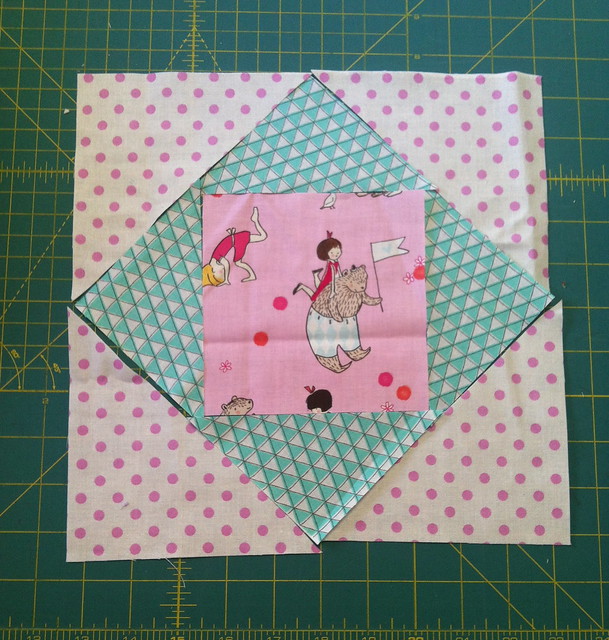
Lay your pieces out together to be sure you like the combination.  This is especially important when you cut out a million squares/triangles at once ready to chain piece 12-24 blocks in a day!  I ended up with some very interesting colour/pattern combinations that I would never normally have paired up together - but I must say, it has worked beautifully!

IMG_2172

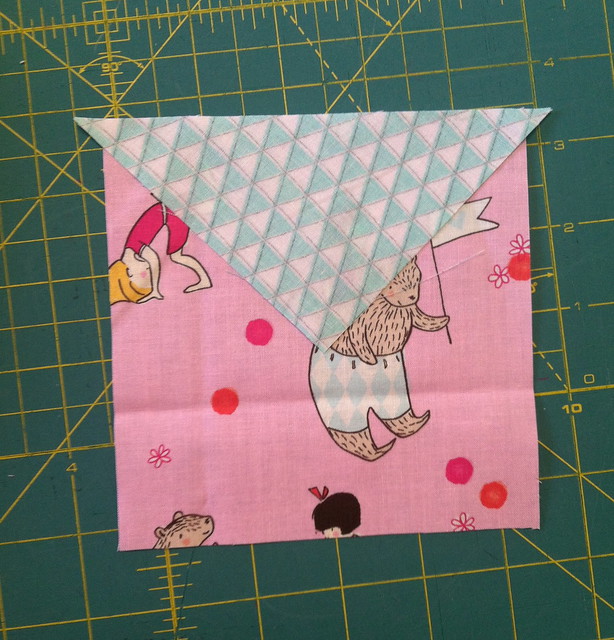
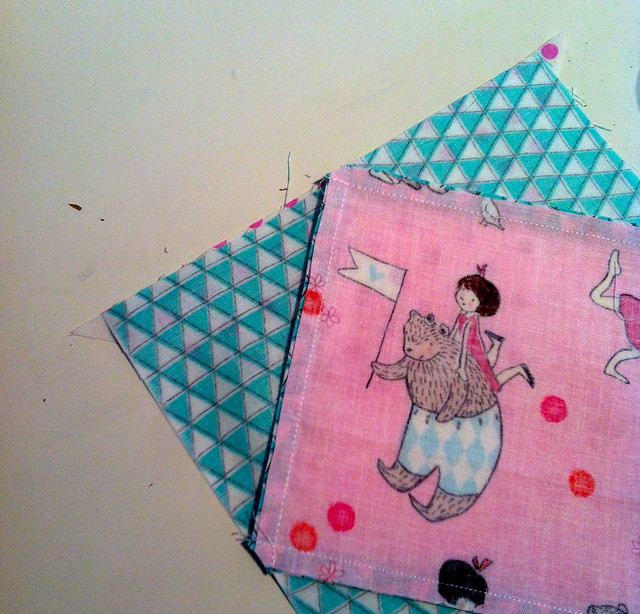
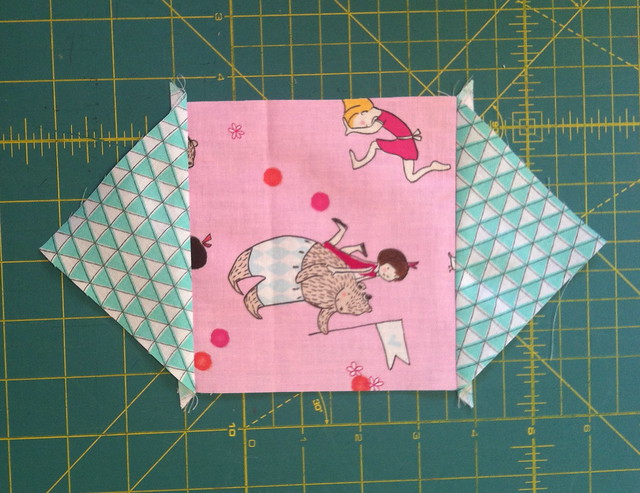
Take your 5" square and place one of the smaller triangles over one edge, centred.  I have shown you above as an example, but as you will see throughout this tutorial, I sew all of the pieces with the triangle pieces on the bottom.

IMG_2174

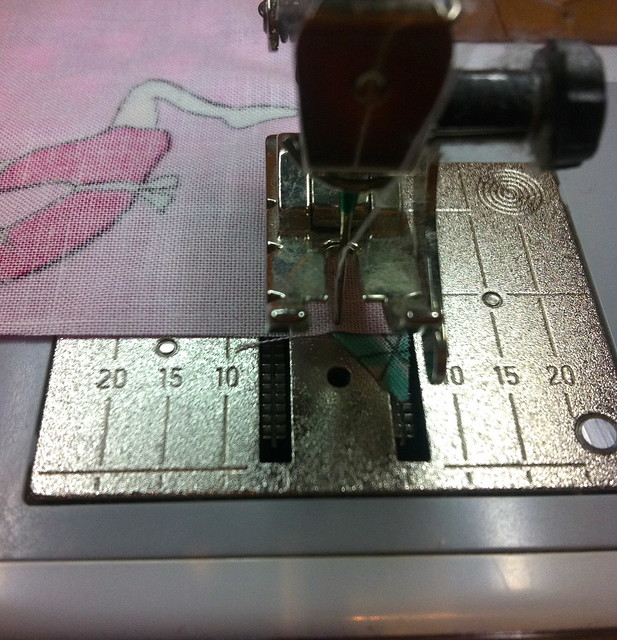
You will have two little "dogs ears" poking out on either side of your squares, when you start to sew them, you want them to almost line up with your 1/4" point - ie. my needle.

IMG_2175

Sew right along the side, making sure you still have your little dogs ear sticking out at the other end.  As you can see above, the needle/stitching finishes at the same/similar point to where the dogs ear is.

IMG_2176

Repeat on the other side, so you end up with the above.

IMG_2177

Press your triangle outwards.

IMG_2178

Then repeat on the other two edges of your square.

IMG_2179

This time round you will have two dogs ears sticking out!

IMG_2180

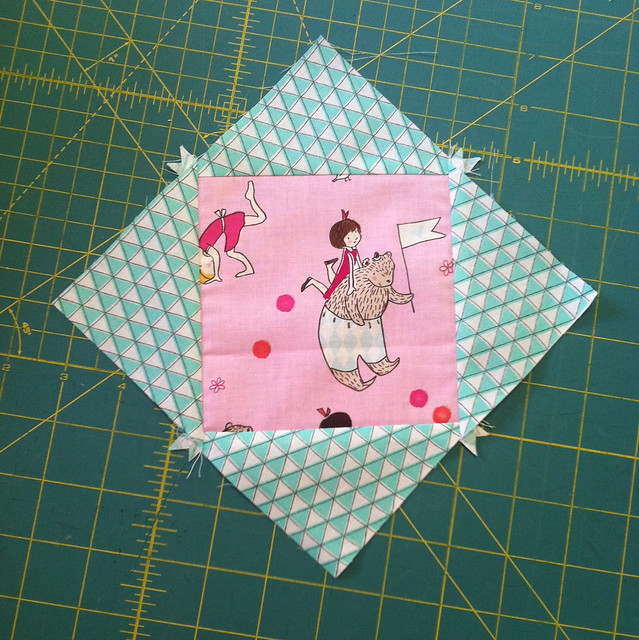
Press the triangles outwards again, and you should have a relatively square block.  Trim off your dogs ears.........

IMG_2181

But only trim back to the edge of the seam furtherest from your points.

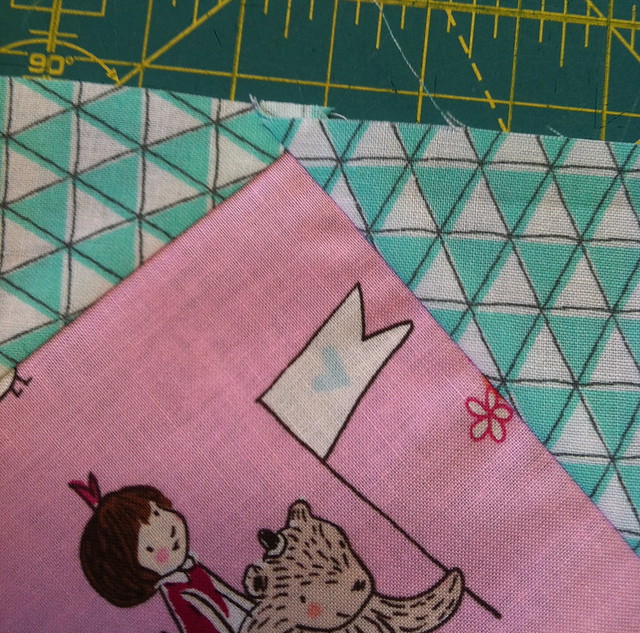
IMG_2182

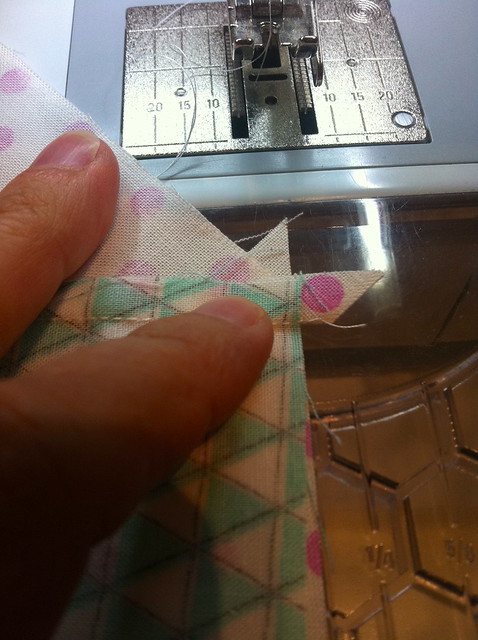
Because when you take your large triangles to join to this square block, you may have some uneven seams as above.  Line up your triangle with dogs ears sticking out the sides again, and sew with your 1/4" seam.......

IMG_2183

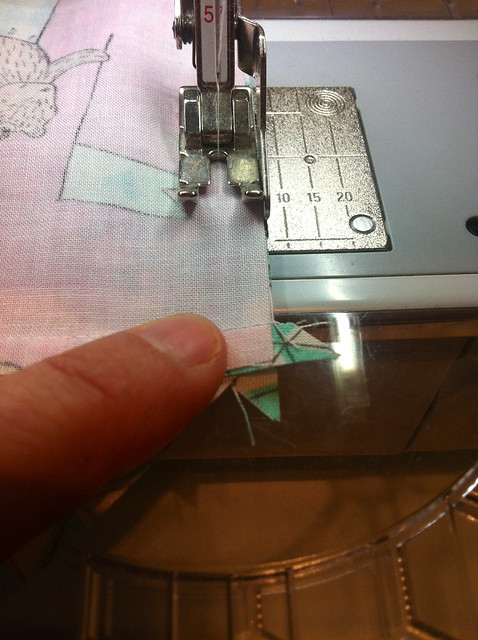
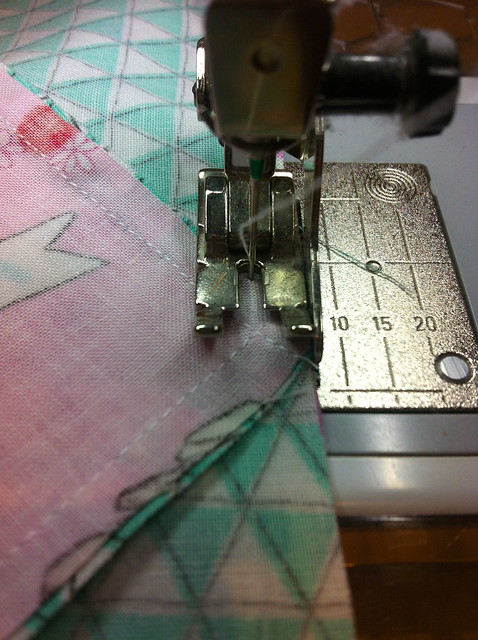
Take your time, and when you get to the intersection where your points are, make sure your needle is lined up just a smidge above the point intersection - as above.  This is how you can ensure your fussy cut square will have four perfect little corners/points!

IMG_2184

Repeat on the other side and press the triangles to the side.

IMG_2185

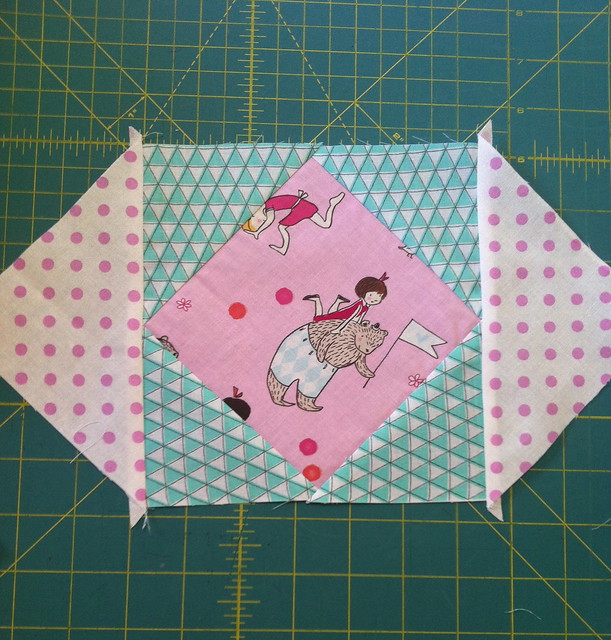
Now take your last two triangles and line them up as you did for the inner triangles.

IMG_2186

And your last intersections!

IMG_2187

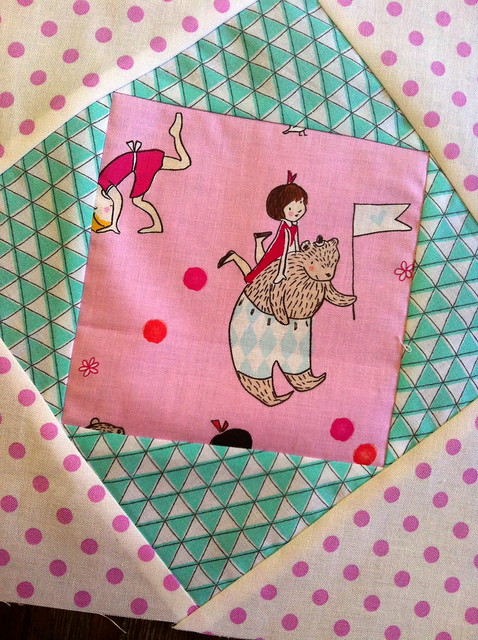
Press your final triangles outwards and you're finished!  In theory, you should have a 1/4"to spare around your block, so that when you piece your blocks together, you will have your points intact from your inner triangles!

IMG_2188

I really hope this makes sense!  The most important part of constructing these blocks is having your points intact, and as you can see above, this block's points are fab!  If you've been around long enough, you would know I am not a "nit-picker", and as long as the end result is good, it doesn't "really" matter how you got there!  Miraculously, I've now made 30 of these blocks, and they are all almost perfectly measuring 9.5"!  And I haven't lost a point on any of the squares - so if I can do it - anyone can!


IMG_2189

And just to show you - you can chain piece these blocks like there's no tomorrow!!  Yesterday, I pieced 12 blocks at a time - I only had six left to do today, and this is how I rolled!

So - who's going to economise with me?!?!!

9" Economy Blocks

I'm linking up - You can too!

Related Posts Plugin for WordPress, Blogger...