Showing posts with label bag. Show all posts

Tuesday, August 26, 2014

My Super Tote!

In keeping with the 2014 theme of "throw lots of balls up in the air and juggle them", I started yet another project the other day, and finished it at late-o'clock last night!  It's my Super Tote!  Now, to be honest, I'd worked myself up a bit about the Super Tote.  I had put it in the "this is going to be difficult" basket and was a little bit scared.  But I'm here to tell you - it's actually relatively easy!  Once you get past all. the. cutting. out.
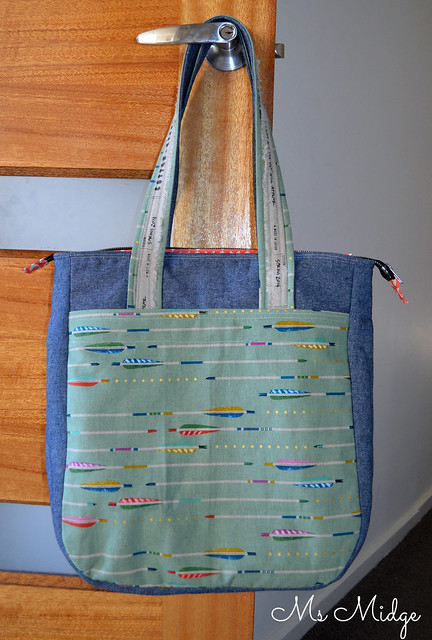
Cotton + Steel Supertote

As you can see, I used my beautiful Cotton + Steel canvas for the outer sections.  I adore the tones in it, the green is actually a really subtle shade.  I kept changing my mind about what to use for the main sections - I had some shot cotton that was in the running, but in the end I went with denim.  I found a few metres of it in the bottom of my shelves, and when I got it out and looked at how dark it was, I remembered a tip from one of the girls at the Sit n Sew day I went to!  Emma from For My Little Monster uses her denim INSIDE OUT!!!!  Bingo!  This front section is also a big old pocket - with another magnetic snap!
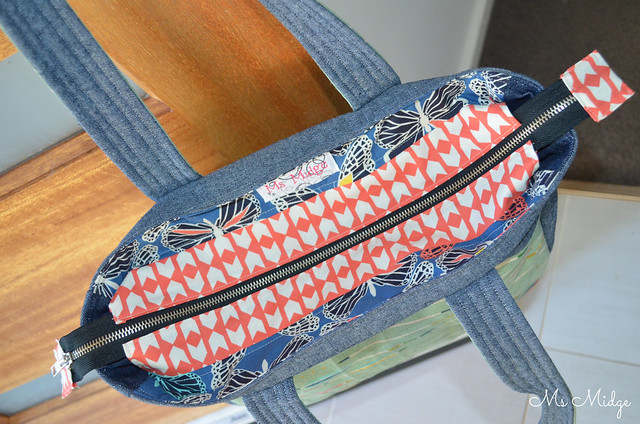
Cotton + Steel Supertote

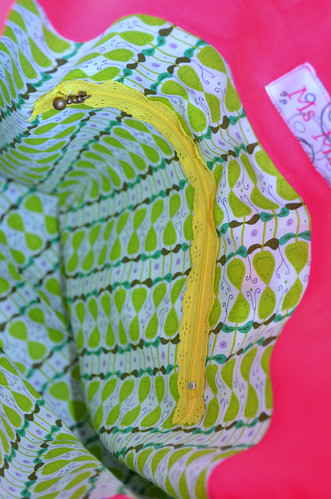
Once I sorted those main parts out, I had to work out which prints to use for the million other sections!  This bag pattern is proof that you don't necessarily need to order fat quarter bundles or larger of fabric collections.  You see, I have a fat eighth bundle of Cotton + Steel (in two of the ranges), and from a fat eighth you can get the recessed zipper pieces and the inner pocket pieces!  Yeh!  So I chose my favourite colour for the recessed zipper - coral.  LOVE this print.  The zipper was super easy to do - except for the part where I chose to use a chunky metal zipper.  Please note - metal zipper + hot iron = ouch.  Angie from GnomeAngel had told me of this before, and I was being reallllly careful, but no.  Ouch.  Anyway, I got it done!
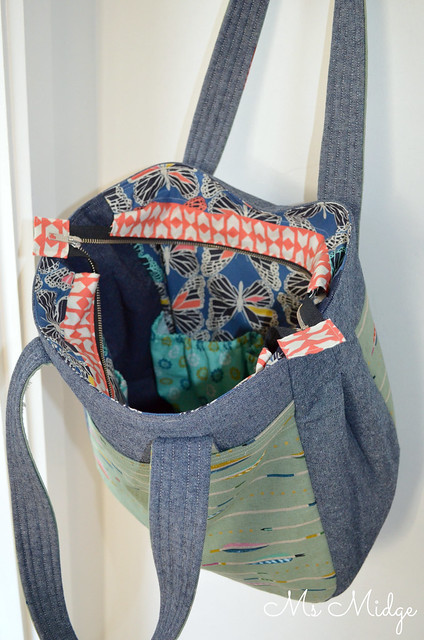
Cotton + Steel Supertote

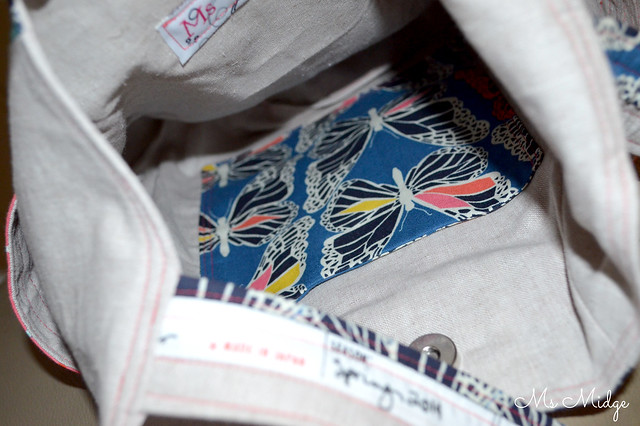
The lining of the bag is the Butterfly print I used for my 241 Tote.
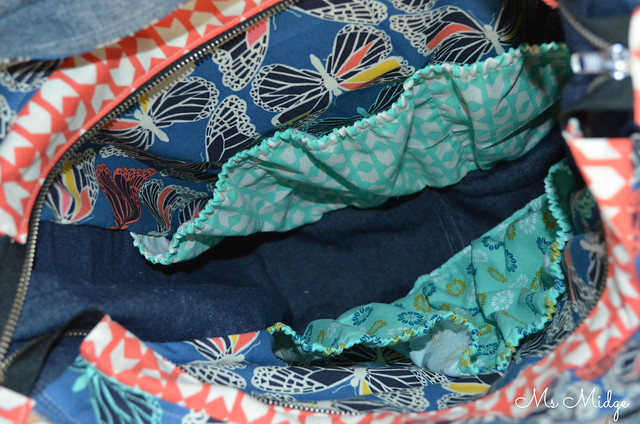
Cotton + Steel Supertote

And the gorgeous little pockets on either sides are yummy turquoise prints.  I'm not sure if you have picked the little mistake I have made with the gusset?  Hmmmmmm.......... well, when I was pulling the bag all the way back out the right way, I realised I had sewn the gusset lining in with the dark side of the denim!  Whoops!  Moving right along.......  Constructing the bag was relatively straight forward.  If you've made any sort of lined bag before, you will be able to work it out - promise.  If you haven't made a bag before, you may want to read the instructions through a few times and really wrap your head around them.  When I was attaching the lining to the recessed zipper sections, it took me a few minutes to realise why it's called "recessed"...... derrrr.....because it sits lower in to the bag!
Cotton + Steel Supertote

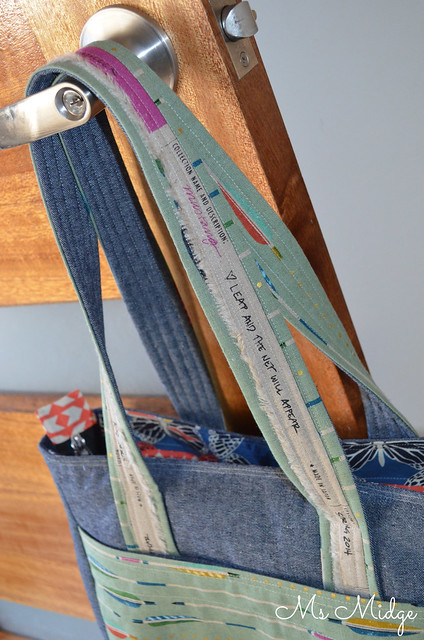
And the handles.  Sigh.  I would be devastated to know if people are actually NOT using the selvedges from these fabric ranges!  They are really something special, with gorgeous little quotes on them  "Leap and the net will appear".  Love!

So, a review of sorts.  I freakin love this pattern!  For the interfacing I used a reasonably heavy weight iron on wadding from Spotlight.  It is not a stiff interfacing - because I don't like my bags to be stiff.  But having said that, I think next time I make one, I will put a slightly stiffer interfacing on the gusset, to give the sides and bottom of the bag a little extra oomph.  Stitching the final topstitching around the top of the bag was a little bit of an effort.  The thickness, especially at the sides of the bag, was reasonably tricky to get through the machine.

I used my walking foot through the entire process (except for the zipper installation).  This made sewing through the layers a little easier.  I used a regular machine needle, because I didn't have a denim one, but I'm thinking next time I shall invest in a denim needle :)  I also used Aurifil 50 weight thread in #2000 - a beautiful golden colour.  I'm thinking a 40 weight thread would be good in future.

All in all - the big thumbs up from me!  I can see many, many more of these in my future.  You can buy the Super Tote pattern by Noodlehead HERE.

I'm linking up - You can too!


Sew Cute Tuesday

PS. This is sort of kind of me sewing along with Sewvivor.  You HAVE to head over to see all the fabulous entries this week for the bag challenge HERE.  And if you're feeling patriotic - remember to vote for our two Aussie girls - Angie and Crystal!

Saturday, August 16, 2014

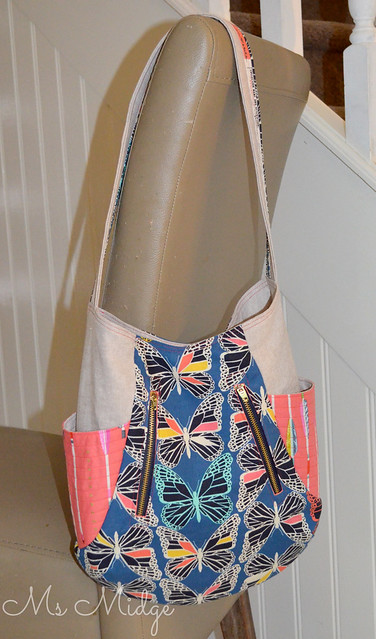
Moonlit 241 Tote

A few weeks back, I asked my IG peeps for bag pattern suggestions.  There was an overwhelming majority happy to recommend both the 241 Tote and Super Tote by Noodlehead.  A few days ago, I finally bit the bullet and bought BOTH patterns!  I then also stopped past Spotlight and got some extra bag making supplies and was ready to rumble!

I'm pleased to say I have finished the 241 Tote today!  And I'm a very happy camper....

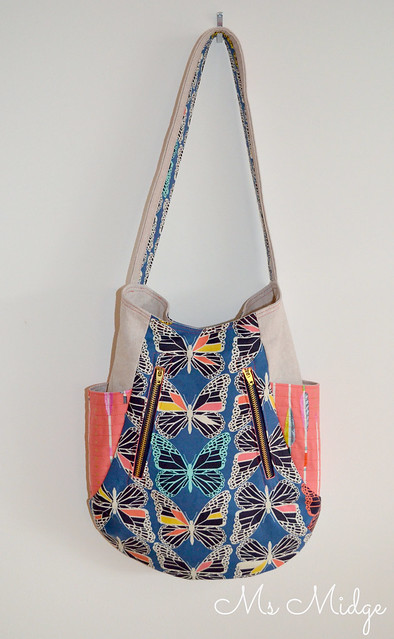
Moonlit 241 Tote 

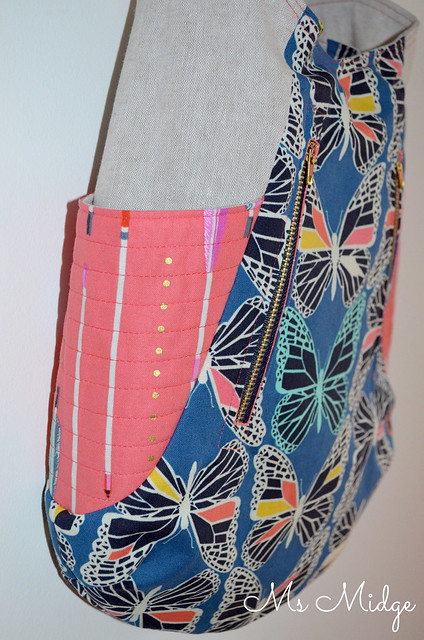
Even though I was expecting a canvas butterfly print from Cotton + Steel's new range, I still went ahead and used the quilting cotton that arrived.  And I'm so glad I did!  I love the combination of the denim blue butterflies and coral arrows.  Yummo!

Moonlit 241 Tote 

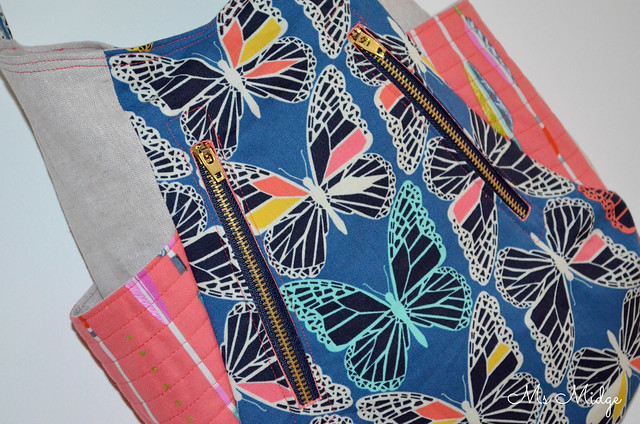
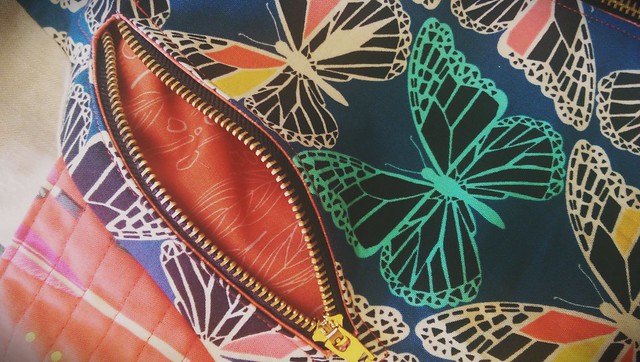
The side panels and lining throughout the bag are Essex Linen.  It contrasts perfectly with the other prints.  I purchased chunky metal jean zippers for the front.....a first here.  What I didn't think about was the fact you can't cut the ends off if you want to make them a bit shorter, like regular dress zips.  Whoops!  So I had to sew a wider berth around the top and bottom of each zip.  I love the look of them.

Moonlit 241 Tote 

I used Aurifil #5002 - a beautiful shade of coral - for all of the top stitching.  You know coral is my favourite colour right?

Moonlit 241 Tote 

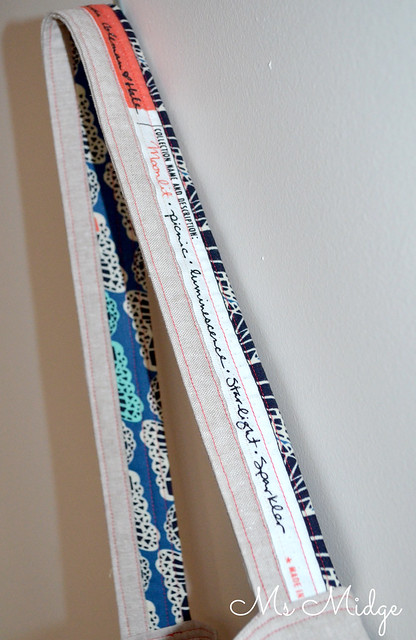
And probably my favourite part of the bag - the handle.  I don't know how anyone could bare to part with these fabulous selvedges?  I couldn't!  The instructions direct you to cut a piece of fabric 6" x 26" for the handle, so I cut the selvedge off at 2.5", then 4.5" of the linen.  Cut the linen in half length ways and inserted the selvedge between them.  I had to sew the edge of the selvedge on TOP of the linen on one side, so as not to lose any of the text.  I freakin love it!

Moonlit 241 Tote 

Another first - magnetic snaps!  Never used them before, but I can now see them becoming a regular fixture on my bags!  So easy!?!?!?  I also love the little slip pocket on the inside - you can never have too many pockets in a bag.

2014-08-16_04-34-53 

Speaking of pockets..... The leaf print from Wee Wander co-ordinates divinely with the arrows.  Winning.

Moonlit 241 Tote

So - overall a very fabulous bag!  The only thing I WILL do differently when I make my next one (and undoubtedly many more after that) would be to upsize the pattern a little.  But for me, it's actually the perfect handbag size.  

Great, easy to follow pattern, with plenty of instructions.  I used a dressmaking interfacing - sort of like spiderweb weave - and it was enough structure as I don't like "stiff" bags.  I think if you added some batting to it, it would be ok also.

Next stop - the Super Tote!  You can find the 241 Tote Pattern HERE.

Tuesday, April 22, 2014

Fun With Fabric - "Enchanted" by Sarah Fielke

A few weeks ago, I answered a call from Windham Fabrics, who were looking for people to help out with items for their Spring Market booth and Catalogues.  Lucky for me, they chose to send me Sarah Fielke's new range "Enchanted" to make whatever I pleased!  I was a little excited and was thrilled when I opened the package to find some beautiful, bright and divine prints to work with!  It took me a couple of days to decide what I would make, but I think I chose wisely.....

Sarah Fielke "Enchanted"

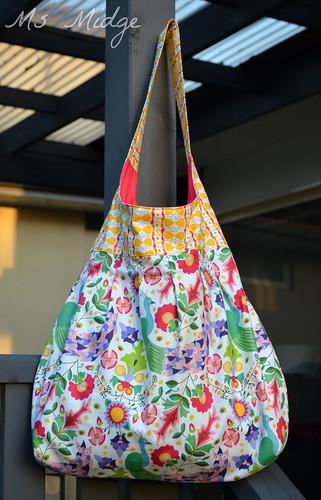
"Peacock Garden in Spring" is perfect for the Boho bag, because of it's big bold print.  The colours really have to be seen to be appreciated.  I teamed it with "enchanting stripe in Autumn" for the top and handles, which is, to me, like a mix of love hearts and beanstalks!

Sarah Fielke "Enchanted"

The "enchanting stripe in Summer" is the most perfect shade of lime ever!  Given we are just heading in to our coldest months here in Australia, I think these bright colours are just what we need!

Sarah Fielke "Enchanted"

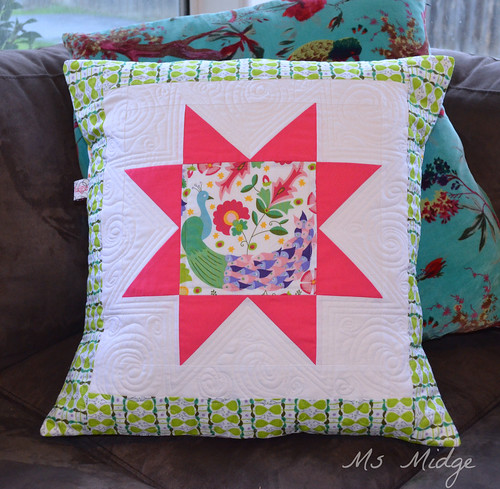
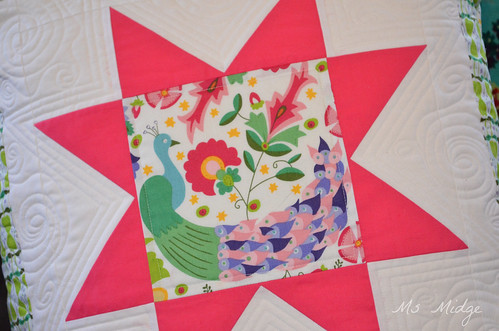
I also whipped up a cushion using the peacock print - which is absolutely perfect for fussy cutting!  The peacock centre block was cut precisely 6.5" square.  Nice one!  The pink solid was also supplied by Windham and is gorgeous quality.

Sarah Fielke "Enchanted"

I used my trusty Aurifil #2024 to piece and also quilt around the star.  Some echoing around the points and then free motion swirls for texture.

Sarah Fielke "Enchanted"

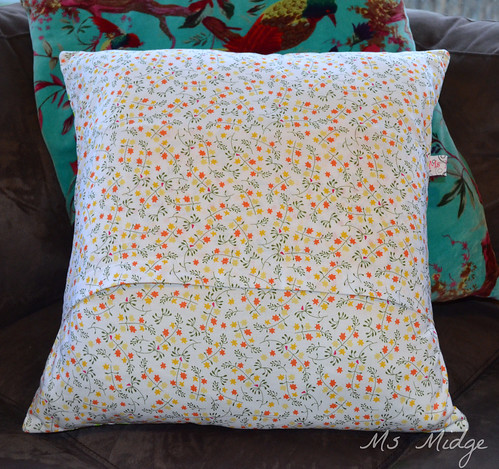
And a simple envelope enclosure on the back using "Enchanting Sprigs in Autumn".  Another gorgeous little print with the tiniest hint of pink.

Now - Sarah tells me the full range will be hitting patchwork and quilting stores from June/July!  So be sure to keep an eye out and get yourself some!  You can check out the full range HERE.

I'm linking up - You can too!


Sew Cute Tuesday

Fresh Poppy Design

Thursday, March 27, 2014

Boho Cat Bag - Yes, I said Boho Cat Bag!

No other name really fits.....

Boho Cat Bag

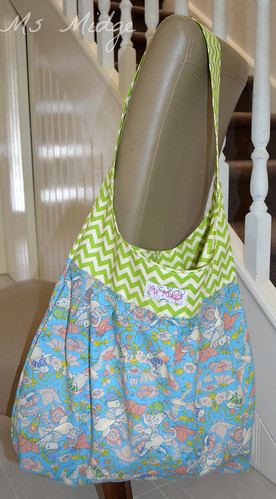
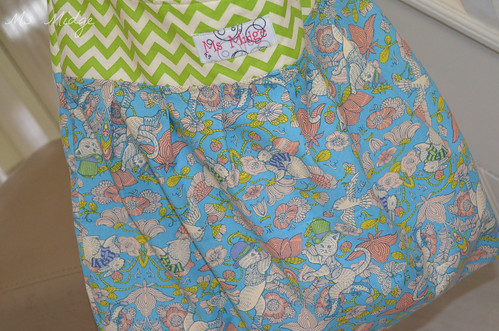
I have had this divine Jolie Pomme fabric sitting on my shelf for over a year.  It came straight from Tokyo in The Great Fabric Haul of 2013.  And today, it was plucked off said shelf for project "make a gift for my 16 year old God-daughter".  I used THIS tutorial by Thimble - it was very straight forward and dare I say - simple!

Boho Cat Bag

The quirky detail in the fabric is just amazing.  Dancing cats and bunnies wearing scarves - Love!

Boho Cat Bag

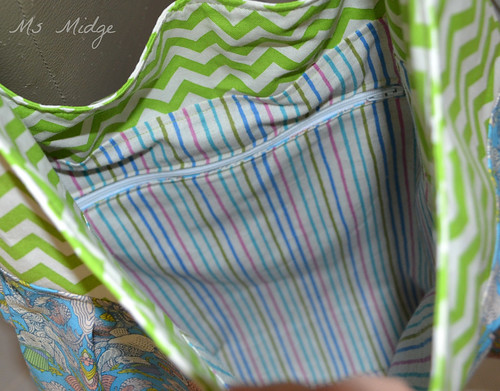
I popped in to Spotlight this morning and grabbed some of their $1 Fat Quarters - this bag used almost two FQ's of the green chevron for the handles and top part and about 2/3 yard of outer fabric and lining fabric.  The lining is a gorgeous stripe that was also at Spotlight in the $4 clearance quilting fabric pile!  I think it may even be a little on the "organic" side.  Winning.

Boho Cat Bag

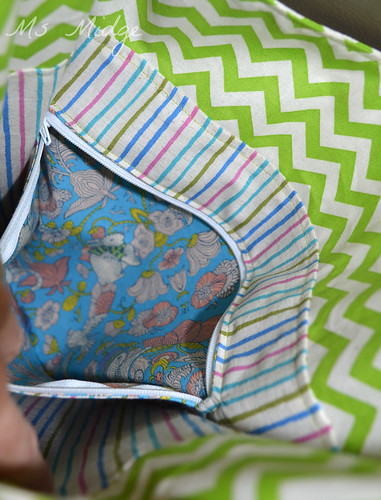
I added a little zipper pocket on the inside using my tutorial HERE, instead of the pocket included in the Thimble tutorial.  The thread is a divine Aurifil Green #5017  I picked up last time I was there.  It was one of those "jump out and grab you" kind of colours, that I really had no plans for - but it was PERFECT for today!  Here's hoping the teenager loves this bag as much as I do!

I'm linking up - You can too!


Saturday, December 28, 2013

The "For Pleat's Sake" Bag - Tips & Zippered Pocket Tutorial.

Thank you so much to everyone for your lovely comments on my Secret Santa gift reveal!  It killed me to keep it a secret for so long!  As promised, I've put together some tips for sewing it together, sort of like a review I guess!  I've also done a little tutorial on how to put a zippered pocket in.  So brace yourself for lots of photos…..

Secret Santa Gift
First things first - You can find the tutorial for this bag HERE.  It really is quite a simple bag to make, once you wrap your head around it!  To be perfectly honest, it took me many hours to get past the first step of getting the pleats done. And I ended up doing it differently to the tutorial, because the measurements just weren't adding up.  Now whether that is because of my lack of mathematical genius, or whether the measurements really just weren't right - You can be the judge of that!  I found the photos and measurements really hard to work out.  So this is what I did (after many times of measuring, pinning, un-pinning, re-measuring etc etc)…...
IMG_5115
I ended up going with five pleats instead of six.  I measured the middle point of the bag pieces, and then measured 1/2" for each of the pleats.
collage
This is how I do my pleats.  Clockwise L-R:  Find the middle point and pin.  Fold the fabric over right sides together with the pin being at the fold.  Pin the measurement for the pleat, in this case 1/2".  Fold the fabric back over to show the right side and pin the pleat down.
IMG_5117
I then press the pleats well and depending how big they are, I will sometimes pin them further down the pleat also.  I followed the other measurements in the tutorial to a tee, in terms of how far down to sew them etc.  Because my pleats were different measurements, it altered the bag measurements when finished - but it was only by a little!

NOW - moving on to another little tip that I like to see visually…..

IMG_5120
The tutorial gives good instructions on how to make a flat bottom for the bag, however, one thing I wanted to see, was this.  I find it quite fiddly to match up the seams, but if you can peek inside the bag and visually match up the seams, and run your finger along it, you can pin it on the outside to ensure it's still matching!
IMG_5121
And pin that sucker down ready for measuring, sewing and then cutting.

PUTTING IN A ZIPPERED POCKET - I'm not re-inventing the wheel here, in fact, I used a tutorial from the pattern I bought to make my camera bag, which you can find HERE.  The one difference is that this time I used a decorative zipper…..
IMG_5124
So once I'd sewn the pleats in to my bag panels, I then set about putting the pocket in.  First thing to do was find another co-ordinating fabric and cut it to size - I cut it 12" x 16".  My zip is 9" long. (I had to cut a second piece of fabric as the one pictured above wasn't wide enough!)
IMG_5125
On the wrong side of the zipper pocket, I measured down 9" and marked a line, then another line 1/2" under that.  Then measure 1" in on either side and mark the lines to make a long rectangle.
IMG_5126
Place your pocket fabric right side facing down on to the bag panel, centre it.  Also measure approximately 1 1/2" down from the top to where your top line will sit.
IMG_5127
Pin in place.
IMG_5128
Now you sew over the long rectangle that has been marked, making sure to backstitch at both the beginning and end.
IMG_5129
Mark a line through the centre of your rectangle, and two diagonal lines like above.
IMG_5130
And using sharp scissors, cut along those lines - being very careful not the cut the stitching.
IMG_5131
You then need to pull the pocket fabric through the hole to the other side.
IMG_5132
Giving you a neat opening.  Press firmly and neatly.
IMG_5133
You then take your zip and place it over the top of the opening, pinning in place.  Sew around the zipper, making sure to catch the fabric underneath…..
IMG_5134
And sewing over both ends of the zip.  If you're not using a decorative zip, you just need to sew the zip to the other side of the pocket, with the zip showing through.
IMG_5135
Lastly, you bring the pocket fabric right sides together and sew all the way around, creating the pocket. (You don't sew the pocket on to the bag panel!) This will now sit in between the outer bag and lining.

And one last little tip for the construction of this bag.  And I am finding it very difficult to articulate this!  When it comes to sewing the lining and bag together, I had to unpick the side sections a couple of times and come up with a different way to do it.  Once again, I think more photos would have helped.
IMG_5136
To start it off, you need to line up the V sections at the side.  But because of the bulkiness of it, it wouldn't turn through nicely for me, which was frustrating!
IMG_5138
So I had to start off the stitching here a little differently.  I actually sewed straight across about half an inch at this section.
IMG_5139
Like this.  And then line up the rest of the bag as per the tutorial and sew all the way around, just leaving the opening at the bottom.  I found it turned out relatively neatly this way!

Secret Santa Gift
^^^^^^^^^^  For those sections up there at the sides ^^^^^^^^^
IMG_5140
And just because the tutorial doesn't mention this, to close up the opening on the bottom of the lining, just tuck the seam allowance inside and press….
IMG_5141
Then sew along the bottom of the lining around 1/4" in.  This makes for a nice neat finish on the inside of your bag!

The tutorial also only calls for you to top stitch around the sides of the bag, however I chose to top stitch around the top also.

One last thing.  The bag handles.  The tutorial suggests where to buy them, but they are UK based.  I found some HERE on Etsy, shipped from Asia, and they are fab.  Not leather, but a great finish!

And there you have it!  I really do hope that all of this makes sense, and is helpful is you choose to make yourself one of these fabulous bags!  I have put one on my to do list - for myself!

Thursday, December 26, 2013

Secret Santa Gift Revealed!


As you would now know, earlier this year I was invited to join a wonderful paper piecing bee - Wombat Stew.  For someone relatively new to paper piecing, it has been such a fun adventure, learning all sorts of new tricks!  But the best part about this bee has been the friendships I have gained.

A couple of months ago, the girls decided we should do a secret Santa swap.  I was so excited, I 'd never been a part of one, in handmade circles anyway, and so I started thinking and over thinking what I would make my partner.  I waited for my email telling me who my recipient would be, and was thrilled (and terrified) to find it was Gina from Party of Eight.  Gina is one super talented lady, and the pressure was on....

Thankfully, these crafty gals are also smart, and we set up a thread in our FB group to tell eachother our likes and dislikes, and what kinds of things we would love to receive.  Amongst other things, Gina mentioned she would like a tote bag, and in her favourite colours list was "a warm sunny yellow or mustard".  Bingo!

I knew I'd pinned a fabulous tote bag tutorial I'd always wanted to make, and I had THE MOST PERFECT yellow fabric on my shelf awaiting use.  And so this is what I made.....

Secret Santa Gift
The "For Pleats Sake" tote bag.  The fabric is a divine Japanese print by Kayo Horaguchi.  It's a little heavier than quilting cotton, so perfect for this project.  And the most perfect shade of yellow/mustard.
Secret Santa Gift
I auditioned quite a few fabrics for the lining, and even asked Chelsea which she preferred.  This Anna Maria Horner Field Study won.  And in my humble opinion is perfect!  I also used a pretty decorative zipper I'd had sitting in my drawer forever.  The zipper pocket is not in the original tutorial, but I will be doing my own tutorial on how I made this bag in the next day or so for you all!
Secret Santa Gift
I love the colours!
Secret Santa Gift
I couldn't just send a bag, so I collected a bunch of other lovely goodies to add.  There's a big pack of Tim Tam biscuits (cookies), which are the best Australian chocolate biscuits around!  Some strawberry fabrics (Gina has a thing for them), some Snugglepot & Cuddlepie fabric (a famous Australian story book) and a few sewing notions.
Secret Santa Gift
And this is how the bag looks worn.  Excuse the dodgy picture - I was in a rush to get this packed up and ready to post and asked the five year old to take the photo!
Secret Santa Gift
I pieced and top stitched the bag with Aurifil #2810 50wt.  The tutorial states to use a couple of different threads for attaching the handles, however, I couldn't find them in the store. And due to my rushing to get it sent, I just triple threaded my big needle and gave it a shot!  I'm hoping it will hold, and hoping Gina will forgive me if she has to re-sew the handles on!
Secret Santa Gift
The reason for my rushing?  Well, my darling mother in law was heading over to the USA for a long holiday and said she would take my parcel and post it over there for me.  The handles arrived from China the day before her departure, so I madly attached them, got to the post office for a postage box and then wrapped it all to go!  Cudos to Gina for her patience - this parcel arrived at her place weeks ago, and she must have sat it under her Christmas tree, as she only opened it on Christmas Day!
I thoroughly enjoyed making this bag!  And just like the cushions I never make myself, this bag makes me want to make myself one!  One day.....

As I said earlier in the post, I will be back in the next couple of days with my version of the tutorial for this bag.  There were a few things in the original I just couldn't work out or get to work, so I took lots of photos to show you how I made it work!

Christmas Day is done and dusted here in Australia, and we are now looking forward to the New Year......I have so many plans, so many projects......  How about you??
Related Posts Plugin for WordPress, Blogger...