Day 12 people! You just HAVE to head over to see
Gina at Party of Eight: Our Story! She has the sweetest little tutorial for a Christmas cushion! Makes me want to get paint out. When the kids aren't here. Terrible mother I am…..
Anyway, there's only a couple of days left until I open the Linky party up for everyone to SHOW ME YOUR CUSHIONS! If you're not down with the program, head on over
HERE to my original post to get all the information you need, and make sure you're back here on time to link up!
Meanwhile, back at my place, I've finished my final order for the year! Well, ever time I say that, someone else asks me to make something, so I shouldn't bet on it. Every now and then, a customer comes to me with a new request - an item I haven't made before or made to sell before. This happened a couple of weeks ago. The lovely Emma had seen the Fairytale fabric I had in stock and asked whether I could make a doona (duvet) cover set for her daughter for Christmas? Ummmmm, sure! I've only ever made one doona cover before, but I knew it was feasible. It was just working out a quote and getting the thumbs up. Which I did to both.
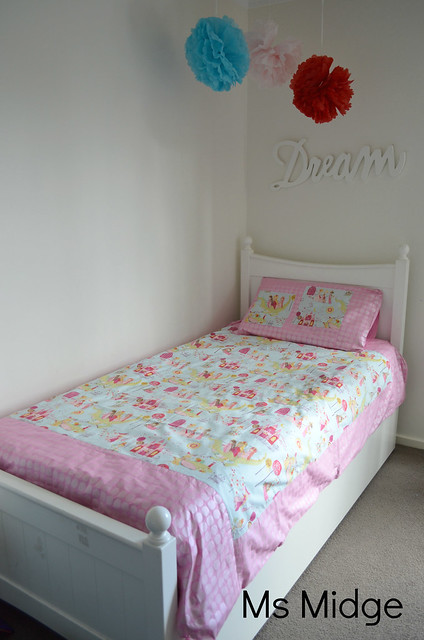
So without further ado, here is the divine Fairytales Doona Cover Set that was posted off yesterday!
 |
| I had to try it on my daughter's bed to make sure it all fit properly……I didn't want to take it off…. |
 |
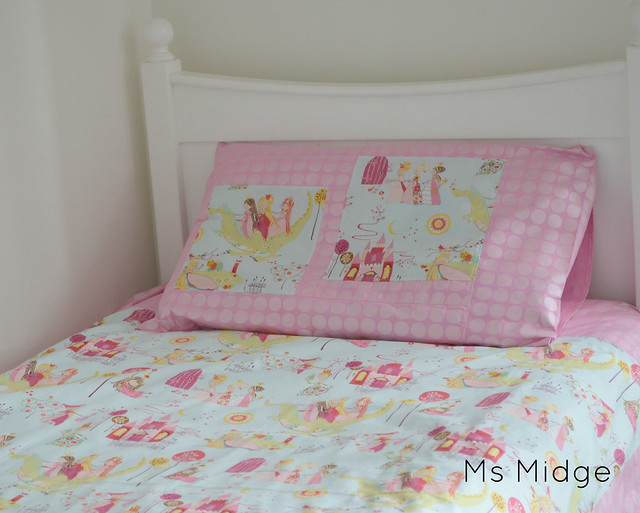
| I'd never made a pillowcase before, so had to wing it a bit…… I'll show you how I put it together at the end of this post! |
 |
| It's just a little bit patchworky…... |
So, how does one make a pillowcase when one cannot find a tutorial that mentions the foldy/envelope bit that tucks your pillow in? Well, one takes off her own pillowcase, turns it inside out and works it out from there…..
But in case you were wondering, I took some photos to show you!
 |
| First of all, I measured up the existing pillowcase. Mine was 29" x 20". And then the envelope section on the inside of the case is an extra 7". So, for the pillowcase front, it is 36" x 20". The back is 29" x 20". |
 |
| On both the front and back right hand sides, I did a neat little seam with no raw edges showing. So fold the edge over half an inch, and then again, and sew done. |
 |
| Here you can see the two pieces ready to go. |
 |
| Place the back on top of the front, right sides together, with the longer section to the right (with the neat seams). |
 |
| Then fold the longer section over on top of the back. |
 |
| Like so. You will have the right side down on to the wrong side of the back. |
 |
| Pin it all in place. |
 |
| Sew the entire way around with a 1/4" seam allowance and then neaten your edges with an overlocker or serger. |
 |
| And you're done! See the fabulous little envelope inside that will hold the pillow in? |
 |
| This order was actually a lot of fun to make! And it ended up so neat I was even surprised with my efforts! All the inside seams - even on all the sections of the pillowcase were overlocked, so it should last many years to come! |
I'm linking up with Needle & Thread Thursday - You can too!


I think I saw this on instagram. It turned out super cute! :D I'm sure the recipient will love it!!
ReplyDeleteSuper cute!
ReplyDeletethese fabrics are fab! such a sweet set.
ReplyDeleteSo cute!!! I love those fabrics!
ReplyDeleteAdorable doona set you whipped up Midge! If it wasn't a custom order I would say to leave it on your daughter's bed.
ReplyDeletecutest little girl fabric, ever!! and great to read your explanation of the pillowcase construction!
ReplyDeleteThank you so much for sharing this at Needle and Thread Thursday!
:) Kelly @ My Quilt Infatuation
A beautiful finish suitable for a princess! I like how you offset the panels on the pillow.
ReplyDeleteGreat Blog !!!
ReplyDeleteThanks for sharing such nice blog.
You have a nice collection.
I like to buy duvet cover sets....