Showing posts with label Quilt Story. Show all posts

Tuesday, December 2, 2014

Confetti Cannon

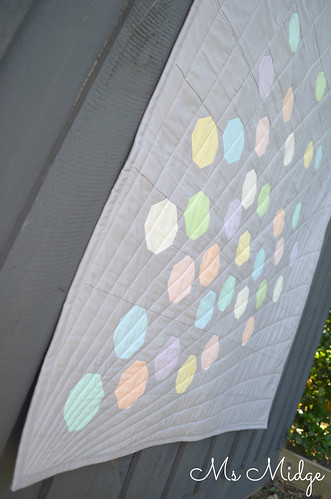
When the MQG sent out an email a few months ago, regarding the Quiltcon Michael Miller challenge, I very quickly signed up thinking "this will be fun!"  I received my little bundle of pastel cotton couture weeks later and thought "Ummmmmm".  I had no idea how to make the pastels work.  I mean, I've only ever used pastels a few times in my quilting life, so was left a bit deflated.  I took them out again not long after and just stared at them.  That was when I thought of Confetti.  The tiny little pieces of pastel paper, which are used in celebrations everywhere.  And that was my inspiration......

I went "old school" for the planning of this quilt.  After weeks of having confetti twirling around in my head, I got myself some grid paper and pencils, and literally just drew up what I'd been thinking of.  And the following day, made the entire quilt top.

Confetti Cannon

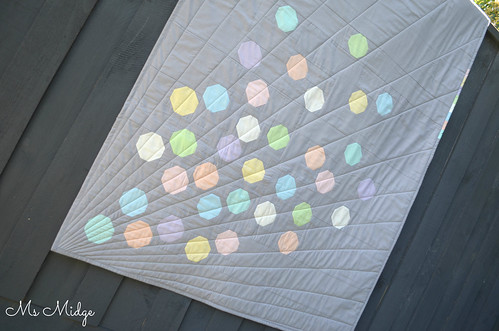
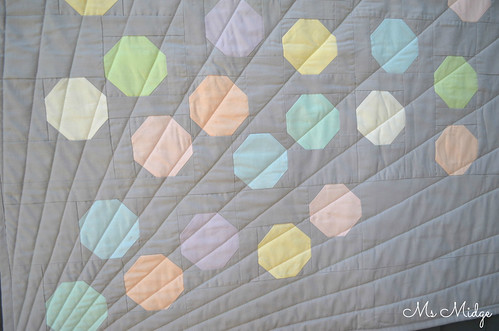
As per usual, I winged it a bit!  I made it up as I went along - literally dividing my design up in to blocks of squares of rectangles, however the little confetti spots would fit in.  The 3" snowball blocks were easy-peasy.  34 in total.  Because I wanted the confetti to be randomly scattered throughout the quilt top, it made the piecing rather, shall we say "interesting"?  It is probably what some Modern peeps would call "improvisational" - I just call it random!  But it worked - and that was the end result I was after...
Confetti Cannon 

Once I had the top made, I thought and thought and thought about how on earth I was going to quilt it.  I had an idea in my head, but thankfully one of my lovely MQG friends - Katrina - cemented the idea and helped me visualise it!  I think the diagonal lines from the bottom corner help create movement and project the confetti up in to the air!

Confetti Cannon 

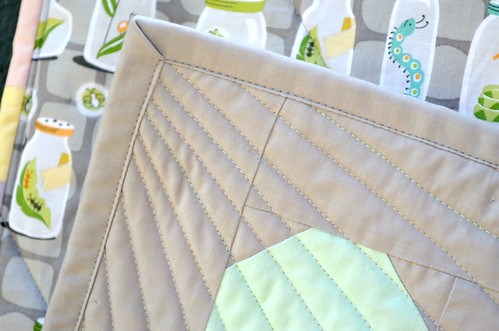
I mostly stuck with the grey for the binding, but also added a little pastel rainbow to the side.  I LOVE it!
Confetti Cannon 

This photo shows you a little more closely how the piecing has been done.  It's one very fiddly jigsaw puzzle!

Confetti Cannon 

The Michael Miller challenge rules are to use all Cotton Couture in the quilt top and then any Michael Miller fabric for the binding and backing.  I made a quick trip down to the large quilting store nearby and scoured their shelves for something to suit as backing.  This quilt was always going to be for a baby/child, so when I stumbled (literally, I stumbled over it) over this Backyard Baby print, I grabbed it!  It's SO perfect.
Confetti Cannon 

It's a little difficult to photograph, but I used several pastel shades of Aurifil in the quilting - re-threading my machine after every. single. row.  Was it time consuming?  Yes.  Was it worth it?  Yes!!
Confetti Cannon

I spent all day Saturday stressing about the photos to submit!  You see, I've never actually entered a quilt show!  And the rules state only two photographs to be sent in - one hanging on a wall and the other a close up.  So I moved furniture in my front room so as not to get any shadows and did my best!  I guess only time will tell.....

I have thoroughly enjoyed this challenge - because it really was a challenge!  Throw a girl some pastels and see what she can come up with!

The Stats:

Name:  Confetti Cannon
Size: 40" x 60"
Fabric: Michael Miller Cotton Couture pastels & Ozone.  
Backing:  Michael Miller Backyard Baby
Quilting:  By Me on my Bernina
Thread:  Aurifil 40wt Pastels

I'm linking up - You can too!
Sew Cute Tuesday

Fresh Poppy Design


Tuesday, September 23, 2014

Make Modern Magazine & My Pavement Puddles

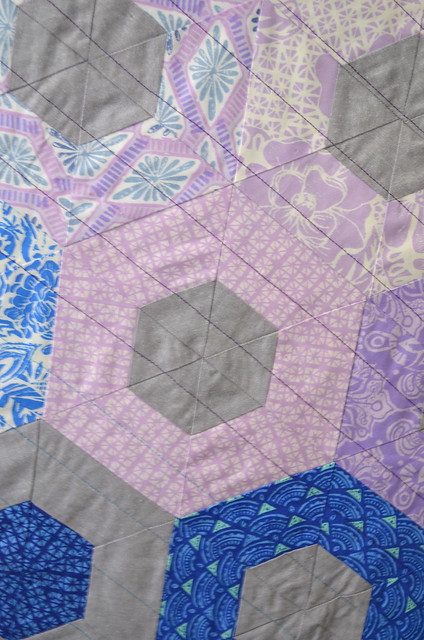
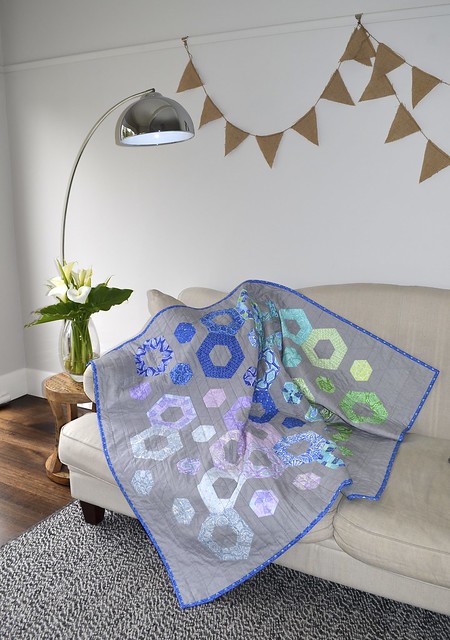
Today is my day on the Make Modern Blog Hop.  I know I've spruiked about the magazine and my contribution when it first came out, but today I get to tell you how my Pavement Puddles quilt came about!

 I went through varying stages of ideas and designs for ideas before I finally got to my submission.  There was talk of a laptop cover - which I got 3/4 of the way through before stuffing it up and having a meltdown.  Then I was going to do a giant floor cushion cover - before I changed my mind again and, you guessed it,  cue the meltdown.  Eventually, it was me not getting through to the Sewvivor top 16 that cemented my quilt submission!  You see, Pavement Puddles began in the upstairs of GJ's in Brunswick - where I spent a Saturday sewing with some blogging friends.  I'd finished the paper piecing I had taken with me, and decided to pull out my Horizon jelly roll. I had earmarked a hexie project in the hope that I would make it in to Sewvivor and would need a hexie project!

Anyway, I wandered downstairs to the shop floor and found the Peppered cotton by Studio E, bought myself a metre and went on my way.  After constructing my first few hexies, I knew it was a winner!  I marched straight back downstairs and bought the last two metres of the peppered cotton, and took it all home and put it on the shelf....

Fast forward a few days later, and finding out I was a not going to need the hexie project, I took this little old photo and sent it through to the MM gals.....


And asked if this hexie quilt idea would be one they'd like for their magazine?  Then fell over with relief when the answer was Yes!

Anyway, I guess the moral of that story is - Missing out on being a Sewvivor contestant really was the best thing to happen to me at that very time!  Because as they say - the rest is history!

Pavement Puddles came together as a quilt remarkably fast.  For some remarkable reason, my lack of mathematical ability flew out the door, and all of my measurements worked out! But as usual, I decided I needed to throw a spanner in the works, and emailed Kate & Pete Spain to see whether they could help me source some yardage for the backing.  They were incredibly generous and helpful, and a week later, I had backing fabric in my hot little hands.  Needless to say, I got the quilt finished and submitted in the nick of time!

DSC_0435 

DSC_0425

I named it "Pavement Puddles" because it reminds me of the colourful puddles left on the pavement after a sun shower.

Sooooooo, that's how my first ever submission for publishing rolled.  It was a giant learning process for me, and the ladies at MM were the best cheerleaders around!  

Now, if you haven't already subscribed to Make Modern, or bought yourself the first copy - you can pop over and sort that out right now!!

And if you want some background tales from the other contributors, you can check them out here:

Full Blog Tour Roster:
1st September                   Make Modern
3rd September                   Kristy @ Quiet Play
5th September                   Where Jane Creates
7th September                   Gina @ Party of Eight: Our Story
9th September                   Molli Sparkles
11th September                 Juliet @ The Tartan Kiwi
13th September                 cat&vee
15th September                 Ruth @ Ben and Charly’s corner
17th September                 Kelly @ Kelliotmagic
19th September                 Alyce @ Blossom Heart Quilts
21st September                 Serena @ Sew Giving
23rd September                 Melissa @ Ms Midge
25th September                 Anne @ Hudson Valley Quilts

And if you haven't read the first issue, then I guess you wouldn't know that I'm also writing a little old column each issue!  That's right - I am now to be referred to as the "Domestic Quilting Goddess"...... I'm still laughing.  Each issue, I will be giving a little bit of my own basic quilting advice from my own experience, quilting on my little Bernina.

Thanks for having me Make Modern! x

Monday, June 9, 2014

Bohemian Triangle Quilt

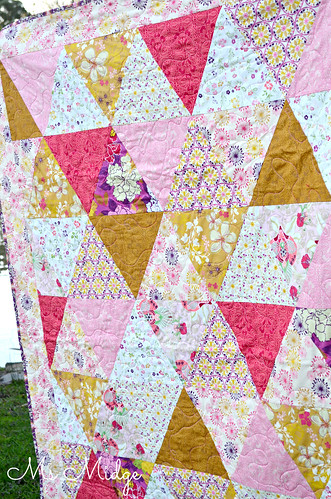
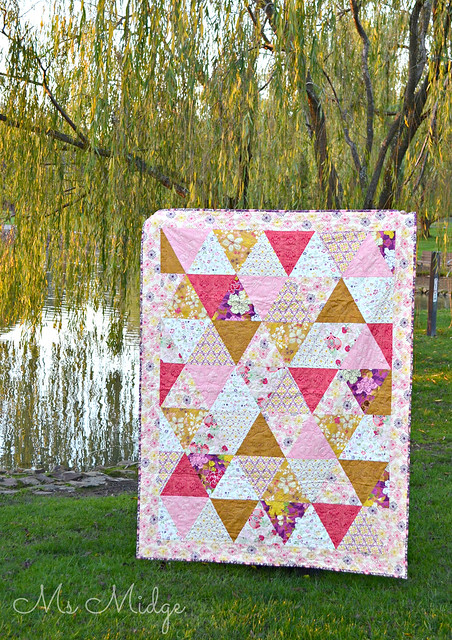
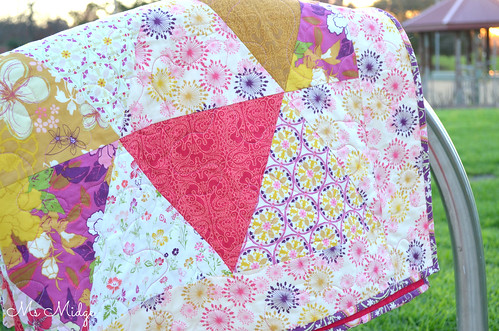
I know I said after my first triangle quilt that I wouldn't be in a hurry to make another, but I really just couldn't help myself!  You see, I signed up for a Pink, Gold & Pearl Showcase over at Siiari Rose, thinking it could push me a little to use colours I would never normally choose.  And then I wondered what the hell I had done, because I couldn't find any fabrics that suited the theme.  Until the last #greataussiedestash on IG, when I found a great big bundle of Art Gallery Bohemian fabric!  I had hit the jackpot.  Half of the range is in green and yellow tones, but this half was perfect.....

Bohemian Triangle Quilt


And the first thing I wanted to do with them was cut triangles.  So I did.  And I could. not. be. happier. with the end result.  I've always loved Art Gallery fabric, but to make an entire quilt top using them is beyond divine.  They are so utterly silky and smooth and sort of......sexy.  Hahaha......

Bohemian Triangle Quilt

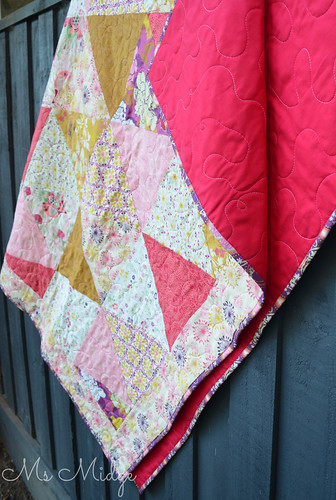
 I got out of my FMQ groove, and jumped in.  I used the gorgeous variegated pink Aurifil thread in a 40wt, in a free flowing meandering pattern with a few loops here and there. The backing is literally the perfect match to the pink print on the front.  It's not as "hot pink" as the photo depicts - it's actually called "ruby" and is true to its name.  It is a broadcloth cotton.

Bohemian Triangle Quilt

This is an "equilateral" triangle quilt.  I used my triangle ruler and made them 9" each side.  I followed the same rules and tips I used for my Isosceles on Point quilt.  Too easy. 

Bohemian Triangle Quilt

I was cross at the weather-gods all of Saturday, as the rain came down......but by Sunday afternoon the sun was shining.  I coaxed my husband out of his tv-viewing comfort and we wandered down to the local park just as the sun was setting.  I promised him he'd only get a few strange looks and he stood where I told him to stand - right in front of the most amazing golden tree on the lake.  I couldn't have asked for a more perfect background to this most perfect quilt!

I'm pleased to say this lovely finish will be available to purchase in the Showcase on July 8.

I'm linking up - everywhere - You can too!
stitch by stitch

Sew Cute Tuesday

Fresh Poppy Design

Tuesday, November 12, 2013

The Go To Gift

A few weeks ago, I started thinking stressing freaking out about what the make the kids teachers for Christmas gifts.  Once I remembered I still had SIX WEEKS (cue the hyperventilating), I relaxed and put some proper thought in to it.

Fast forward to today - and I had only a few "have to sew" things in the morning, and once I'd ticked them off, I got down to the task of the first teacher's gift.  My "go to gift" - a cushion.


Paper pieced Lonestar Cushion

Isn't she beautiful?  I pinned THIS paper piecing pattern last week, and knew it would be perfect to use for a cushion.  And although I love the original I saw, with the coloured fabric centre, I wanted more negative space for quilting, so kept mine white.  I dragged out my bag of Sarah Fielke scraps - leftovers from my Flying By The Seat Of My Pants quilt - and got the star and borders whipped together in a couple of hours.  This is a GREAT paper piecing pattern for relative beginners.

Paper pieced Lonestar Cushion

And then I got my Free Motion on!  These swirly patterns are probably my favourite in terms of free motion quilting.  They seem to be the design I do best - my stitch length is uniform throughout - something I have a bit of trouble with when doing some other designs.  I used a white Aurifil #2024  for all the negative space quilting.  I then took to pebbling the outside border.  I used my recently acquired hot pink Aurifil #1011 for this - and I LOVE this colour!  Now my pebbling is far from perfect, but I quite like it that way :)

Paper pieced Lonestar Cushion

I think the straight line shadowing on the inside of the star gives it a bit of a 3D effect?  I just love it!

Paper pieced Lonestar Cushion

And the back?  This is from a fat quarter of the same fabric range (if you're wondering what it is, it's called "On The Pond") and was easy to make in to a concealed zipper back.  So neat.

So that's another finish off that invisible list of things to do for Christmas.  I'm happy to say that when Cadyn walked through the door from school today, and I showed him this - his eyes lit up.  He was thrilled when he saw it was for his teacher.  He has a real soft spot for this lovely lady, as do I.  She has brought out the absolute best in him, and he's gone from being a kid that was struggling a bit and was anxious about learning - to a confident young man who is excelling in his work and in her words, is eager to learn.  So, me thinks she deserves this little piece of heaven.

NOW - if you are still planning your handmade Christmas list, I have something coming up very soon, that just may interest you!  Watch this space!

I'm linking up with Sew Cute Tuesday, Fabric Tuesday and I Quilt - You can too!


Fresh Poppy Design


Sew Cute Tuesday


Monday, October 28, 2013

Isosceles On Point - A Triangle Quilt

I'm incredibly proud to do the big reveal of my triangles quilt! As you well know, this project has taken me longer than usual, and has made me use my brain considerably more than usual. But it's done! And dusted! And delivered! I've called it "Isosceles On Point", because of the 338 triangles and their beautiful points. Enjoy.......


Isosceles on Point

I was somewhat surprised that it ended up relatively "square" when it was finished. Those pesky little half triangles down the side of the quilt were so out of whack, I thought for sure it would be all over the show!

  Isosceles on Point

I can't take any credit at all (well, just a little) for the fabric/colour combinations in this quilt. From the moment Larissa (my husband's cousin) approached me to make a custom quilt for her, she had a vision of what she wanted - and she stayed very true to that vision! I was VERY nervous taking on the order - Larissa is a visual merchandiser (think Freedom Furniture) and is rather fastidious in her taste for all things interior design. So I was more than happy to sit back and give her space to work out her fabric choices. It worked beautifully, because she managed to find the exact hues she was after, and delivered it! The ONLY say I had in terms of design, was in my finding of the black and white stripe, and the choice to use Aurifil #4670 40wt thread - a divine variegated silver/grey. Larissa trusted me with both of these choices!

  Isosceles on Point

The biggest decision she had was in the backing fabric. Larissa had seen my Wonky Star Cot Quilt, and had fallen in love with the Paloma Grey dot I used. So I searched the web and discovered plenty of yardage at fabric.com. I think it was the perfect choice!

  Isosceles on Point

This photo shows the thread off beautifully. The way it goes from dark grey to a light silver is just divine.  It was my first time using 40WT Aurifil, I'm a 50WT kind of gal.  However, I loved the slight difference in thickness of the thread.  My machine seemed to REALLY like it!  So it looks like another order is in order....

Isosceles on Point

And you can see the same effect on the back. I straight line quilted myself silly on this one. I used my walking foot and did straight lines 1/4" on either side of every. single. triangle. That's a lot of lines. FIVE bobbins worth of lines. It is also the biggest quilt I have put through my darling Bernina. It was quite the workout!

  Isosceles on Point

I love how it looks against the background of my very bright green lawn in the afternoon sun!

  Isosceles on Point

LOVE how the colours all look together. LOVE.

  Isosceles on Point 

 And this last photo? Well, we were sitting at the dining table eating dinner, and I looked towards the staircase where the quilt was hanging. The sunlight was streaming through the front door and I jumped up and grabbed my camera announcing it was the perfect light! My family looked at me like I was crazy crazier than normal, then continued eating whilst I snapped away. Sigh. 

 In the details - Size: King single 87" x 67". 
 Fabric: Prima Homespun solids from Spotlight. Stripe from Lincraft. Dear Stella "Paloma". 
 Batting: Cosy Cotton 
 Thread: Aurifil #4670 40WT - Variegated silver/grey. 
 Quilted by: Me! On my domestic Bernina 430

I'm happy to say this was received with much excitement on Sunday morning.  And I am more than happy to see the back of triangles for quite some time!  Well........ I do have quite a few leftover, so maybe I'll just make something with them......

For those of you who have asked me to do a tutorial and for tips on sewing triangles - have no fear!  I took a gazillion photos during the process and will get down to the task of trying to make them make sense for you all very soon!  Give me a week or so and it will be here!

I'm linking up with a bunch of wonderful linky's this week - You can too!


Sew Cute Tuesday


Fresh Poppy Design


Related Posts Plugin for WordPress, Blogger...