
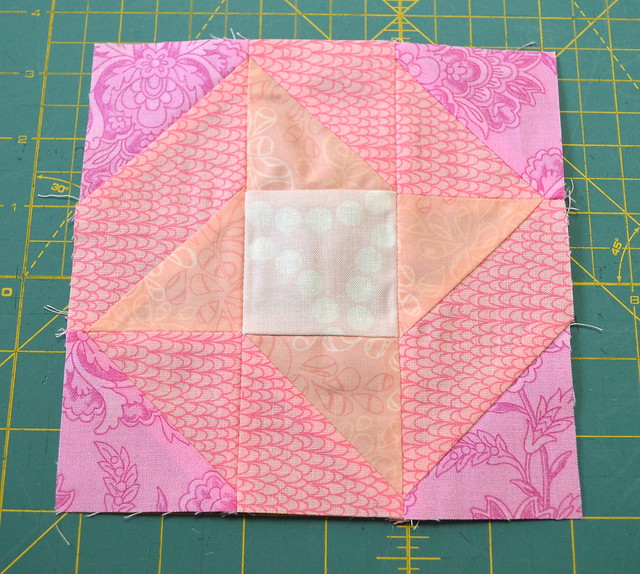
Many months ago, I promised you all a tutorial for a little block I like to call "Radiating Sparkler". Well, today is the day!
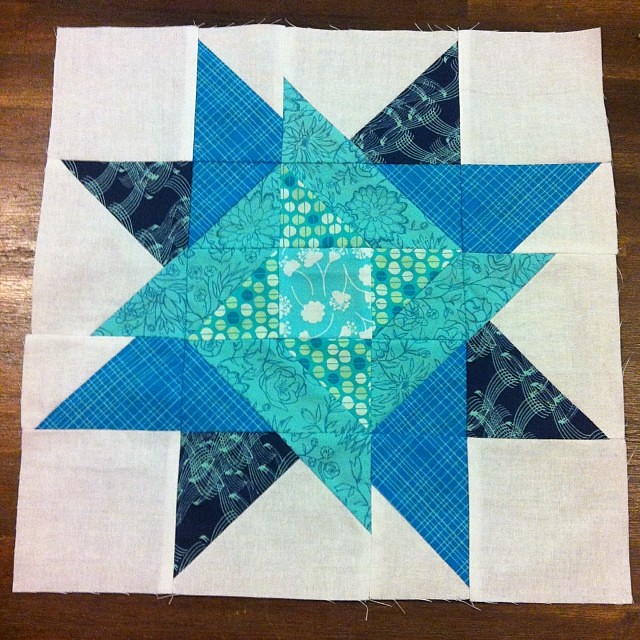
I first came across this block whilst doing the Fat Quarter Shop Designer Mystery Block of The Month. And instantly fell in love with it!
When it came to thinking about which block I would like my QCA Bee #5 to make for me back in March, I kept coming back to this block. After an extensive search on the interwebs, with no results, I ended up emailing Kate Spain, who is the fabulous designer of this block, and asked her permission to share her tutorial with my Bee. Kate very graciously replied and gave me the thumbs up!
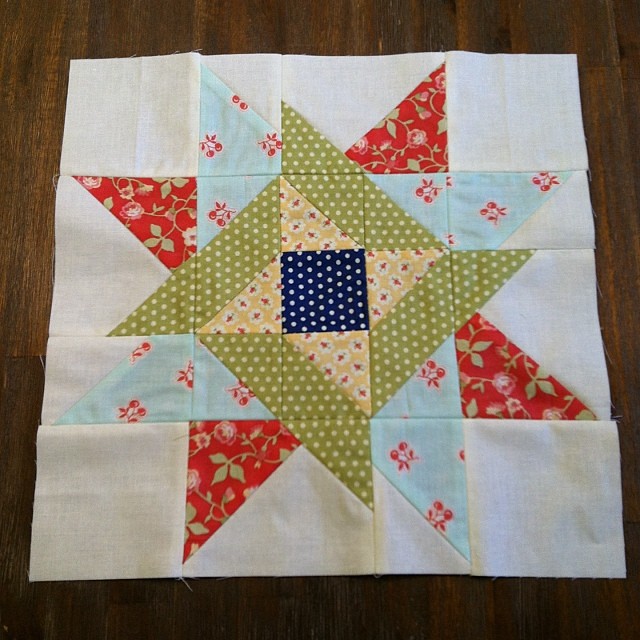
I got cracking and made up my "radiating colour" version of the block to see if it would actually work! And it did! So here is my twist on Kate Spain's "Sparklers" block design. I hope you like it!
Let's go!
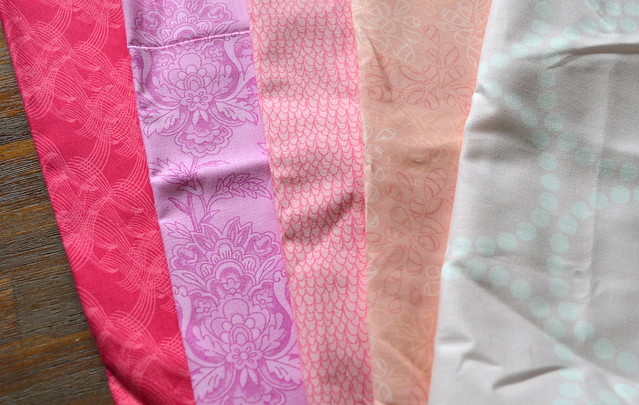
The first task is finding five fabrics in the same colour, but different shades. You want a good progression from light to dark/bright. You don't need much fabric for each block, a fat eighth is plenty big. You also need a background fabric, for my blocks, I am using white.
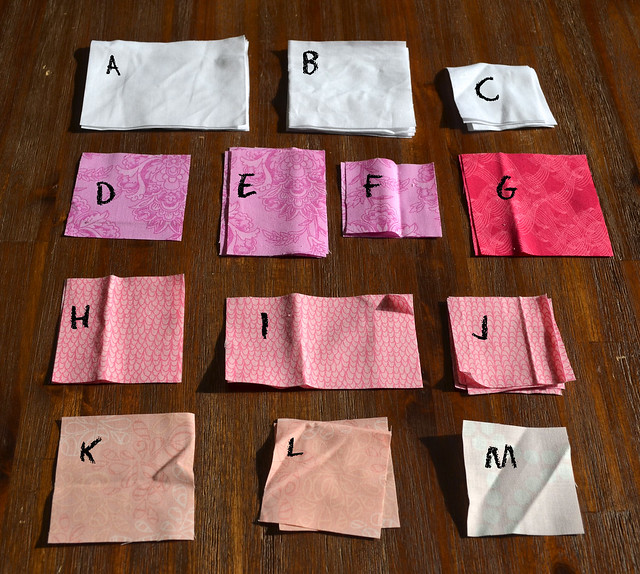
Then it's time to cut:

Now let's get sewing! Use a scant 1/4" seam.
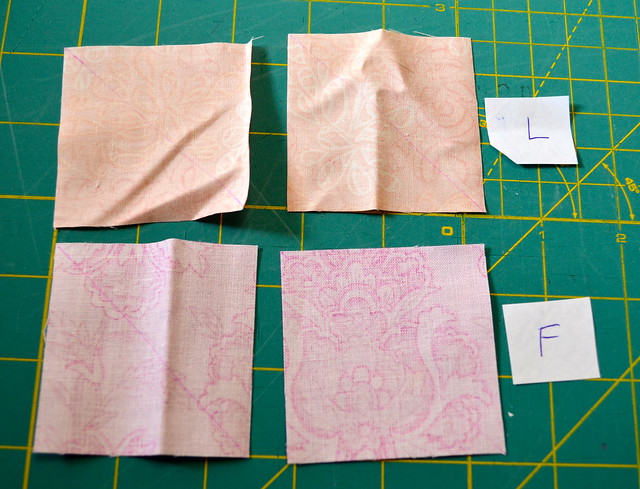
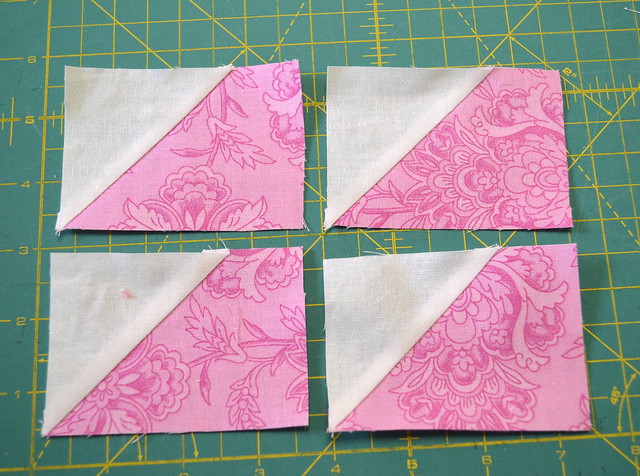
Draw a diagonal line on the wrong side of the fabric L squares and Fabric F squares.
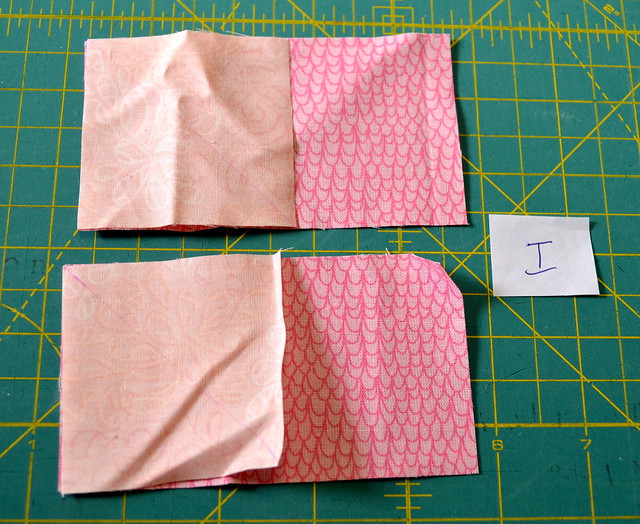
With right sides facing, layer a fabric L square on the left end of a fabric I rectangle.
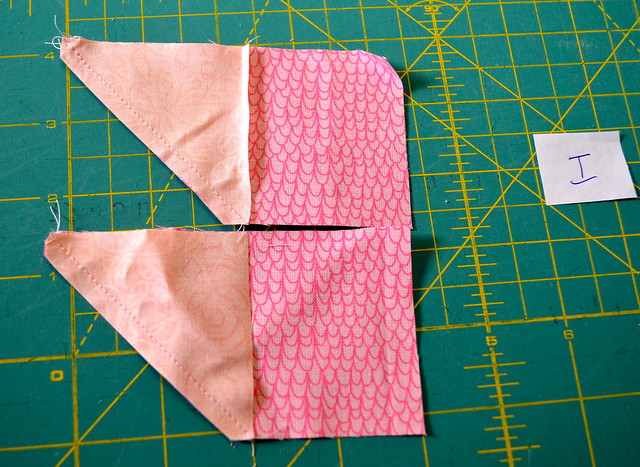
Stitch on the drawn line and trim 1/3" away from the seam. (This is how you will trim the other blocks that ask for same instructions).
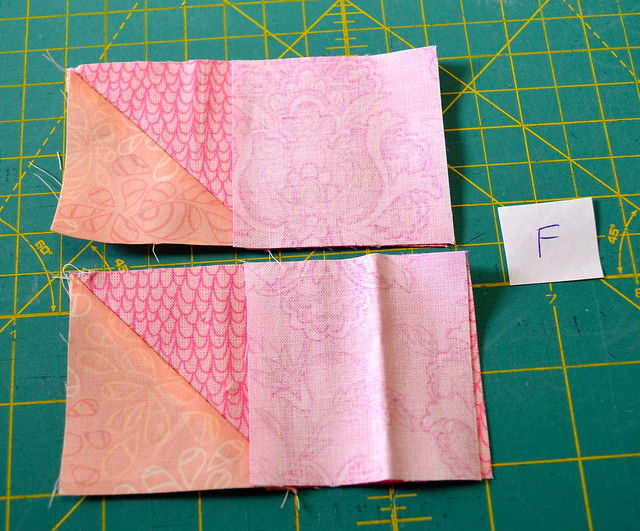
Press to one side. Then take your fabric F square and place on the other end of the rectangle, sewing along the marked line.
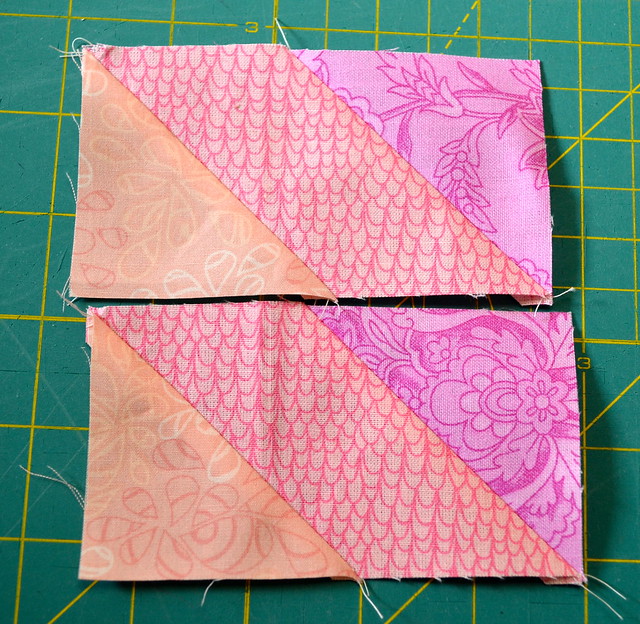
Trim and press. This gives you your first two blocks. They should measure 2 1/2" x 4 1/2". Put to one side.
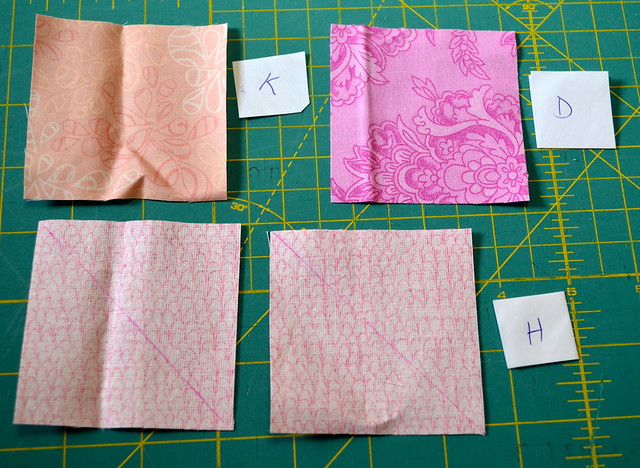
Draw a diagonal line on your H fabric squares and right sides facing, lay on to a Fabric K square and Fabric D square.
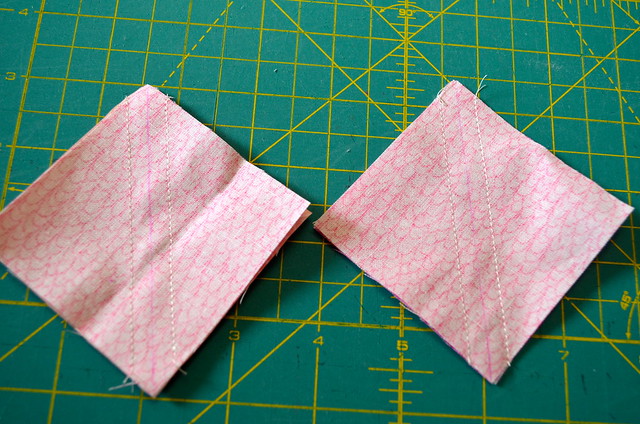
Stitch 1/4" on either side of the marked line to make four HST's.

Cut down the middle on the marked line and press. These blocks should measure 2 1/2" x 2 1/2".
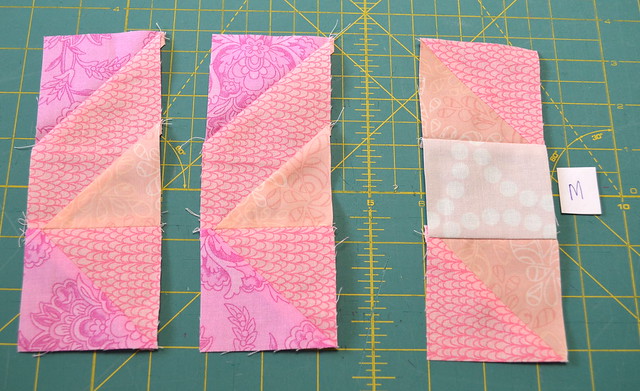
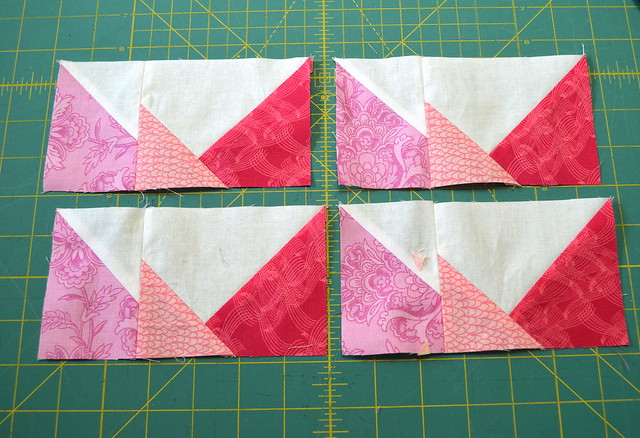
Assemble your F/I/L block and your D/H block as shown on the left. Then take your K/H blocks and attach to your M square as shown on the right.
Assemble those three blocks together as shown above. Put to one side.
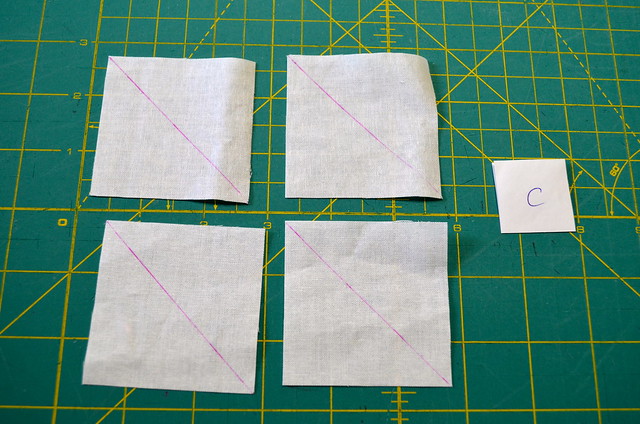
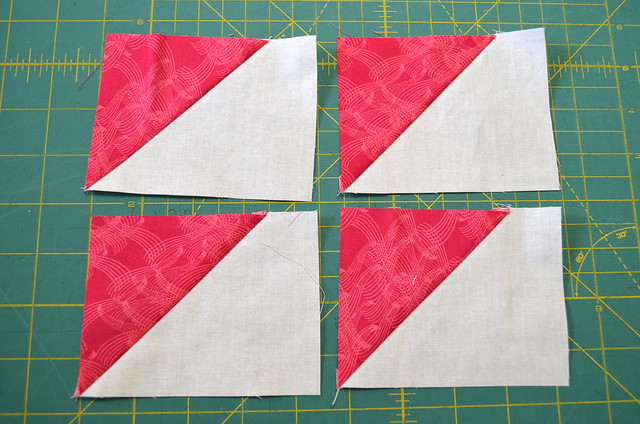
Draw a diagonal line on the wrong sides of the fabric C squares.
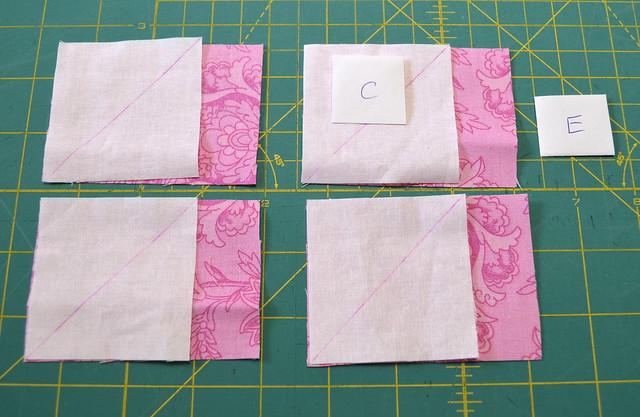
Place them on top of the right sides of your fabric E rectangles, with the line facing as shown above. Stitch on the drawn line.
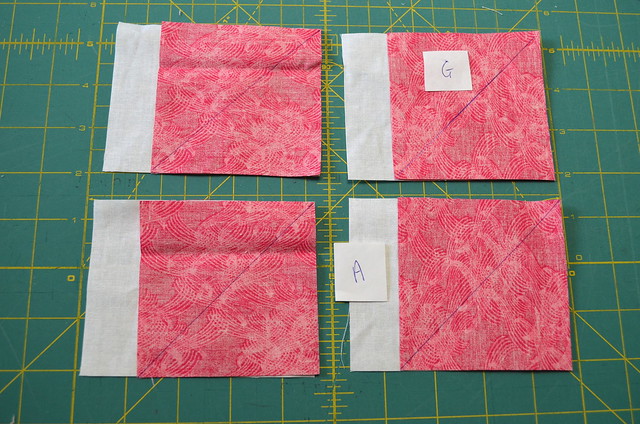
Draw a diagonal line on your fabric G squares, then place on top of your fabric A rectangles as shown above. Stitch on the drawn line.
Trim and press as show above. These should measure 2 1/2" x 3 1/2".
Trim and press as above. These should measure 3 1/2" x 4 1/2".
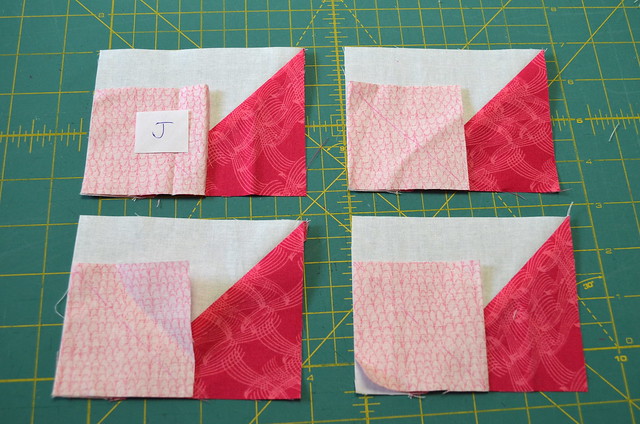
Draw a diagonal line on your fabric J squares. Place on top of your G/A blocks as shown above and stitch on the line.
Trim and press as shown above.
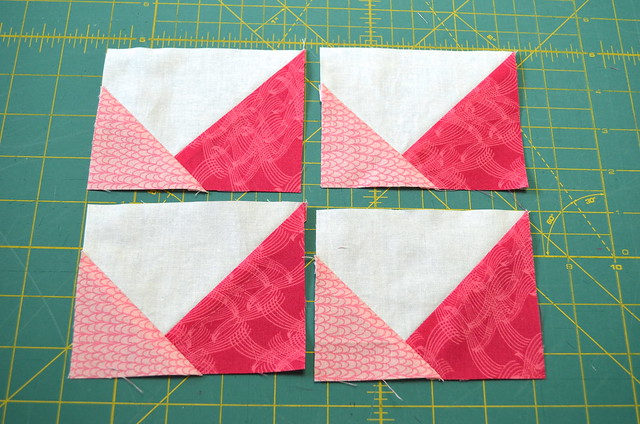
Assemble the last two blocks together as shown above. These should measure 3 1/2" x 6 1/2".
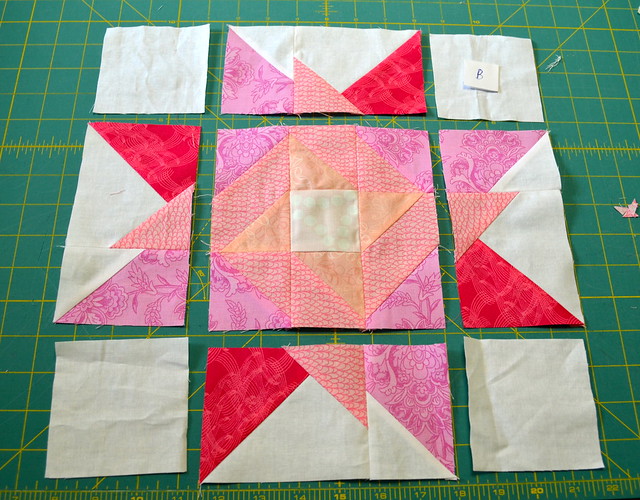
Take all of your finished blocks and assemble them as shown above, adding in your fabric B squares. I sew my the top three, middle three and bottom three together, and then sew the three rows together.

And you're finished! The finished block should measure 12 1/2" square!

And when you receive all your bee blocks, and throw in a few mini sparklers - you get this! I will have a little old tutorial for the mini sparklers in a couple of days for you!
So - what do you think? Will you be making some radiating sparklers for yourself?? If you do, then be sure to show me! Use the hashtag #radiatingsparkler on IG and FB!
Have a wonderful weekend! xx
I'm linking up - You can too!
So - what do you think? Will you be making some radiating sparklers for yourself?? If you do, then be sure to show me! Use the hashtag #radiatingsparkler on IG and FB!
Have a wonderful weekend! xx
I'm linking up - You can too!
Love this! I am going to put it on my list of summer quilts to sew. Thanks for sharing a tutorial for it. :)
ReplyDeleteI love this block, thanks for the tutorial! Any way to get this in pdf form? I can never find these when I want to try something new :)
ReplyDeleteLove this - thanks so much for sharing.
ReplyDeletelooks like a great rainbow scrap buster! thanks for sharing.
ReplyDeleteAbsolutely gorgeous!!
ReplyDeleteLooks great! Thank you for sharing. One day I might actually make it, lol.
ReplyDeleteWhat a great block.
ReplyDeletestoppying by from the linky party Anything Goes Monday. come visit my blog, I have a giveaway.. love the block
ReplyDeleteLove that block...will need to bookmark this. Thanks for visiting Anything Goes Mondays
ReplyDeleteI love this! Might be next on my 'teaching myself how to quilt' list :)
ReplyDelete