Showing posts with label 2013. Show all posts

Tuesday, December 9, 2014

Project Pictorial

Every now and then, I look through my downloaded photos to both Instagram and here on my computer, and I find finished projects I haven't shared with you!  So here is a little "project pictorial".....
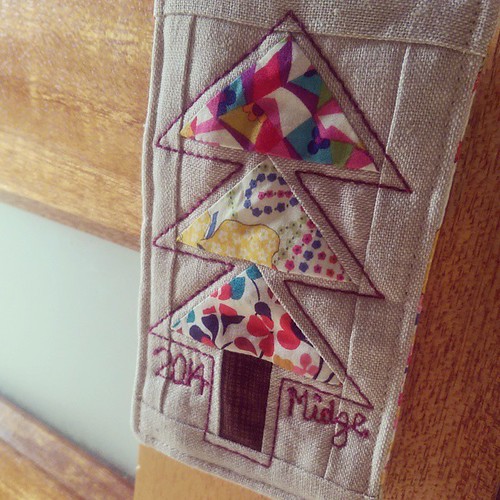
Finished!! I hope whoever receives my Xmas decoration at our #melbournemqg get together likes it! #liberty #aurifil

My Christmas ornament for the Melbourne Modern Quilt Guild swap!  I cracked open my Liberty stash for this one, and love how it turned out.  We swapped on Saturday at our Sit and Sew day, and thankfully my recipient said she loved it!
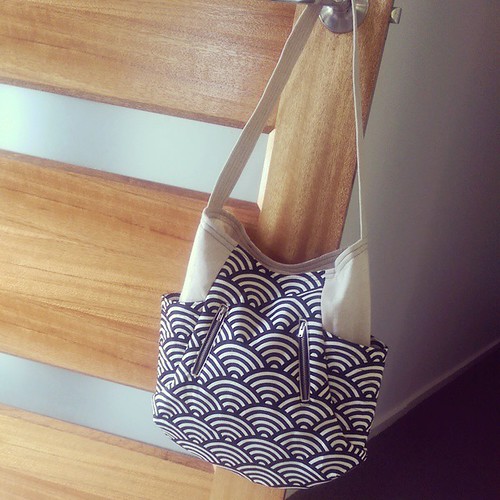
Custom order bag number one finished!

I have had a few last custom orders to get finished before Christmas.  Last week, I managed to get two 241 Totes made - this one is made from some Home Dec fabric I purchased at Spotlight months ago and linen.....
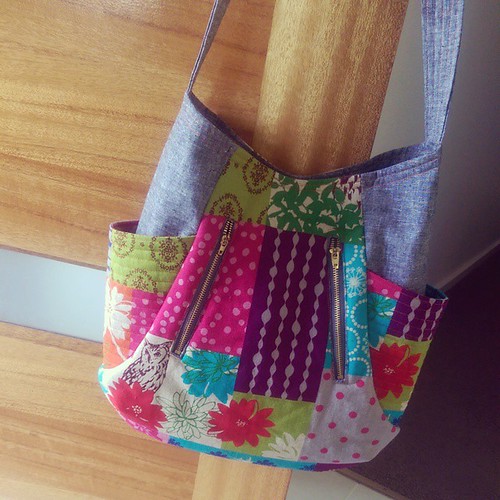
And the second..... Ticking off lists here.....

And this one is from some of the delicious Enchino I brought back from Japan, and more linen blend fabric.  I love them both!
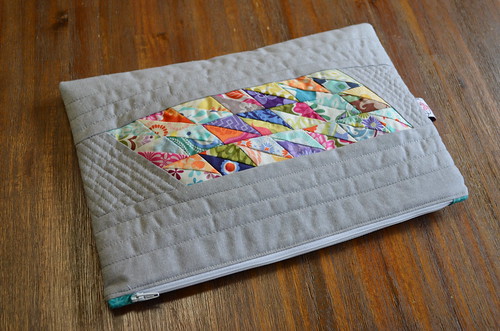
Kate Spain Zippered Pouch

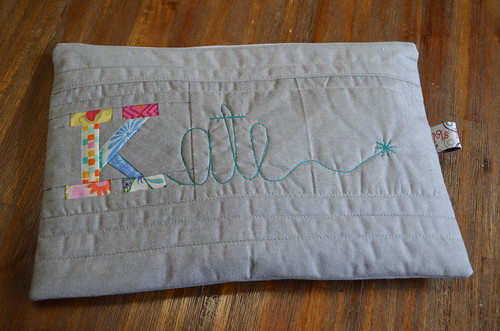
Now this little project I made months ago!  And forgot to share!  I wanted to make something for Kate Spain in return for her generosity during the Charm swap/along and also with my Pavement Puddles quilt.  I got all the teeny weeny scraps from my KS wall hanging and just made them work!
Kate Spain Zippered Pouch

On the other side, I paper pieced a K and then free motion quilted the rest of her name.
Kate Spain Zippered Pouch

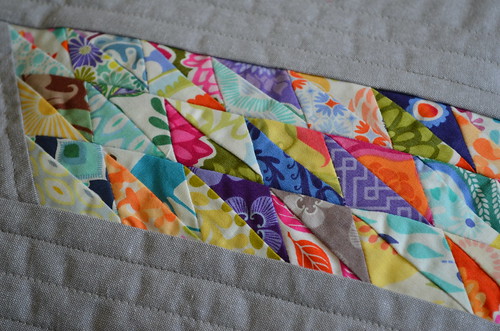
Teeeeeeny weeeeeeny pieces of yummy fabric scraps!  I think the pouch ended up being around 12" long, so that gives you an idea of how small these are.
Kate Spain Zippered Pouch

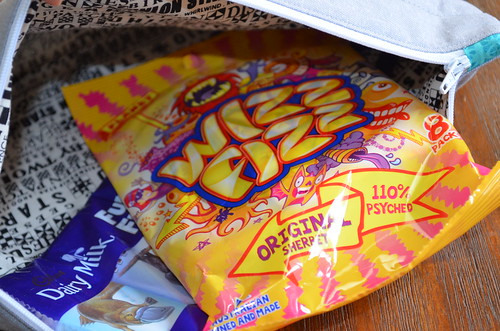
I filled it with yummy Aussie sweets and the lovely Quilt Jane hand delivered my present to Kate at Quilt Market for me.  Thanks Jane!

Cushion for Skye

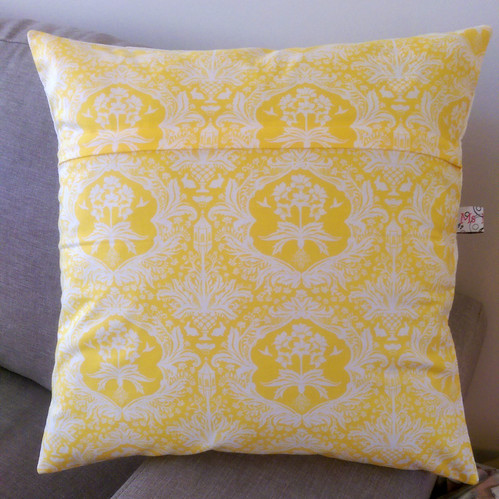
This delightful cushion started off as a bee block.  And went terribly wrong when I trimmed all 27 geese down to size, without realising the tutorial meant finished size PLUS seam allowance.  So I was left with all these yummy geese with nowhere to fly......  Then I read the bio of the November recipient in my Aussie Handmade Birthday Swap and see she loves yellow and orange!  Win win!  So I added some bits of white here and then to make it all fit and symmetrical, and BAM - cushion cover done!
Cushion for Skye

I backed it with this beautiful Flora print!
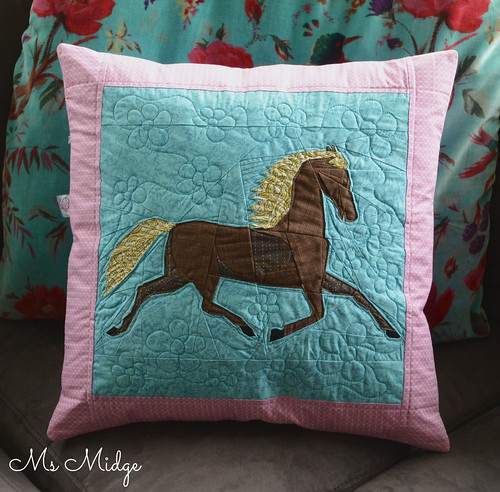
Custom order Folkart Horse Cushion

And yesterday - well, I finished this amazing custom order cushion cover!  The customer requested a horse cushion.  So I searched the interwebs, and given this was for a 10 year old girl, I figured the horse should look as realistic as possible!  I used THIS pattern.
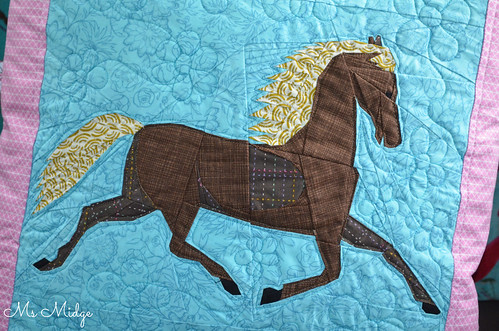
Custom order Folkart Horse Cushion

Fast forward to when I cut out all the pieces of pattern and nearly died at what I had in front of me!  But I am SO glad I didn't chicken out and just jumped in.  I am absolutely in love with the finished product and can't wait to send it off to the customer.  I used a multitude of fabrics and pieced and quilted it using 40wt Aurifil threads in brown, turquoise and pink.

Custom order Folkart Horse Cushion

And a little Wee Wander for the backing!

Phew.  That's it - for now!

Tuesday, December 31, 2013

2013 - The Year That Was....

In one word - exhausting.

If I were to look back at 2013, I would tell you that I got through it.  I landed on my feet - opposed to curling up in a ball.  So I guess I would call it a success?

On the creative side of life, it couldn't have been a better year!  I finished my 20th quilt for the year last weekend, and happily handed it over to my husband's cousin, for the new little man in her life - baby Archie.  And I have to say - the satisfaction that I receive when I've finished a quilt and am able to gift it to someone is unbelievably wonderful!  It adds to the enjoyment of the making.
Quilts 2013

Quilts 2013
I somehow managed to make the ever popular Swoon quilt too..... Which to my utter astonishment has had over 7500 view on Flickr after being picked up by Explore!  It seems people like a random photo with a cat!
Swoon finished!

I took my paper-piecing addiction to an all new high, by making this fairytales wall hanging....

Fairytale Wall Hanging - Paper Pieced


I've made a gazillion cushions this year.  Plenty for gifts and plenty for a consignment that headed over to a homewares shop in Bali.  Happy to say they all sold!
Cushions 2013
There's been Bee Blocks.....
Blocks 2013
And assorted other projects....

Assorted projects 2013
And amongst all of the quilty things I've made for myself and others - I've made plenty of little people's clothing for customers (and my kids!).....

Garments 2013
I think it's fair to say I spent a fair bit of my year behind my Bernina.

And on a personal note..... I think I've achieved a hell of a lot....

Achievements 2013

I've watched those four kiddos of mine grow like weeds.  Apparently I now have a man for a son.  My bestest friend moved back to Australia after 15 years in London, and I've been blessed to be a part of her two little girl's lives.  I've won fabric!  I bought a big kick-ass camera and am loving taking photos.  I've made cakes.  Lots of them.  I've spent countless days and nights with close friends.  I've learnt to quilt - properly!  I learnt to paper-piece, and became addicted.  I've bought a shit load of fabric.  I participated in my first ever crafty swap/secret santa.  I participated in my first ever quilt-along.  I went overseas with my husband for the first time.  I hosted my first ever blog hop.  And I survived Christmas!

I've had some pretty shitty times this year also.  I've watched my sister kick an almost 30 year habit and have been by her side to deal with the ramifications.  I've learnt more about mental illness, but feel like I will never, ever understand.  I've watched my teenage son become a man, and helped him through what could have turned out to be an absolute disastrous situation.  I've gotten along with his father - mostly.  I've seen families torn through in-fighting and poor decisions.  And I've been sadly reminded that life is too short for some, and to never, ever take the ones I love for granted.

2014 is shaping up to be a fabulous year.  Today is my tenth wedding anniversary!  In a few week's time, my youngest will be heading off to school, and for the first time in 15 years, I will have no children at home.  I am planning on working less weekends, and working more weekdays.  I am planning on diving in the deep end and pushing forward with some business dreams I have held for far too long.  But most of all - I am planning on continuing to see the great things in life and not focusing on the crappy ones!

So after that long, drawn out recap of this year - I wish you all a wonderful and happy new year!  May it be fun, filled with love and laughter.  I thank you all for coming to visit me here in my happy place, and look forward to sharing my trials and tribulations with you all again in 2014.  And a very special shout out to the wonderful group of friends I have made through quilting.  You have all become such an integral part of my daily life, and I love you dearly.

Love,
Midge
xxx

Sunday, December 29, 2013

In The Right Direction - A Quilt

I am very happy to say I've just finished another quilt!  Unlike a lot of my projects, which are done and dusted within a week or so, this darling quilt was a long time in thinking before even being made.  And once I started it, took a couple of months.  BUT it's finished!  So without further ado, may I present "In The Right Direction"......

In The Right Direction

This project started out with the aim of being a queen size quilt, but changed to throw size part way through due to the fact I knew I wouldn't be able to afford to have it sent off to be quilted!  AND I came up with a plan for how I wanted to quilt it myself.  The lovely Kristy @ Quiet Play had altered her paper pieced Winterbound pattern for me, upsizing it for the queen size, hence my blocks are bigger than her original.

In The Right Direction

The design for the quilting came during the putting together of blocks.  I made an off centre arrow, on a similar angle to the blocks, using some sticky tape.  And once I was ready to quilt it, thought I was completely bonkers and was so completely worried about stuffing it up!  But I'm happy to report that it was relatively easy to conquer.  I just attached the silver bar thingamajig to my walking foot, so as to get even spacing between the straight lines, and off I went.  I used my trusty Aurifil #2024 to paper piece and quilt this beauty!


In The Right Direction

I intentionally bought a cream coloured Homespun for this quilt.  I think it works beautifully with the tones in the Dear Stella "Cleo" fabric collection.

In The Right Direction

The backing fabric is from the same range, and was chosen obviously for its same arrowed effect!  I absolutely adore it!

The stats:  Measures 57" x 63"
Fabric: Cleo by Dear Stella & Homespun
Thread: Aurifil #2024
Quilting: Straight line quilted by Me on my Bernina 430

This makes my 16th quilt finish for 2013!  It is a very special gift for a very special someone, and I can't wait to hand it over!

P.S. - Sunday is usually all about my stash, but I've been a very good girl.  Please pop over and see the lovely Fiona @ Finding Fifth today - it's her last post before she hands over the reigns to Molli Sparkles! xxx


Paper Piecing Party


Saturday, December 28, 2013

The "For Pleat's Sake" Bag - Tips & Zippered Pocket Tutorial.

Thank you so much to everyone for your lovely comments on my Secret Santa gift reveal!  It killed me to keep it a secret for so long!  As promised, I've put together some tips for sewing it together, sort of like a review I guess!  I've also done a little tutorial on how to put a zippered pocket in.  So brace yourself for lots of photos…..

Secret Santa Gift
First things first - You can find the tutorial for this bag HERE.  It really is quite a simple bag to make, once you wrap your head around it!  To be perfectly honest, it took me many hours to get past the first step of getting the pleats done. And I ended up doing it differently to the tutorial, because the measurements just weren't adding up.  Now whether that is because of my lack of mathematical genius, or whether the measurements really just weren't right - You can be the judge of that!  I found the photos and measurements really hard to work out.  So this is what I did (after many times of measuring, pinning, un-pinning, re-measuring etc etc)…...
IMG_5115
I ended up going with five pleats instead of six.  I measured the middle point of the bag pieces, and then measured 1/2" for each of the pleats.
collage
This is how I do my pleats.  Clockwise L-R:  Find the middle point and pin.  Fold the fabric over right sides together with the pin being at the fold.  Pin the measurement for the pleat, in this case 1/2".  Fold the fabric back over to show the right side and pin the pleat down.
IMG_5117
I then press the pleats well and depending how big they are, I will sometimes pin them further down the pleat also.  I followed the other measurements in the tutorial to a tee, in terms of how far down to sew them etc.  Because my pleats were different measurements, it altered the bag measurements when finished - but it was only by a little!

NOW - moving on to another little tip that I like to see visually…..

IMG_5120
The tutorial gives good instructions on how to make a flat bottom for the bag, however, one thing I wanted to see, was this.  I find it quite fiddly to match up the seams, but if you can peek inside the bag and visually match up the seams, and run your finger along it, you can pin it on the outside to ensure it's still matching!
IMG_5121
And pin that sucker down ready for measuring, sewing and then cutting.

PUTTING IN A ZIPPERED POCKET - I'm not re-inventing the wheel here, in fact, I used a tutorial from the pattern I bought to make my camera bag, which you can find HERE.  The one difference is that this time I used a decorative zipper…..
IMG_5124
So once I'd sewn the pleats in to my bag panels, I then set about putting the pocket in.  First thing to do was find another co-ordinating fabric and cut it to size - I cut it 12" x 16".  My zip is 9" long. (I had to cut a second piece of fabric as the one pictured above wasn't wide enough!)
IMG_5125
On the wrong side of the zipper pocket, I measured down 9" and marked a line, then another line 1/2" under that.  Then measure 1" in on either side and mark the lines to make a long rectangle.
IMG_5126
Place your pocket fabric right side facing down on to the bag panel, centre it.  Also measure approximately 1 1/2" down from the top to where your top line will sit.
IMG_5127
Pin in place.
IMG_5128
Now you sew over the long rectangle that has been marked, making sure to backstitch at both the beginning and end.
IMG_5129
Mark a line through the centre of your rectangle, and two diagonal lines like above.
IMG_5130
And using sharp scissors, cut along those lines - being very careful not the cut the stitching.
IMG_5131
You then need to pull the pocket fabric through the hole to the other side.
IMG_5132
Giving you a neat opening.  Press firmly and neatly.
IMG_5133
You then take your zip and place it over the top of the opening, pinning in place.  Sew around the zipper, making sure to catch the fabric underneath…..
IMG_5134
And sewing over both ends of the zip.  If you're not using a decorative zip, you just need to sew the zip to the other side of the pocket, with the zip showing through.
IMG_5135
Lastly, you bring the pocket fabric right sides together and sew all the way around, creating the pocket. (You don't sew the pocket on to the bag panel!) This will now sit in between the outer bag and lining.

And one last little tip for the construction of this bag.  And I am finding it very difficult to articulate this!  When it comes to sewing the lining and bag together, I had to unpick the side sections a couple of times and come up with a different way to do it.  Once again, I think more photos would have helped.
IMG_5136
To start it off, you need to line up the V sections at the side.  But because of the bulkiness of it, it wouldn't turn through nicely for me, which was frustrating!
IMG_5138
So I had to start off the stitching here a little differently.  I actually sewed straight across about half an inch at this section.
IMG_5139
Like this.  And then line up the rest of the bag as per the tutorial and sew all the way around, just leaving the opening at the bottom.  I found it turned out relatively neatly this way!

Secret Santa Gift
^^^^^^^^^^  For those sections up there at the sides ^^^^^^^^^
IMG_5140
And just because the tutorial doesn't mention this, to close up the opening on the bottom of the lining, just tuck the seam allowance inside and press….
IMG_5141
Then sew along the bottom of the lining around 1/4" in.  This makes for a nice neat finish on the inside of your bag!

The tutorial also only calls for you to top stitch around the sides of the bag, however I chose to top stitch around the top also.

One last thing.  The bag handles.  The tutorial suggests where to buy them, but they are UK based.  I found some HERE on Etsy, shipped from Asia, and they are fab.  Not leather, but a great finish!

And there you have it!  I really do hope that all of this makes sense, and is helpful is you choose to make yourself one of these fabulous bags!  I have put one on my to do list - for myself!
Related Posts Plugin for WordPress, Blogger...