Friday, July 25, 2014

Sea Breeze Mini QAL - It's My Turn!

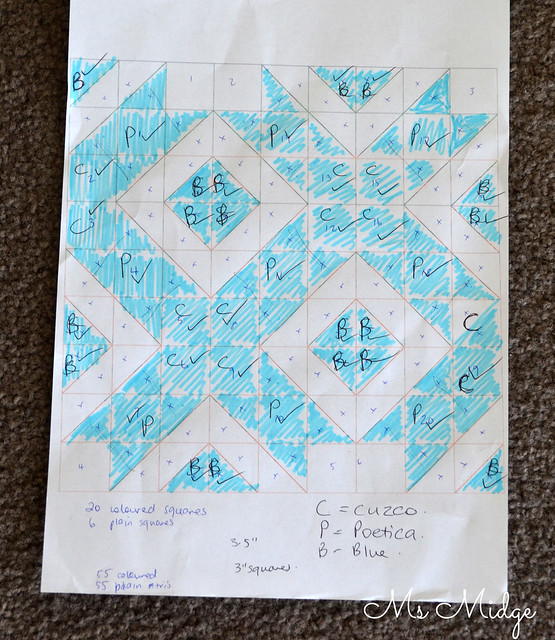
If I'm to be honest, a mini quilt QAL was the last thing I had in my sights a few months ago, but who was I to knock back a spot on Gnome Angel's list??   I procrastinated for quite some time after buying the pattern, because I was trying desperately to figure out how I could make this little mini in to something that reflected my own style and my own "vision"??  Ok, does that sound stooooopid?  Anyway.....  After before-mentioned procrastination, I finally had that vision, and was grateful to one of the QAL peeps for producing a little colouring in platform for me.  Next thing, I found myself happily colouring in which lead to this little picture......

SeabreezeMQAL

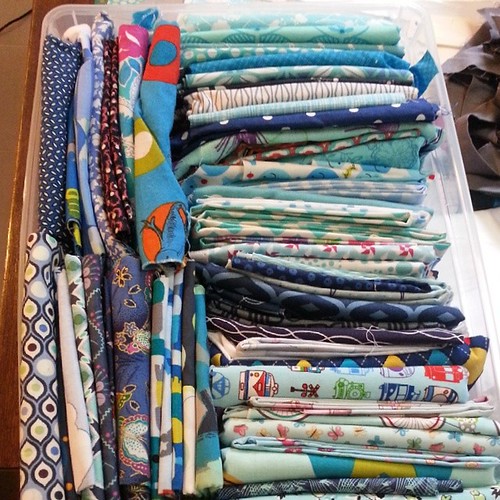
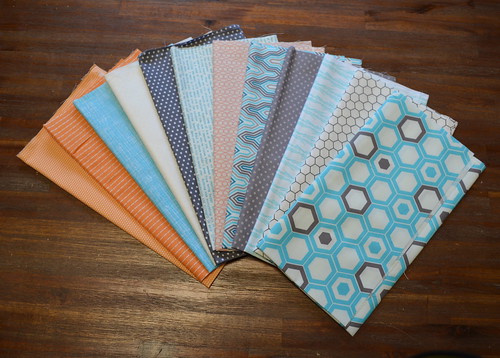
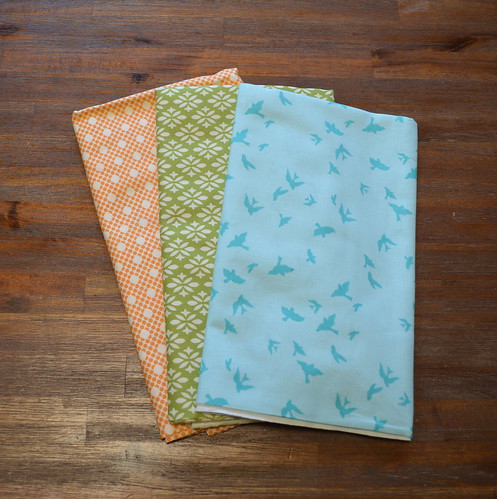
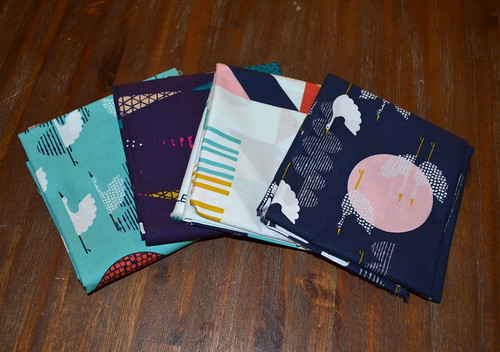
Doesn't really look like the Sea Breeze does it?  The next step after the colouring in was fabric selection.  This mini was never going to be for me - you see, I have a grand plan that my sewing room walls will eventually be filled with others minis, not my own!  So with the recipient in mind, I set out finding the fabric I would use......


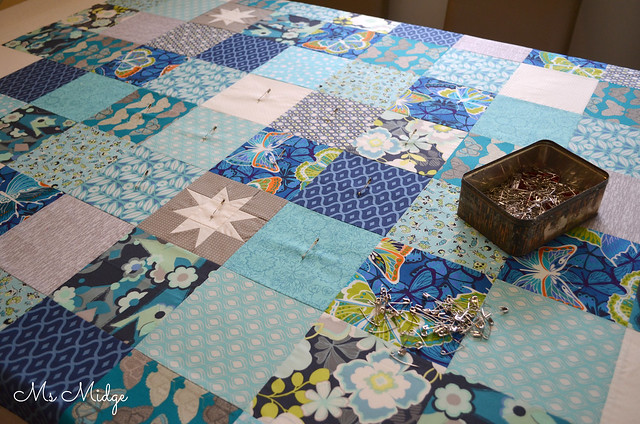
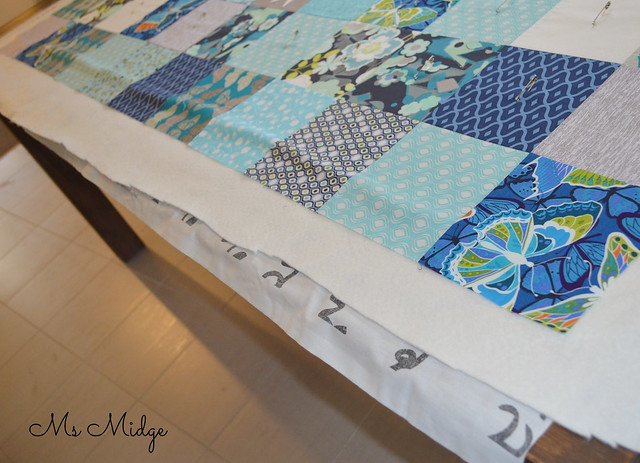
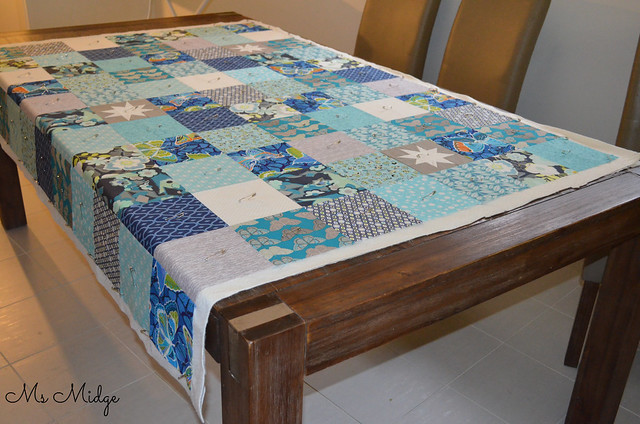
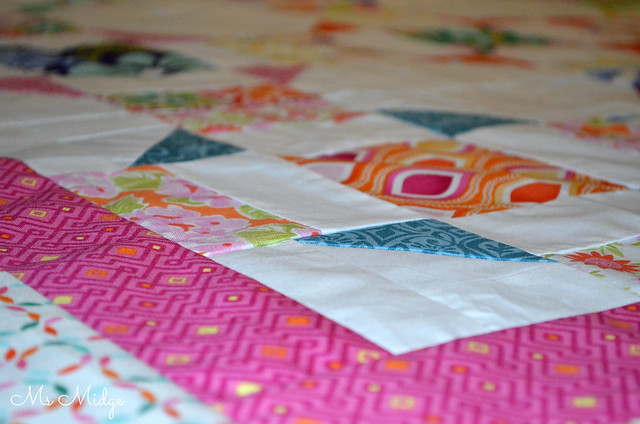
Kind of bright yes?  And then it was translating the drawing and fabric in to an actual quilt top......


It was about here that I may or may not have done a little fist pump!

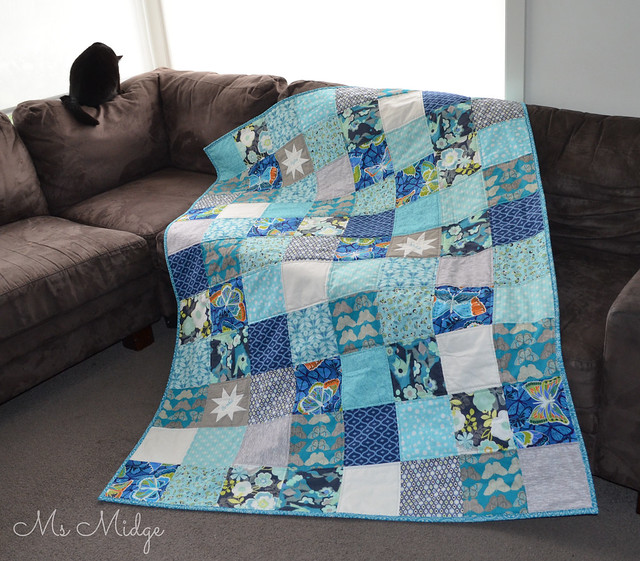
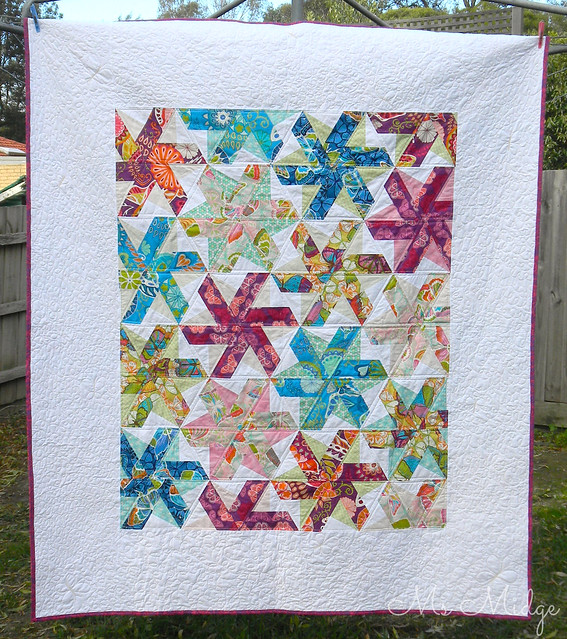
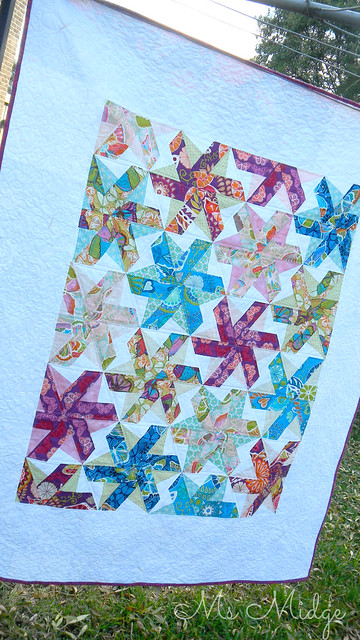
And here she is - in all her glory - my Sea Breeze Mini Quilt!


SeabreezeMQAL

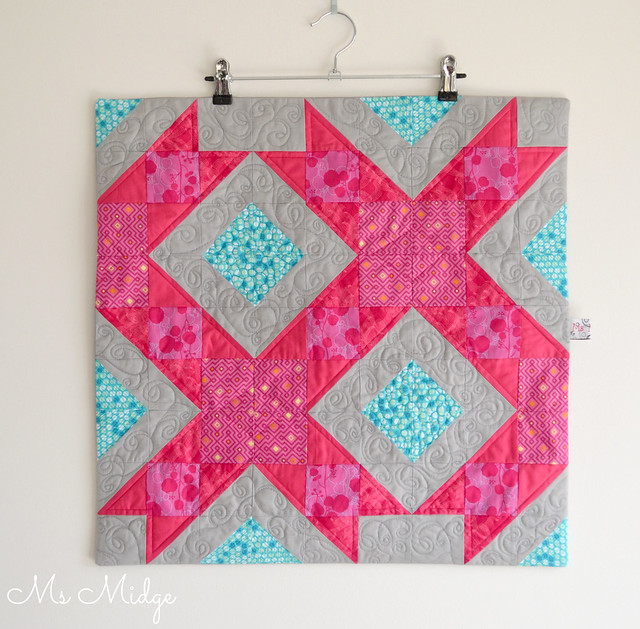
You like?  I LOVE!  Not only does it look unique because of the fabric layout, the quilting then changed the look of it also.

SeabreezeMQAL 

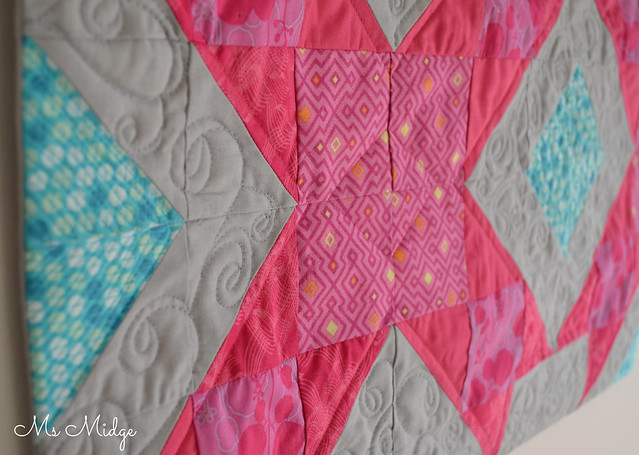
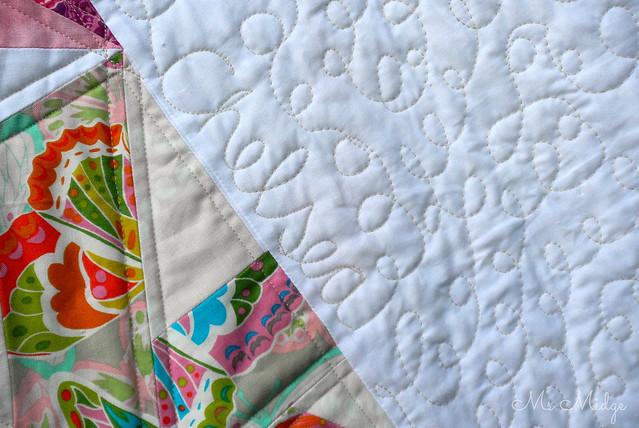
I used a number of Aurifil threads - #2605 for swirls in the grey negative space, #2810 for a little matchstick and pebble action on the turquoise and #2530 straight-lining around the pink "ribbons".

SeabreezeMQAL 

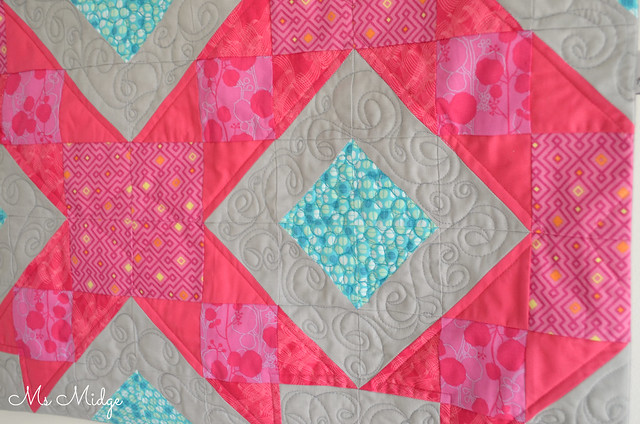
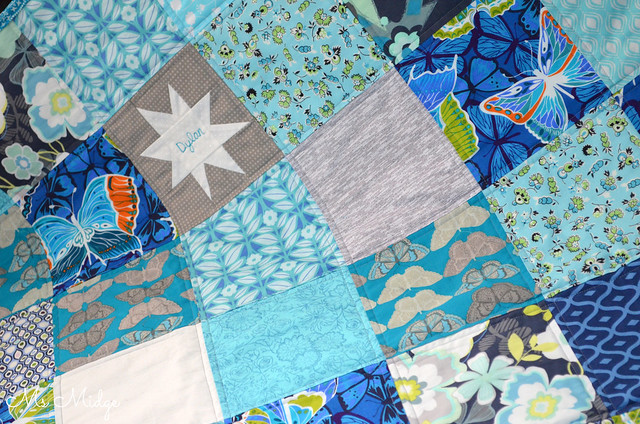
There are a couple of intersecting hst's that are not perfect, and I keep picking on them, but I really am very happy with how relatively straight it all is!

SeabreezeMQAL 

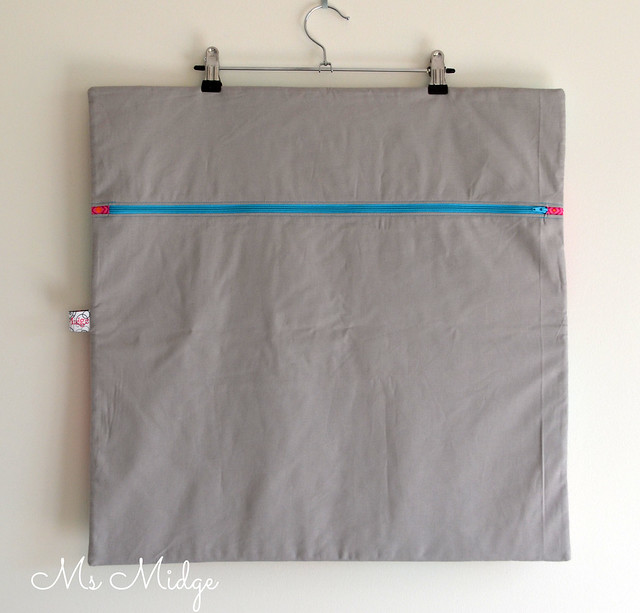
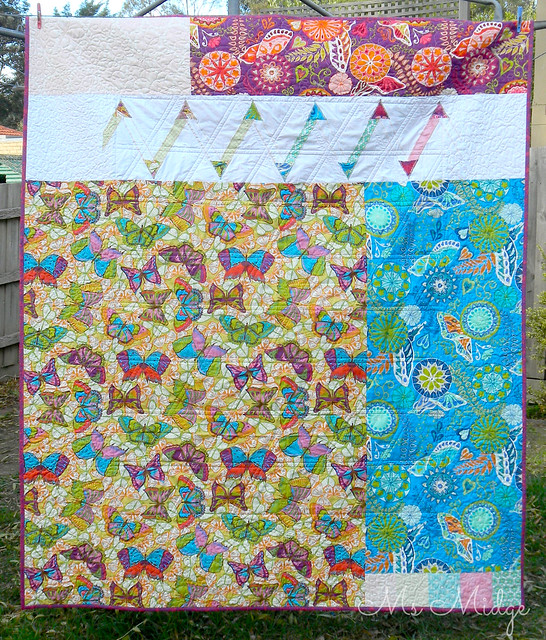
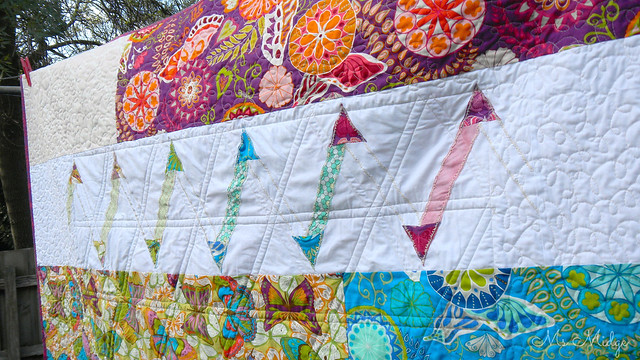
And just because there is a use for almost everything in this world - I've made this big mini in to a cushion cover!  I've found a neat way of making an exposed zipper look pretty, and am wrapt with the end result.

Sea Breeze Mini QAL

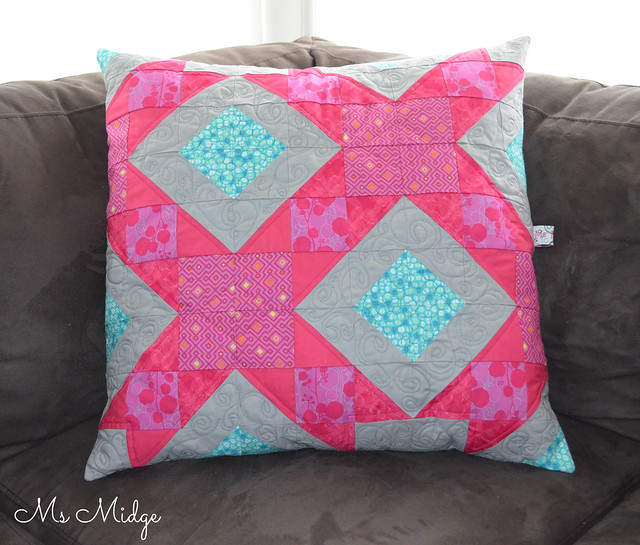
So - what do you think?  Did I take the secondary or third pattern within the pattern and make it work?  I think so!  Lesson of the day:  A pattern doesn't always have to be ONE pattern.  You can ALWAYS find a few others within.

If you're yet to get on board with the QAL - there's still plenty of time to grab your pattern and get moving.  This really is a one day project if you're focused and have nothing else to do!  Pop over to Gnome Angel and get the low-down!  You'll find the whole schedule of action and will be able to drool over everyone's creations!  Go!

There's also a progress linky right here, right now, so go ahead and link on up!


I'm linking up - You can too!

Thursday, July 24, 2014

TUTORIAL - Table Basting Your Quilt

Last year some time, I heard someone, somewhere, talking about table basting.  Table what-ing??  I was sold before I even knew what it meant!  I'd spent forever crawling around my lounge room floor, or tiled kitchen floor, basting my quilts - and my knees had had enough!  I'm hearing a collective "ahuh" from you all right now aren't I?  Since that lightbulb moment, I have somewhat perfected the process, and now enjoy basting don't hate it quite as much, and revel in my smooth quilt backs!  I have repeated this process to numerous friends, who are all enjoying basting success also, so thought I'd share it with you all!

Now - the first rule is - you do not have to have a 10 seater dining table as I do!!!  Baste your quilt on the table you have, and follow the same instructions.  Having a smaller table just means you will have more overhang on the sides and possibly - ends of your table.  The second rule is......  Well, there is no second rule.  Let's go.....

baste

First step is to iron your quilt back to within an inch of its life.  Make sure that baby is silky smooth without a crease in sight.  Take said quilt back and lay it on your table.  You want to have it centred as much as possible ie. the same amount of overhang on all sides.

baste2 

Then go and rummage through your kids art & craft supplies (or your own) and find your self some sticky tape (or cellotape - whatever it's called wherever you are!).  You can use any tape at all - so if gaffa tape is all you have - make it work.  You want to tape both ends down to your tape.  Making sure you keep your smoothness intact!  If you have a really small table and a really big quilt, you're going to have to get inventive!  I've had others say they use bulldog clips etc.  So think about what you have handy that's going to keep that quilt back in place!

baste4

Once you have secured your quilt back, it's time to layer up.  Lay your batting on top, using the same technique - centre it over your quilt back, with the same amount of overhang.  Then smooth it all out, from the centre outwards.

baste5

Same same again with your quilt top.  Iron it super smooth, then pop it over the top!  It's really important you follow the same theory as any basting process - and smooth it from the centre out.  This way you will end up with a straight quilt top!  I have been known to sometimes iron the quilt top once it's on top of the quilt sandwich - if it's been creased considerably in the putting on top of everything process.

baste6

Now it's time to baste.  I baste from the centre outwards - which is what I learnt through all my online learning.  Use as many pins as you think your quilt warrants - but remembering the more pins the safer you're going to be!  Once you've pinned all of the quilt top that is on top of your table, it's time to move on to the overhanging sections.....  You need to remove your sticky tape for this to happen!

baste7

You want to go to the side of your table and with both hands, gently pull your quilt over to one side, revealing the overhang on the other side.  You will see in the photo above that you have a big kink in the quilt sandwich?  You now have to smooth that outwards and repeat all the other steps to baste that section.

baste8

Repeat again, by pulling the quilt over to the other side, which will reveal your last remaining section.  Baste - AND YOU'RE DONE!

baste9

Once I have basted my quilt, I then roll it up ready for quilting and it usually sits on top of the lounge in the back room.  Or if I'm really keen, I'll then set my machine up on the dining table and quilt it then and there!

I really hope you've found this helpful!  I've seen/heard of tutorials for table basting which includes using lengths of timber (?!??!) but I'm a huge fan of keeping things as simple as possible, with as little props as possible.  I think this method demonstrates that!

If you have any questions at all, feel free to fire away!  As I said earlier in this post - I have never had a problem with my quilting using this method - no puckering, bunching up or folds in the back.  If it works for me, I'm guessing it could work for you!


Wednesday, July 23, 2014

W.I.P. Wednesday - KS

Amongst a million other projects I've managed to start, I have two very special WIP's that are almost at basting stage.  My Kate Spain charms are actual works in progress!

KS WIP 

This, my friends, is my first ever foray in to hexies!  I dared to hashtag them #cheating on IG last week, but was told I certainly am not cheating!  Yay for me.  Anyways, this little quilt top came about when I was left with about half of my charms from this next project......

KS WIP

Which is super top secret - hence the very small sneak peek!  I HAD a love/hate relationship with this quilt top - loving it because of all the KS and hating it because it is the project that caused "Bernina-Tantrum-gate".  But yesterday I had a little brainwave, which ended with me adding some borders and falling in love all over again.  I will hopefully have this project finished and ready to show you all - ALONG WITH A PATTERN!!! - in the next week or two!  Stay tuned.....

P.S. - Tomorrow on the blog - A table basting tutorial!

I'm linking up with Little White Dove - You can too!


Little White Dove

Tuesday, July 22, 2014

Kate Spain Charm Along - Progress Report!

Wow!  There have been some very busy bees this past week!  Here are some fabulous progress photos from some of the members of the Aussie Charm Swap.......  I'm sure there are some others of you out there who are participating in the Charm-along as well, and I can't wait to see what you're all making with your Kate Spain charms!  There's less than two weeks left until it's time to link up your projects and be in the running for all the AMAZING prizes from the sponsors!  Now - two weeks is a long time in my world - so if you've been under a rock and haven't heard about the Kate Spain Charm-along, then you need to READ THIS and get started STAT!!!!  Make sure you also go and check out all the fab sponsors and see why I chose to work with wonderful Australian peeps!

On to the pretty pictures.......


Clockwise from top left:  Bridie has started with something simple (!?!?!?), little old hexies!  Molli is throwing a plethora of ideas around as he battles it out with his head on which one to go with!  Susanne's crosses mixed with the low vol prints are just divine!  And that other project there - well, that's mine!  I pulled out some templates for half hexies I bought last year and gave them a crack!  I finished a little quilt top today.....


Clockwise from top left:  Jill has been tumbling.  Emma has her quilt top well and truly on its way.  Sandie will now be known as the HST Queen.  And Chrissy is making bags!


Amy has well and truly got her entry sorted, with this gorgeous Honey Honey quilt!  Love!


And Alyce has made this gorgeous table runner from some of her favourite KS prints.  

As of this afternoon, I now have TWO quilt tops made from my Charm Swap package.  TWO!  I am hoping to have them basted and ready to quilt for a sit and sew day on Saturday (my first ever time at a sit and sew day!?!).  Wish me luck! 

If you're participating in the Charm-Along, be sure to let me know, and send me some photos of your progress!


Monday, July 21, 2014

Blue Hues

I love making quilts.  I'm pretty sure I've made that clear?  I love making quilts for customers, especially when said customers leave all the finer details to me.  Last Tuesday, one of the Mums at school asked me if I had time to make a quilt for her by the 27th of July?  "Sure" I said - "Colours?  Style?"  The only specifications I got were "Blue is the recipient's favourite colour and can you please embroider some names on it?"  Ok.

Now because I literally had the s*its with the world over the epic disaster that was my machine's tantrums, I went straight home and pulled out my entire stash of blue fabric, and went to town.  By lunchtime I had all the fabric cut out and placed on my design floor (read: my loungeroom floor).  I stopped for lunch and was then ecstatic to find my machine's tantrum had ceased and she was ready to participate in some sewing.  A couple of hours later, I had a quilt top.  And the following day, a finished quilt.......

Blue Star Lap Quilt 

All the pretty shades of blue come together to make the most amazing sea of yumminess!  I snuck a little grey in and a delightful little white spot, which both blend beautifully with Valori's butterflies, Tula's eye drops and Art Gallery's florals.  There's a little Violet Craft in there too.

Blue Star Lap Quilt 

I grabbed my handy bolt of Ikea backing, which I think worked well.  Bella the cat thinks so anyway!

Blue Star Lap Quilt

The squares are 6.5" in size, which really just makes cutting so quick and easy!  And when it came to featuring the names on the quilt, I went with some little wonky stars, made from 2.5" squares and embroidered the names using Aurifil #2810 Turquoise.  I kept the quilting of the blocks nice and simple - straight lines using Aurifil #2605, my favourite silver/grey thread!

Blue Star Lap Quilt

And the very pretty binding is a great Spotlight print I bought last year and love!

This is a super easy quilt to make, and really effective when the right combination of prints are used!  If you are ever in need of a speedy gift - here's your go-to pattern!  Finished size is perfect for a lap quilt - 48.5" x 66".

I think I managed to both surprise and delight the customer by having her order delivered three days after she placed it?!!?


Saturday, July 19, 2014

Sewvivor - Ms Midge - Melissa G

Family Ever After have launched their third SEWVIVOR series, and this season is the Quilter's Edition.  Ahuh!  

It has taken me a couple of weeks to work up the courage to write this post and throw my hat in the ring, but here I am.....

I LOVE a good challenge!  I love being thrown a curve-ball or a quilt-ball shall we say.....  I have been told I am a "quilt-churner" or prolific quilt maker, and have on many occasions whipped together a quilt in a day.  So, I think if the judges were to throw in a Survivor like challenge of say, eating a kilo of chocolate whilst winding a bobbin and burying threads - I'd say I could manage that!

So, if you will, read this post with the background sound of Destiny's Child and Beyonce, belting out:

"I'm a survivor, I'm not gon give up, I'm not gon stop, I'm gon work harder; I'm a survivor, I'm gonna make it, I will survive, keep on survivin"........

The Quilt I have chosen for this auspicious occasion is my Butterfly Bloom Bloom Quilt.  Some of you who have been around here for a while may very well remember it?  I finished it over a year ago, as a gift for my daughter Chelsea.  When I was debating which quilt to enter, I ummed and ahhed, but then took in to account what the Sewvivor rules tell me:

         "Be sure it is your best representation of you, your sewing skills, and your                                                                                        creativity!"

bloom

Although I have "grown" as a quilter in the past twelve months, I feel this quilt represents the beginning of a real LOVE for quilting and the entire quilting process.  This was my first quilt-along (with Lee from Freshly Pieced) and it challenged me in ways I did not even think possible!  It was the first time I'd thought, really thought, about fabric selection and the way it can change the look of a block.  I mean, who knew there were low and high volume fabrics?  And tones???  I almost gave up before I even began!

bloom2 

It was the quilt I really got the hang of free motion quilting on!  

bloom3 

I had a ball adding in words and butterflies.....

bloom4 

I also went to town piecing the back.

bloom5 

It was also the first time I appliqued scraps of fabric to a quilt.

bloom6

 And lastly - it taught me all about the importance of precise cutting and piecing!

So - there you have it!  Consider my hat thrown!  I'm looking forward to watching Sewvivor unfold - regardless of whether I'm in it or not - I will be sewing along!


Wednesday, July 16, 2014

W.I.P. Wednesday - Warp & Weft Woes

Despite having a tantrum throwing sewing machine this past week and a bit, I have actually managed to get quite a bit done.  I am also happy to say that I think I may have figured out the cause of before mentioned tantrums from said machine - Inferior fabric.  Yes, I did just say that.  I am not a fabric snob - never have been, never will be.  BUT.  The project I was working on when my machine decided to lose its bananas just happens to be my secret squirrel Kate Spain Charm-along project.  In which I am using my good old trusty white Homespun from Spotlight as the mixer.  This did not occur to me to have anything to do with the problem until I got my machine back from Mr Fixit (who I might add said the timing was slightly out, but other than that, just had a regular service), it sewed like a dream.  I put my entire Sea Breeze mini quilt together without missing a beat (and using a grey homespun).  Then when I started back on my KS project - SNAP!!!!  What the???

 I ended up walking away from my machine, feeling dejected and depressed.  I organised to return to Mr Fixit and sit with him whilst he worked out what the problem was.  But then something strange happened.......

I was at school drop off yesterday morning, and one of my friends - a fellow school Mum - sidled up to me and asked if I had much on at present?  I grinned and asked why?  "Well, any chance you can make a quilt for me by the 27th??"  Of course I said SURE!  I figured it would get my mind off my broken machine and I'd use Mum's.

Anyway, I returned home from school and pulled out my blue stash........

Just had a request at school drop off for a quilt. ...in ten days!! So I've just cracked open my stash of blue to get this done!!

Then chose a bunch of yumminess, and started to sew - on my "broken" machine.....

Breaking news. ...... I'm back!  My machine has,  it seems,  ceased its tantrum. #thankyouforthecheering #onfire #quiltinaday

Approximately four hours later, I had a completed quilt top - and NO SNAPPING THREADS!?!!?!?!!  I was excited, relieved and soooo happy!  But wait?  How come no snappity snap??  I pulled out the KS project, and gave it another whirl.  You guessed it - SNAP!

So my friends, this is how I have come to the conclusion I have a dodgy batch of fabric.  To say I am disappointed would be a huge understatement!  I have managed to put together a very small quilt top, but just can't bear the thought of working with that damn white fabric any more......

In other news........

Just pulled these babies out! Going to be one fabulous quilt! #londoncalling @luellabella @mariekabespokebites @wherejanecreates @blossomheartquilts @partyofeightourstory

I pulled out all the London blocks I have received from my fellow Wombat Stew girls!  I have only made the Union Jack, but printed out a few other blocks to put together.  Aren't they fabulous?!?!!?!  From top left, clockwise:  Jane, Kristy, Lara, Marieka, Alyce and Gina.  Such talented girls!  This is going to be one super quilt!

And that pretty tub of blue up above?  Well, that is a result of the following work in progress....

Project #cleanthisshitup has begun! Blue and green in their own tubs.... and who knew I had so many b&w and text prints??? Got their own tub too!

I've started to clean up my stash.  And organise it.  I can tell you now - being able to grab that one tub of blue fabric off the shelf yesterday made life a whole lot easier!  I need to get to the shops to grab some more tubs!

And over here we have precuts and special collections. .... #cleanthisshitup I could be in this room for weeks. ...

And this is getting there.  All my precuts and fabric collections.....Slowly, slowly.

So - what are you working on this week?  I'm linking up with Freshly Pieced and Little White Dove   - You can too!


Little White Dove

Tuesday, July 15, 2014

{Coming Soon} Sea Breeze Mini QAL with Gnome Angel!

My lovely friend Angie over at Gnome Angel is hosting a fabulous Mini QAL, using the Sea Breeze pattern by Canoe Ridge Creations.  I put my hand up to take part weeks ago, and then, you know, time crept up on me and before I knew it - BAM - it was just around the corner!


It all kicks off on the 21st of July, with a great bunch of bloggers to get you through, and show you a variety of finishes.  Let it be known - I have finished my little quilt top, and it is patiently awaiting my quilting attention.  After procrastinating and wondering how I could make the pattern "my own", I must say - I'm incredibly impressed with myself! Hahah!  The big reveal of my mini will be here on the blog Friday 25th of July.  I will also show you a couple of little tips on how to get matching seams.  But for now, here's a little sneak peek.....

I must be excited to have my machine back..... I'm sewing at night!  #seabreezemqal


Sooooo - pop over and grab yourself the PATTERN HERE.  And have a think about how you could make this little mini your own!  There is also a Facebook group HERE.  And the full schedule for the QAL is HERE.

Also, pop over and see Angie's interview with Canoe Ridge's Megan.  I love getting to know quilter's and what makes them tick!


Sunday, July 13, 2014

Sunday Stash & Dash - Guilty Pleasures & Other Stuff....

I received a divine parcel of fabric last week, that shall now be known as "the last big parcel of fabric to arrive for quite some time".  You see, I just happened to book myself a ticket to TOKYO a couple of weeks ago!?!?!?!?!  Yes, you read correctly - I'm going to Tokyo!  This time last year I made a deal with my husband - come tax time 2014 he could get a new fancy television and I was going to Tokyo.  He agreed.....

  One of my dearest BFF's has lived over there for around 20 years now, and I've never been to visit her.  Plus, I just happen to have a God-daughter there too now, so it just had to be done.  Partner that with doing my taxes last night - which meant I had to add up all the receipts for the past 12 months, and well, I sort of had a mini heart attack at how much money I had spent on fabric.  Yes, being that I am a small business, I can claim it all as business costs, but who am I kidding?  Lots of that fabric is also a habit.....

Sooooo, in order for me to put in some serious holidaying (BY MY FREAKIN SELF!!!!) and fabric purchasing in Tokyo, I'm going to try incredibly hard not to buy big bundles of fabric for the next few months.  I leave for Japan on the 9th of October......

Anyways, back to the pretty pictures.... The following bundles were from Pink Castle Fabrics.  

DSC_0365

Fat 16th Low Volume bundle.

DSC_0366

Re-stocking my Word Up bundle....

DSC_0367

A gorgeous bundle of colour for a custom quilt order boy's quilt.  Yum.

DSC_0369

A little yardage of B & C and a yard of Waterfront Park to bind the quilt I am yet to finish!

Also arriving was this little bundle of love which I bought from Penny Poppleton, who kept them aside for me in her #greataussiedestash on IG.  Thanks Penny!!

DSC_0380

Tsuru and Koi.  Now - if anyone else out there has some more Tsuru they would like to re-home, please let me know!  I would like to make a whole quilt from it!

Ok, bed is calling - School's back tomorrow!!!  Yeeeee-hawwwwwwwww!!!!!

I'm linking up - You can too!


Molli Sparkles
Related Posts Plugin for WordPress, Blogger...