Showing posts with label Oz Material Girls. Show all posts

Friday, June 22, 2012

Being Charitable and All That.....

You may remember a few days ago when I posted about my impatience and love of Instant Gratification?  Well, I've had some progress!  Today, I decided to throw myself in the deep end and attempt a REAL quilt block!  And I'm quite pleased with how it turned out.

WHY would I do this you ask?  OK, you didn't ask, but I'm going to tell you anyway.  My lovely friends over at The Oz Material Girls are sponsoring Do Your Block Quilts for Charity!  Which I thought was a great idea, and something I could be involved in.  Basically, it is a bunch of like-minded crafters pulling together and whipping up a basic quilt block, then sending them all to someone who can put them all together to make quilts for some worth recipients.  Good idea yes?

The girls have put together a downloadable instruction sheet HERE.  So if you think you would be able to put together one or even a few lovely little quilt blocks, pop on over to their Facebook Event Page and keep up to date!

Remember - you don't have to go out and buy new fabric for this - once I had committed myself, I then looked around and realised I have packed up 95% of my fabric stash!  But luckily I keep all of my scraps in plastic bags, sorted into fabric collections, so I could open up a bag and put one together.  And this is what my first REAL quilt block looks like!


Isn't she gorgeous?

Whilst you're blog-hopping, pop over to EDENLAND and check out her LATEST POST about being charitable.  She mentions a fabulous charity Foundation 18, which I have now donated to a number of times.  So GO!!

Do you quilt?  Do you like to be charitable?

Monday, April 23, 2012

I have a BUTTON!

Now for anyone reading this who does not have a Blog - you are probably wondering WTF is a Button?  Have no fear, I shall educate you!  A Blog Button is a generic term for an almighty technological nightmare for me!!  But for others, who can actually manage to not go cross-eyed when trying to BE technological - it is a whole lot of funny codes added to a pretty picture which then can be added to a Blog so that other Blogs can GRAB A BUTTON.  Like this...


Ms Midge


My lovely friend Gemma, over at Pretty Bobbins, sent me the links for the tutorials today, on how to make your own Button.  But try as I might, I could not get past designing the actual photo!  Me + codes = FAIL.

In stepped another lovely friend Louise, from The Oz Material Girls!  She is now, to me, the smartest human being on earth!  Not only was she able to put a code together for a Button for me ONCE - but she did it THREE times!  Because once I figured out how to put the pretty picture for the button together, I then decided to muck around with it until I got the above result.  So thank You Louise!

What I did learn today (apart from the fact I am code challenged) is that I have a wonderful group of on-line friends.  Yep, people I have NEVER met in real life, only chatted and socialised via Facebook and Email.  Isn't that fab?!?!?

Another one of my on-line friends is going through a really rough time at the moment, so I just want you to all throw your prayers, wishes and positive vibes my way - so I can forward them to her.

To end, I ask you - Are you technologically challenged?  Or am I on my lonesome?

Thursday, April 19, 2012

Something new I tried last week

Yep - The Oz Material Girls had me guest post again this week.  Another lovely pattern, which I have reviewed and can recommend!  You can check it out HERE.


I hope you're all having a lovely day!  I will be back soon with more extremely interesting and riveting drivel - promise! xx

Wednesday, March 28, 2012

Guest Posting

Hi all!  Just quickly popping in to tell you the lovely gals over at The Oz Material Girls asked me to a regular contributor!  Hoorah!  So that's where I am today!

Up-sizing! is another little tutorial.  Hope it's of interest and/or help to someone!

I'll be back soon xx

Friday, March 16, 2012

Tutorial - Facing the Fear of Facing


Last week, I Guest Blogged over at The Oz Material Girls!  I was wrapt to contribute with my first ever tutorial.  If you sew clothing you may just find it helpful!


A few weeks ago, I bought the "Scientific Seamstress Aline Dress" pattern.  I was after a basic pinafore pattern to get started on some Winter garments and this was perfect!  I received the pattern straight away and began reading the instructions to plan my attack.  I then realised that the reversible version of the pattern required quite a bit of hand sewing, something I steer clear of due to my lack of ability.  So I thought "No worries, I'll just make it one sided".   The e-book did have some instructions on doing so, however, it did not have instructions how to assemble a facing and sew it in.  Right then and there, I gave myself the challenge of working it out.....  And to my excitement - I did!  So here is how I did it....


I started out by following the directions and drawing out my pattern as per instructions.

Then using the template for the bodice of the dress, I cut out another pattern piece, but only a few inches long in the body part.  As indicated on this line on the pattern.


Once all cut out, you should have four pieces.


Next, put your front bodice and facing piece right sides together, then your back bodice and facing piece right sides together, and pin from the armholes around.


Now it's time to start sewing.  Using the seam allowance as recommended in the pattern, start sewing from one armhole, all the way around to the other one, remembering to backstitch 
at each end.


Bodices and facings sewn together.


At this point, you can either overlock the edge of the facing, or if you prefer do a regular
 small seam to neaten.


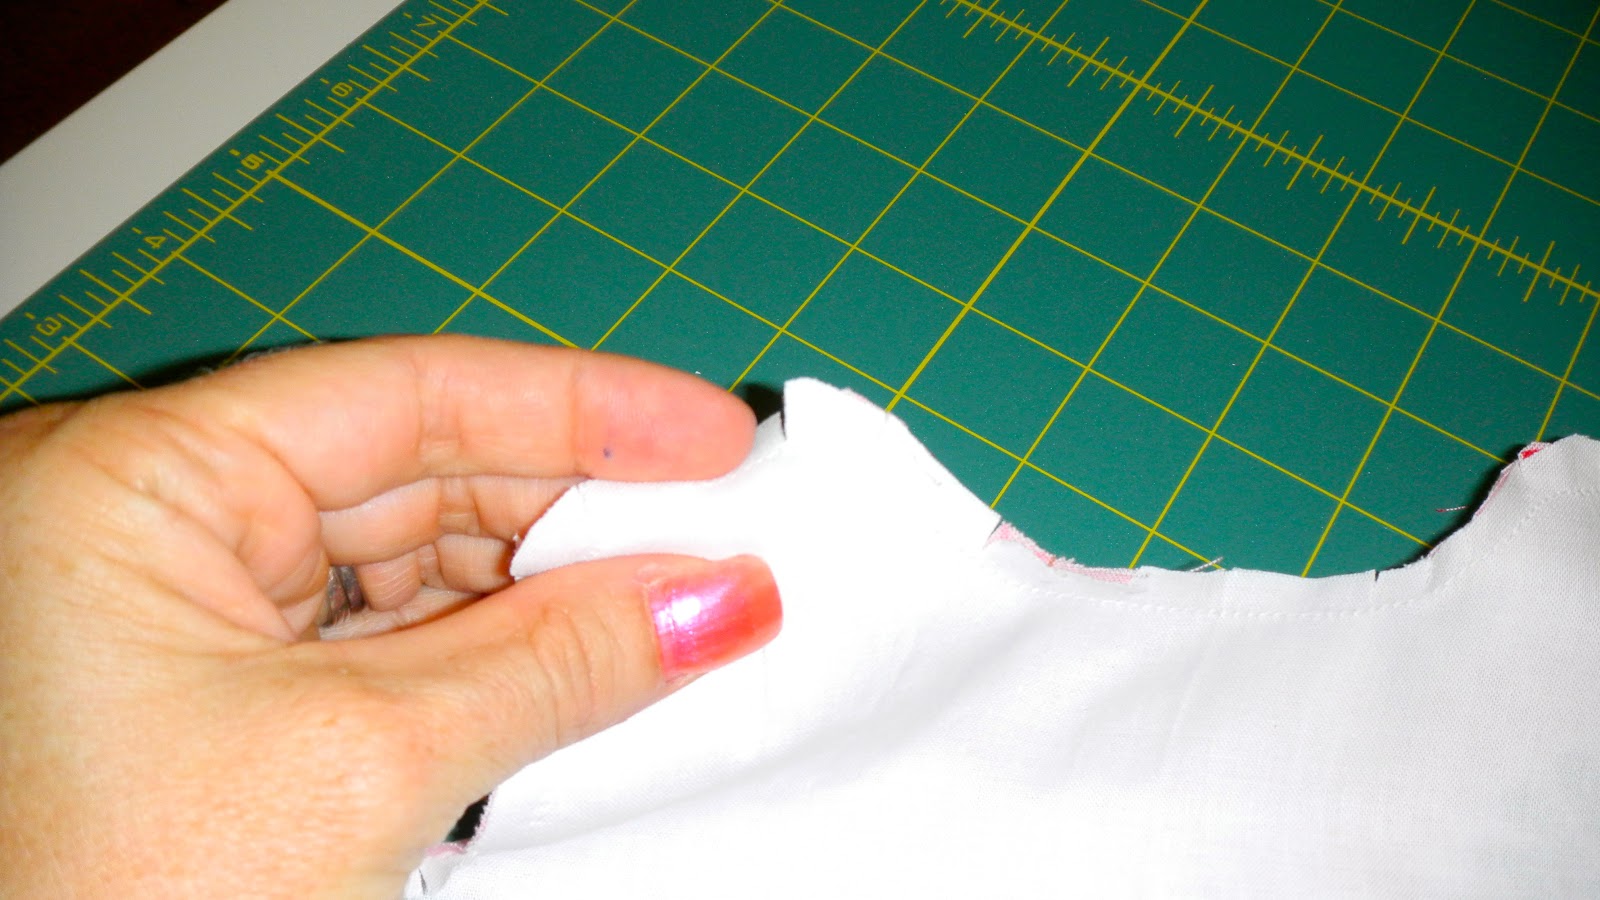
Clip the seam allowances around the curved parts of the garment, being sure not to cut the stitching.  This will help when turning the pieces right side out.


Then turn both your front and back pieces right side out.  You can use any blunt instrument to help get the corners out beautifully.  Chopsticks work wonders! 
You can also add size and/or care labels if you choose.


Once you have it right side out, lay your front and back together, right sides facing each other.  You will pull the facing pieces upwards, opening them up and pinning together also.  


Make sure your seams match up at the armholes.


Sew your front and back together using recommended seam allowance.  You will start at the edge of the facing and follow all the way down to the hem of the dress.  


If you have an overlocker/serger, go over the same seams to neaten or use a zigzag stitch


Pull the facing back down so it covers the stitching.  


It looks nice and neat on both the inside and outside!


Topstitch around the entire top half of the dress, starting just behind one of the armholes and following all the way until the stitches meet again.


You have now successfully sewn a facing into the dress!  
Follow the remaining instructions on the pattern to complete the garment.  
These instructions could be used for most dresses and tops that require a facing.

I hope you found this tutorial helpful - I certainly had a "lightbulb moment" when I realised it had worked!  You can purchase this pattern from Patterns Only, as well as hundreds of other great patterns!


Related Posts Plugin for WordPress, Blogger...