Showing posts with label Help. Show all posts

Monday, January 19, 2015

Sewing For Sydney - Team Blue!

You may have heard about a wonderful quilting collaboration - Sewing For Sydney - happening at the moment?  The delightful Molli Sparkles came up with a wonderful idea - to make quilts for the families of the two people who were sadly killed during the Lindt Cafe siege in Sydney before Christmas.  I was totally on board the day I saw the call out, and whipped up five blocks and sent them off.

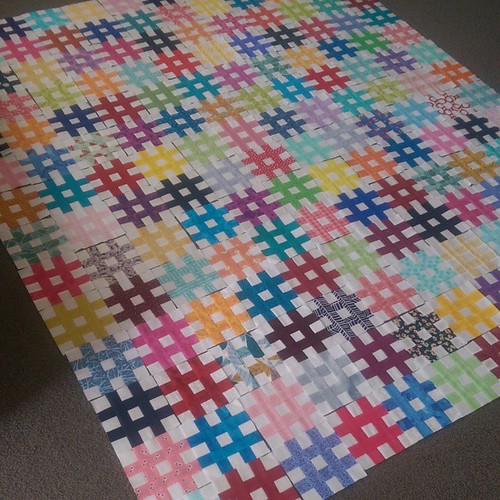
A few days later, I noted just how many blocks Molli was receiving, which meant his goal of making a "couple" of quilts was going to be very quickly blown out of the water, and he may just need a little help?  I sent him a quick message, telling him I'd be more than happy to put a quilt top together if need be.  It was a resounding yes, and a couple of weeks later, 168 lovely little hashtag blocks arrived on my doorstep.

We have a layout! My 6 & 10 year olds just asked what I was making? I just explained the whole story of how @molli_sparkles and the world of quilters have come together and who the quilts were for and why. They were both very impressed and thought it was

And a couple of hours later, I had a layout, ready to sew together.  It was a very random layout, as requested by Molli, and I loved the way the colours all looked!

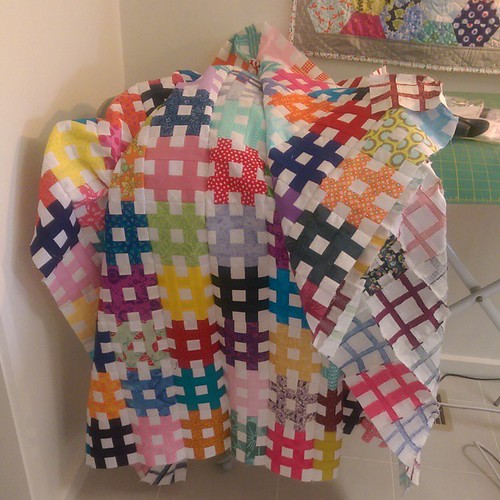
Done! #teamblue has a completed quilt top.....just needs pressing, which will have to wait until I get home from work tomorrow morning! #glitteratitotherescue #sewingforsydney @molli_sparkles

The quilt top was reasonably quick and easy to put together - it helped that I was directed not to worry about lining up the hashtag seams - cos that wasn't going to happen!!!

Hashtag Quilt For Sydney 

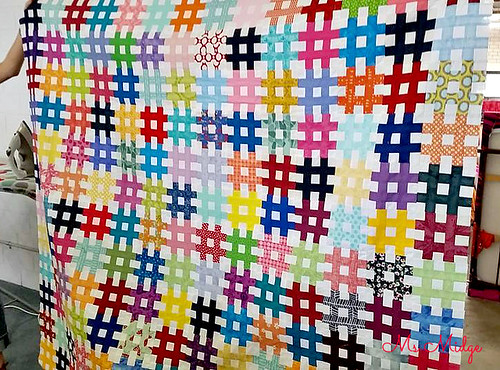
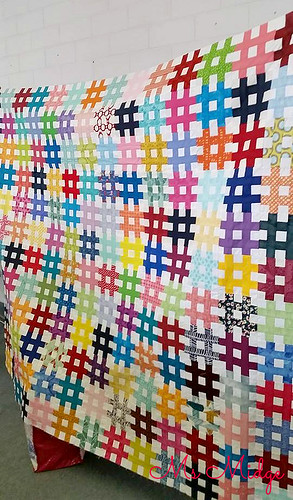
Yesterday was our Melbourne Modern Quilt Guild's sit n sew day.  I took the quilt top along, as the Blue Team's baton was being handed over to Andrea - a fellow Melbourne quilter who had offered to put the backing and binding together.  We showed the guild members - some of whom had contributed blocks to the cause.  It was a really lovely way to demonstrate how a community of quilters, from ALL over the world, can come together to hopefully bring some cheer to families who have lost such a dear loved one.

Hashtag Quilt For Sydney

So, this lovely quilt top will soon be off to our Team Blue's long arm quilter, for some magic to happen, before it is bound and sent back to Molli for distribution!

So - I just want to send out a big THANK YOU to Molli, for allowing me to be a part of this bigger picture.  You've done a good thing girlfriend. xxx

Tuesday, August 12, 2014

Sew Kind Of Wonderful Blog Hop

QCRbloghopbutton


It's true - I have signed up for a challenge - I'm participating in the first ever Sew Kind of Wonderful Blog hop.  Now, given I bought my Quick Curve Ruler back in April, and it's still sitting in its wrapping, very patiently I must say, I'm what you would call a "QCR Virgin".  Ahemmm......  Well, that's about to change!  I've just read through my first QCR pattern and although my head is about to explode with information overload, I'm doing what I do best - jumping in head first!

The blog hop is kicking off on Monday with the following amazing bloggers in showcasing the Quick Curve Ruler and patterns. We have:

Monday 18 August http://quokkaquilts.com
Tuesday 19 August www.cluckclucksew.com
Wednesday 20 August www.fromthebluechair.com
Thursday 21 August liveacolorfullife.net
Friday 22 August www.happyquiltingmelissa.com
Monday 25 August www.greenfairyquiltsblog.com
Tuesday 26 August http://blog.sewbittersweetdesigns.com
Wednesday 27 August www.pleasant-home.com
Thursday 28 August http://www.lucymade.wordpress.com AND http://msmidge.blogspot.com.au
Friday 29 August www.dontcallmebetsy.com

There will be plenty of chances for you to see the Quick Curve Ruler in action, and there will be giveaways galore, so make sure you check in on Monday for more details! The blog hop is going to be followed by a 'Curve it up' Challenge Quilt-a-long on the Sew Kind of Wonderful blog starting in September, so join in the blog hop, get inspired and get ready to Curve It Up!

  CurveItUpQALbutton

Watch this space!

Thursday, July 24, 2014

TUTORIAL - Table Basting Your Quilt

Last year some time, I heard someone, somewhere, talking about table basting.  Table what-ing??  I was sold before I even knew what it meant!  I'd spent forever crawling around my lounge room floor, or tiled kitchen floor, basting my quilts - and my knees had had enough!  I'm hearing a collective "ahuh" from you all right now aren't I?  Since that lightbulb moment, I have somewhat perfected the process, and now enjoy basting don't hate it quite as much, and revel in my smooth quilt backs!  I have repeated this process to numerous friends, who are all enjoying basting success also, so thought I'd share it with you all!

Now - the first rule is - you do not have to have a 10 seater dining table as I do!!!  Baste your quilt on the table you have, and follow the same instructions.  Having a smaller table just means you will have more overhang on the sides and possibly - ends of your table.  The second rule is......  Well, there is no second rule.  Let's go.....

baste

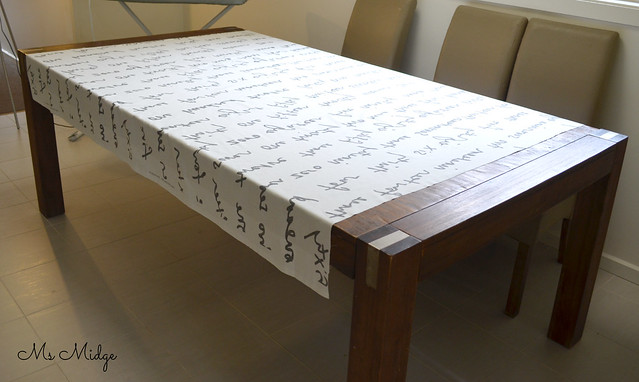
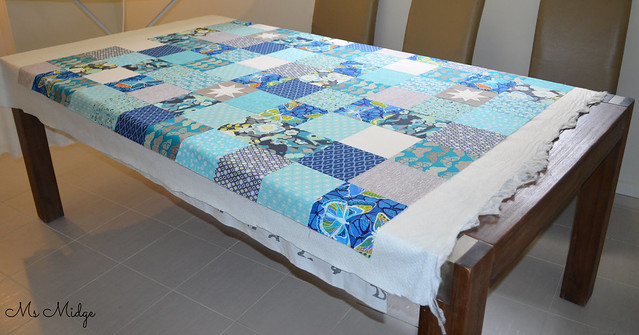
First step is to iron your quilt back to within an inch of its life.  Make sure that baby is silky smooth without a crease in sight.  Take said quilt back and lay it on your table.  You want to have it centred as much as possible ie. the same amount of overhang on all sides.

baste2 

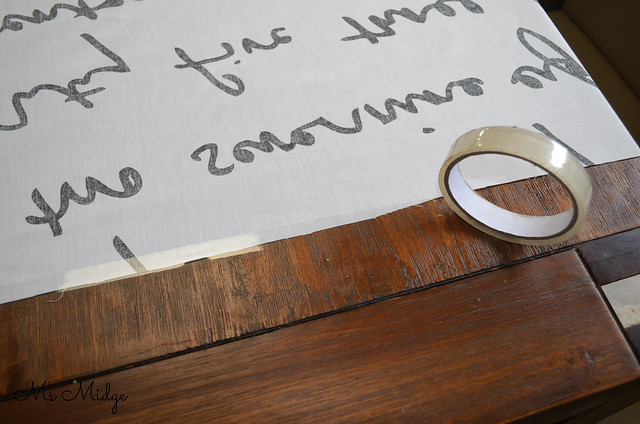
Then go and rummage through your kids art & craft supplies (or your own) and find your self some sticky tape (or cellotape - whatever it's called wherever you are!).  You can use any tape at all - so if gaffa tape is all you have - make it work.  You want to tape both ends down to your tape.  Making sure you keep your smoothness intact!  If you have a really small table and a really big quilt, you're going to have to get inventive!  I've had others say they use bulldog clips etc.  So think about what you have handy that's going to keep that quilt back in place!

baste4

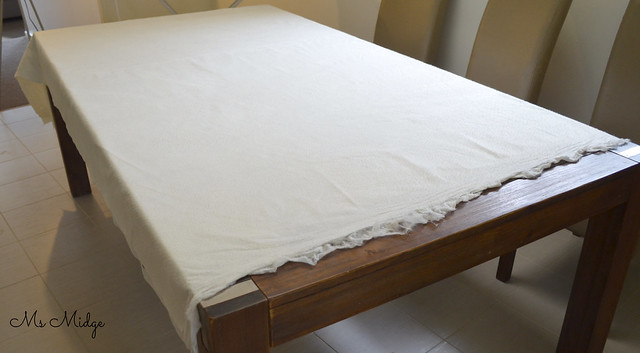
Once you have secured your quilt back, it's time to layer up.  Lay your batting on top, using the same technique - centre it over your quilt back, with the same amount of overhang.  Then smooth it all out, from the centre outwards.

baste5

Same same again with your quilt top.  Iron it super smooth, then pop it over the top!  It's really important you follow the same theory as any basting process - and smooth it from the centre out.  This way you will end up with a straight quilt top!  I have been known to sometimes iron the quilt top once it's on top of the quilt sandwich - if it's been creased considerably in the putting on top of everything process.

baste6

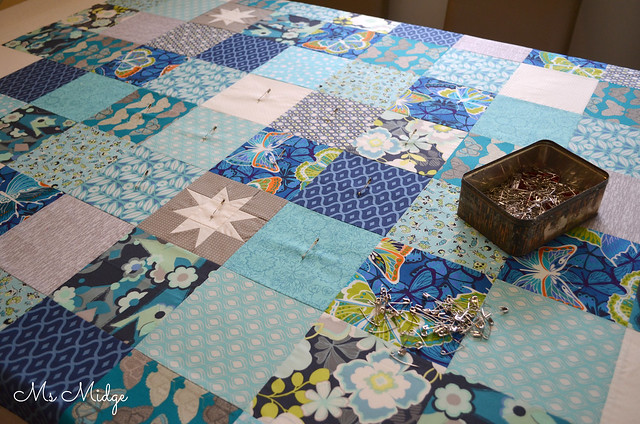
Now it's time to baste.  I baste from the centre outwards - which is what I learnt through all my online learning.  Use as many pins as you think your quilt warrants - but remembering the more pins the safer you're going to be!  Once you've pinned all of the quilt top that is on top of your table, it's time to move on to the overhanging sections.....  You need to remove your sticky tape for this to happen!

baste7

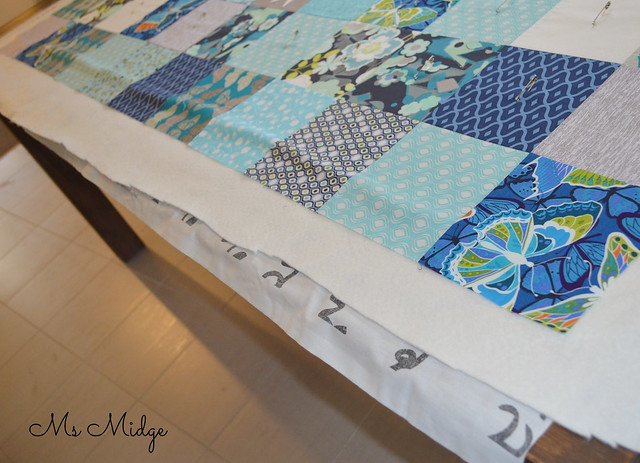
You want to go to the side of your table and with both hands, gently pull your quilt over to one side, revealing the overhang on the other side.  You will see in the photo above that you have a big kink in the quilt sandwich?  You now have to smooth that outwards and repeat all the other steps to baste that section.

baste8

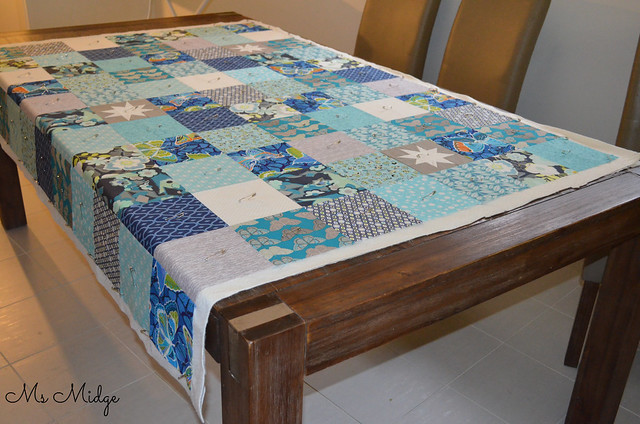
Repeat again, by pulling the quilt over to the other side, which will reveal your last remaining section.  Baste - AND YOU'RE DONE!

baste9

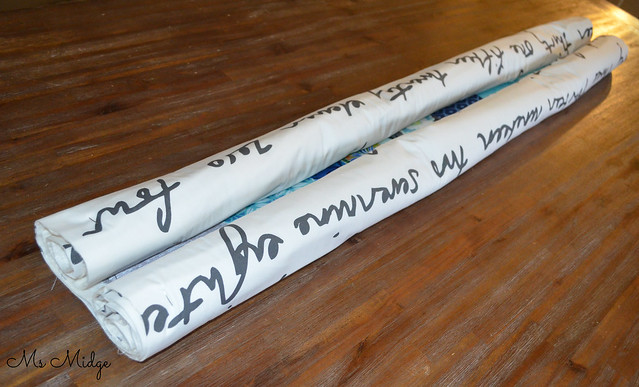
Once I have basted my quilt, I then roll it up ready for quilting and it usually sits on top of the lounge in the back room.  Or if I'm really keen, I'll then set my machine up on the dining table and quilt it then and there!

I really hope you've found this helpful!  I've seen/heard of tutorials for table basting which includes using lengths of timber (?!??!) but I'm a huge fan of keeping things as simple as possible, with as little props as possible.  I think this method demonstrates that!

If you have any questions at all, feel free to fire away!  As I said earlier in this post - I have never had a problem with my quilting using this method - no puckering, bunching up or folds in the back.  If it works for me, I'm guessing it could work for you!


Monday, June 9, 2014

No Waste Drunken Geese Tutorial

Welcome to week two of the Modern Medallion Quilt Along!  I'm here to help you through the next couple of steps.  By now, you should have your New York Beauty Contest done and dusted, and looking to get your plain Jane border and  drunken geese on.  Now, I'll be perfectly honest here, and tell you that I just couldn't figure out how to do the wrap around method for the plain Jane border!  I read the pattern multiple times, but it just wouldn't click.  So I did a regular border.  BUT, I did figure it out eventually, and attached my drunken geese border wrap around style!  So I will share a quick tutorial for that method tomorrow.

For now - let's make some geese - NO WASTE style!  I decided to figure out the no waste method for these little blocks, basically because I started hyperventilating about wasting lots of my precious AMH fabric.  After some searching of the net and desperate search for the mathematical part of my brain, I came up with this...


DSC_0375

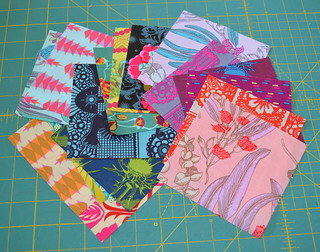
Cut yourself 20 Large squares of your coloured fabrics - 4 3/4".  These will become your triangles (geese).

DSC_0376

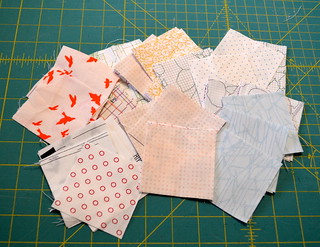
Then attack your low volume stash and cut out 80 Small squares - 2 5/8" (these become the outers of your geese).

DSC_0377

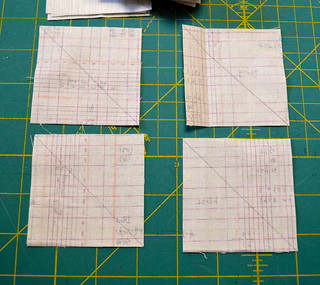
Draw a line diagonally on every single low volume square.  


DSC_0380

Place two of your low volume squares over your large square like so.  Making sure your diagonal lines match up with your corners and eachother.  

DSC_0384

Sew 1/4" on either side of your diagonal line (chain piecing works wonderfully with this technique and saves a whole lot of time!  And makes some literal flying geese - see below!).  Then cut straight through the middle on the drawn line.

DSC_0400


DSC_0385

Press them to the side like above.

DSC_0386

Take another low vol square and place it on top like above.  Once again lining up your diagonal line.  Sew 1/4" on either side of your line, and then cut through the middle again.

DSC_0388

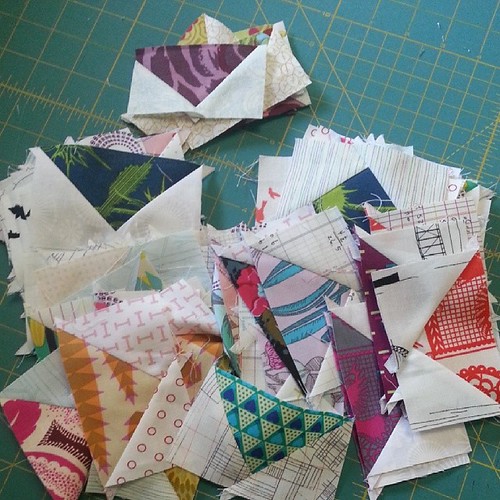
And once pressed - you will have four flying geese from each block!  Now to make them wonky....

DSC_0390

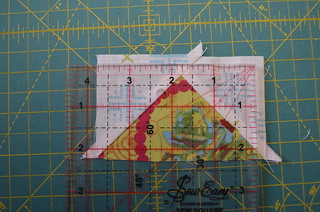
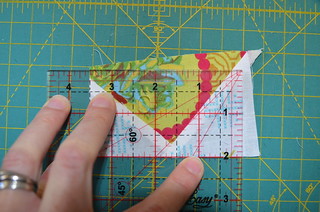
As you can see, your geese end up 4" x 2.5".  We want them to end up a finished size of 2" x 3.5", so you have a little room to work with.   Take your ruler - the smaller the better, this is a 4.5" square - and position it on top of your block.  If you want to keep the points of your geese intact, ensure you have a 1/4" above the point.

DSC_0392

Then turn your ruler in any direction you wish - as long as you have 4" in width and 2" in height.  Trim these two sides.

DSC_0394

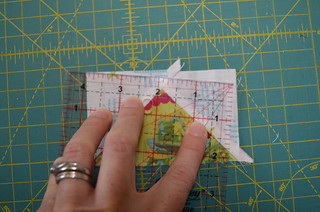
Flip your goose around and then square it up, lining up the two sides you have already trimmed with your finished size on your ruler.  Now trim the other two sides.

DSC_0395

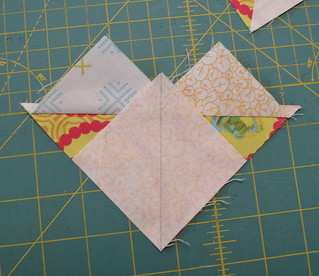
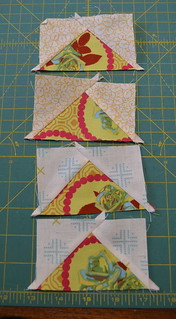
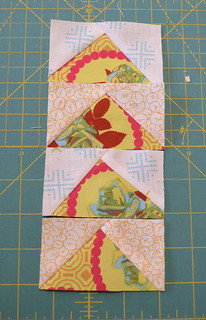
And HELLO wonky geese!  This tutorial will yield 80 of these suckers for you!  And I can tell you I had all 80 geese done and dusted within a day.  Winning!

Honk honk! 80 little geese ready to be wonkified! #modernmedallion #modernmedallionquiltalong

I hope you found this helpful and look forward to seeing a whole lot of drunk geese getting around!  Remember to check back in a couple of days, when I share the wrap around border tutorial!


Monday, November 4, 2013

An Isosceles Puzzle - Tips for Making a Triangle Quilt

Isosceles on Point
 When I was asked to make my Isosceles on Point quilt, I was very helpfully pointed towards THIS tutorial/pattern.  This was the inspiration Larissa had found - which was very helpful indeed!  It was great to get an idea of what I was in for, however, it was  quite basic, and didn't really answer all the questions I had in this new triangle world I found myself in.  And it seems that I'm not alone.  A lot of you asked for tips and told me how scared you were of tackling triangles, so I took a bunch of photos throughout the process, and will hopefully make some resemblance of sense!

In terms of fabric yardage required, I can only tell you how much I used for a king single size.  I bought 1.25metres of each fabric, and when it was finished, I think I had about 20cm of each leftover.  The backing fabric was I think 5 yards.

The template that came in the above tutorial has a flat tip on the triangle.  Now this may make sense to some of you - but it had me stumped, and I could not for the life of me figure it out - no matter how much I googled and asked Yahoo!  So after sewing two rows of flat tipped triangles together, and noting that they were a big fat fail, I altered the shape myself.  It ended up being 5 3/4" across the bottom and 8" high.  If you print out the template from above link, you can trim it to the point!  To cut the triangles out, I cut rows of fabric 7.5" high by the width of the fabric.  Then use the template to top and tail your triangles.  I actually placed 6 layers of fabric on top of each other and cut through them all in one go - because I'm super impatient!

For the end half triangles, I cut half triangles as instructed.  BUT, if I were to do it again, I would just start and finish each row with a full triangle, and then once the quilt top was completely put together, trim it straight down each side.

Le Template trimmed.
Once I had a pile high of triangles, I then needed to figure out fabric placement.  I am still yet to have a design wall, so I was very lucky indeed to have a very organised customer/relative who had done all the hard work.  Ok, well, the first bit of hard work…..

Larissa drew up a grid of triangles, and proceeded to get her crayon on.  This was extremely helpful when it came to fabric placement.  And as you can see, I had to add an extra piece of paper and draw some more triangles.  Clearly I am not an artist in the drawing sense!  But it worked.  I used 7 different colours/hues in this quilt, but you really can use as many or as little as you wish.
Once you've got your fabric placement sorted, you need to panic get prepared to sew them together!  Make sure you have some time and patience.

Begin by taking your first 2 triangles.  Place them RST (right sides together) as shown in the photo below….
(I realise this is not the first two triangles together, but have no photo of  that!)  You want the tip of your triangle to be peeping out at the other end.
You want your little overhang to measure 1/4".  Because where that 1/4" point is, is where you start sewing your 1/4" seam.
With your 1/4" foot on your machine (or if you don't have one,  make sure you have a mark on your machine to follow) put the point of your triangle in.
This photo shows that each time you put your triangles in to sew, the needle should line up with where your overhang begins.
Sew all the way down the triangle, when you get about half way, put your needle down and get the other pointy end of your triangle and align it all together, making sure you again have a 1/4" of triangle peeking out at the end, like in the above photo.  Your stitching should end just like that.  I found it easiest to hold the little overhanging bit at the end so it didn't slip away!
This is what your triangles should look like at the end of each one.  You should have an "intersection" which forms a neat little triangle seam, with overhanging bits.
And once you've continued on adding triangles to your row, press all the seams to one side.  You will have rows of neat little triangles!
When you've got your required amount of rows completed, it's time to sew them together!  This is where some of the things I've noted earlier will come in to play……
Take two rows to be sewn together, and place them RST.  Remember which edge you will be sewing together - otherwise you will find that your fabric placement will be wrong - don't ask me how I know that……..
Get your first "intersection/point" of each row, and line them up.  The most accurate way I found, was to try and line up the points on the inside as pictured.
Once you have the points lined up, pop a pin in right at that point.  When you get to sewing it together, you will know to stop about an inch before that pin to make sure it all still lines up.
Don't worry if your points meeting up means that your top seams are out of whack.  The seams don't matter even half as much as the points!  Pin at EVERY. SINGLE. POINT/INTERSECTION.
When it comes to the actual sewing of the rows together,  where your points meet "should" be around 1/4".  However, do a little measure before you sew, then you can adjust your seam allowance accordingly.  I had to move my needle over one notch to the left, as my points were just over 1/4".

Now you just literally sew!  As you approach your intersections which have been pinned, make sure they are still lining up and that you don't have any "give" in your two triangles.  If you have to ease the fabrics together a little to ensure your points will still meet, then do it!
It was VERY hard to get a photo as I sewed across the intersection!  But you basically want your needle to run JUST across where the point of your intersection is - see photo below.
This is a great example of getting the row of stitching right across the tip/point of the triangle intersection!
And this one too!
When you manage to get the stitching really right, as in the previous two photos - this is what your points/intersections will look like on the right side - PERFECTO!
There WILL be times when you won't get it perfect - but hey - the points are still there…….  See photo below.
See - you still get the points, but there's just a little, little bit of space above and below each one.
Once I had all my rows sewn together, I trimmed off all the overhanging dog ears.  You don't have to do this, but I find it just takes away a little more bulk when you're quilting.

I also like to press my seams apart for the same reason.  
When you have it all pressed, you can feel very VERY proud of your hard work and ALL THOSE POINTS!! 
And one last photo.  I had a few peeps on Instagram ask me about my basting process when I posted this photo.  I have learnt that I can do it standing up, on my dining table (Ummmm, that sounds a little wrong, but you know what I mean!).  It saves my knees and my carpet (and again, sounds wrong).  Here's a quick explanation of how I do it….

I have quite a large dining table - it can fit 10 seats around it.  If I'm doing a quilt that is smaller in length than the table, then I place the backing wrong side up on the table top.  Making sure it is completely flattened out with no ripples etc in it, I get some thick sticky tape (cello tape) and tape the ends of the backing to the table.  I then lay the batting on top, ensuring I smooth out any ripples etc again on the backing.  I find that the batting smoothes out very easily!  Then it's time to put the quilt top on.  I fold the quilt top in half length ways, right sides together.  Then line up one end to where I want it to sit on the batting/backing.  Once I have it lined up on the end, and the sides, I place it down, and unfold over to the other end.  Again, time to smooth it all out and adjust it where necessary.

Once it's all smoothed out and where it should be, I start basting from the centre outwards, and when the whole table worth of quilt is basted, I unstick the tape from the ends, and from one side of the table, centrally, gently pull the quilt over to reveal the rest of the quilt that requires basting.  It's then a matter of smoothly that section out again.  Repeat for the other side.  And HELLO - quilt basted!

If you have a quilt that is too big to sticky tape down on your table top, it means it's usually heavy enough not to move around too much - like the triangle quilt.  It just takes a little more time to smooth out and make sure you won't have a bunched up backing!  I have to say - I haven't had any problems (yet) using this basting method!

So there you go my friends.  A sort of tutorial on how to make your own isosceles triangle quilt!  Now - go forth and triangulate?!!!?!

Related Posts Plugin for WordPress, Blogger...