Showing posts with label Aurifil. Show all posts

Friday, December 19, 2014

T.G.I.F.F. - 2014 Quilt Finale

2014 has been a big year for me - quilting and otherwise.  As the year closes, I have my last two quilt finishes to share with you!  I count myself very lucky to be chosen to make something, as special as a quilt, for others.  The fact that people put their faith in me is really lovely.  Both of the quilts I'm sharing today are for repeat customers.  So I guess that says something about my product!

You may remember my Isosceles on Point quilt from last year?  Well, it now has a brother!
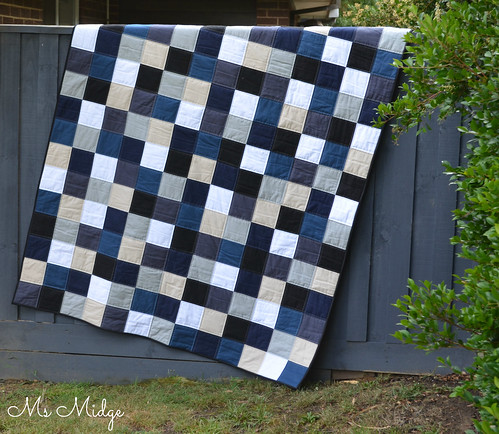
Custom quilt for Archie 

This divine king single quilt is made up of 5" squares in a range of beautiful blue and grey, mixed with black, white and taupe.  It is a colour palette I wouldn't necessarily have thought to put together, but Larissa always has a great eye for colour, and chose them all herself - then delivered them to me.  It was my job to make her vision come alive.

Custom quilt for Archie 

I placed all 221 squares quite randomly, only making sure there weren't pools of the same colour together.  Once quilted with a variegated Aurifil thread #4060 - which is a silvery/moss mix - it really popped.
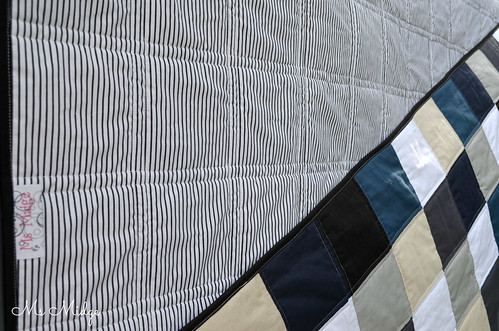
Custom quilt for Archie

Larissa chose this great striped backing.  It's actually a sheeting fabric, which is super wide and made basting super easy.  This quilt is going to wash up so beautifully, and will keep its little recipient snug as a bug!  It was delivered today, just in time for a birthday!

Next up is the third quilt for a family.  The youngest of three boys needed a quilt to call his own, after his big brothers received theirs last year.  Cass left the colour and fabric selection to me, and was in no rush, so earlier this year I bought a fabulous bundle from Pink Castle Fabrics.  Greys, turquoise and orange were the winning palette and man, do they work well together.....
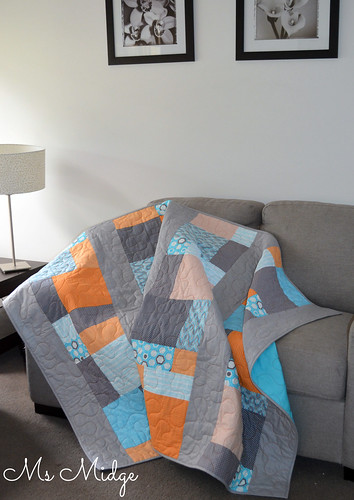
Custom quilt for Brodie 

The design is a basic disappearing nine patch, using 9" squares.  I love the random placement you are left with when you cut up a nine patch!  I also used a grey shot cotton from Spotlight for the solid mixer.  If you ever get the chance to use the shot cotton, do it, it's actually really lovely.
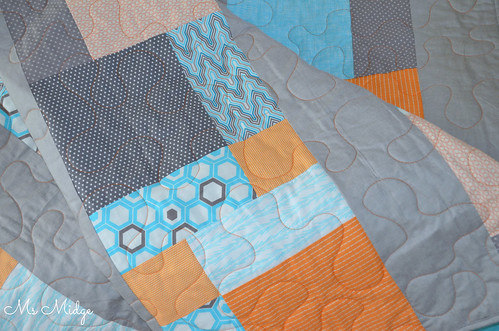
Custom quilt for Brodie

I quilted using a meandering free motion pattern, which I think looks a little jigsaw like.  I used a vibrant orange Aurifil #2150.

So, there you have it.  No more quilts for 2014!  But plenty of WIP's awaiting attention and new projects in line.....


I know I have been a slack blogger of late, and I have not replied to everyone's comments, but I've been flat out and am now dealing with some sort of weird virus, which comes with a delightfully itchy rash and a 6-8 week cycle.  Sooooo, thank you again for always taking the time to come and read my posts and please know I read all of your comments and really do have the intention of replying!!!
xxxx


Tuesday, December 2, 2014

Confetti Cannon

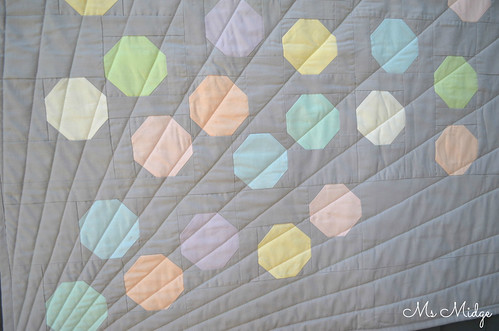
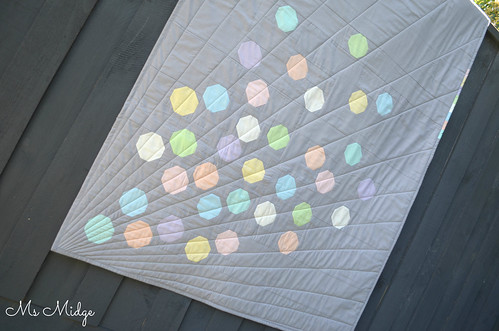
When the MQG sent out an email a few months ago, regarding the Quiltcon Michael Miller challenge, I very quickly signed up thinking "this will be fun!"  I received my little bundle of pastel cotton couture weeks later and thought "Ummmmmm".  I had no idea how to make the pastels work.  I mean, I've only ever used pastels a few times in my quilting life, so was left a bit deflated.  I took them out again not long after and just stared at them.  That was when I thought of Confetti.  The tiny little pieces of pastel paper, which are used in celebrations everywhere.  And that was my inspiration......

I went "old school" for the planning of this quilt.  After weeks of having confetti twirling around in my head, I got myself some grid paper and pencils, and literally just drew up what I'd been thinking of.  And the following day, made the entire quilt top.

Confetti Cannon

As per usual, I winged it a bit!  I made it up as I went along - literally dividing my design up in to blocks of squares of rectangles, however the little confetti spots would fit in.  The 3" snowball blocks were easy-peasy.  34 in total.  Because I wanted the confetti to be randomly scattered throughout the quilt top, it made the piecing rather, shall we say "interesting"?  It is probably what some Modern peeps would call "improvisational" - I just call it random!  But it worked - and that was the end result I was after...

Confetti Cannon 

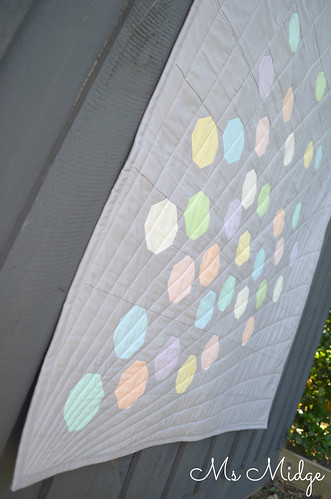
Once I had the top made, I thought and thought and thought about how on earth I was going to quilt it.  I had an idea in my head, but thankfully one of my lovely MQG friends - Katrina - cemented the idea and helped me visualise it!  I think the diagonal lines from the bottom corner help create movement and project the confetti up in to the air!

Confetti Cannon 

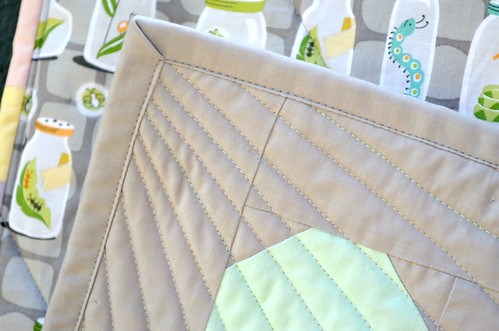
I mostly stuck with the grey for the binding, but also added a little pastel rainbow to the side.  I LOVE it!

Confetti Cannon 

This photo shows you a little more closely how the piecing has been done.  It's one very fiddly jigsaw puzzle!

Confetti Cannon 

The Michael Miller challenge rules are to use all Cotton Couture in the quilt top and then any Michael Miller fabric for the binding and backing.  I made a quick trip down to the large quilting store nearby and scoured their shelves for something to suit as backing.  This quilt was always going to be for a baby/child, so when I stumbled (literally, I stumbled over it) over this Backyard Baby print, I grabbed it!  It's SO perfect.

Confetti Cannon 

It's a little difficult to photograph, but I used several pastel shades of Aurifil in the quilting - re-threading my machine after every. single. row.  Was it time consuming?  Yes.  Was it worth it?  Yes!!

Confetti Cannon

I spent all day Saturday stressing about the photos to submit!  You see, I've never actually entered a quilt show!  And the rules state only two photographs to be sent in - one hanging on a wall and the other a close up.  So I moved furniture in my front room so as not to get any shadows and did my best!  I guess only time will tell.....

I have thoroughly enjoyed this challenge - because it really was a challenge!  Throw a girl some pastels and see what she can come up with!

The Stats:

Name:  Confetti Cannon
Size: 40" x 60"
Fabric: Michael Miller Cotton Couture pastels & Ozone.  
Backing:  Michael Miller Backyard Baby
Quilting:  By Me on my Bernina
Thread:  Aurifil 40wt Pastels

I'm linking up - You can too!

Sew Cute Tuesday

Fresh Poppy Design


Saturday, November 8, 2014

London Calling!

It's finished!  

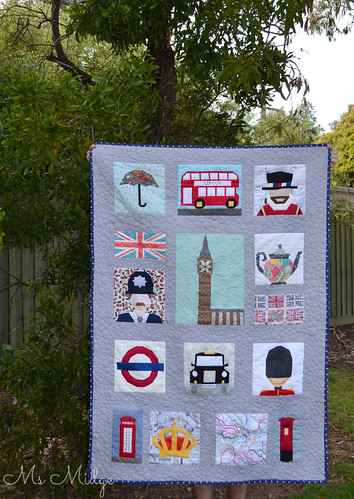
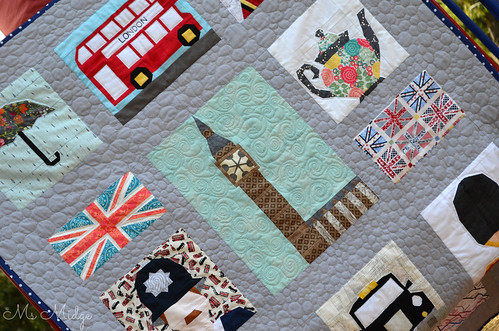
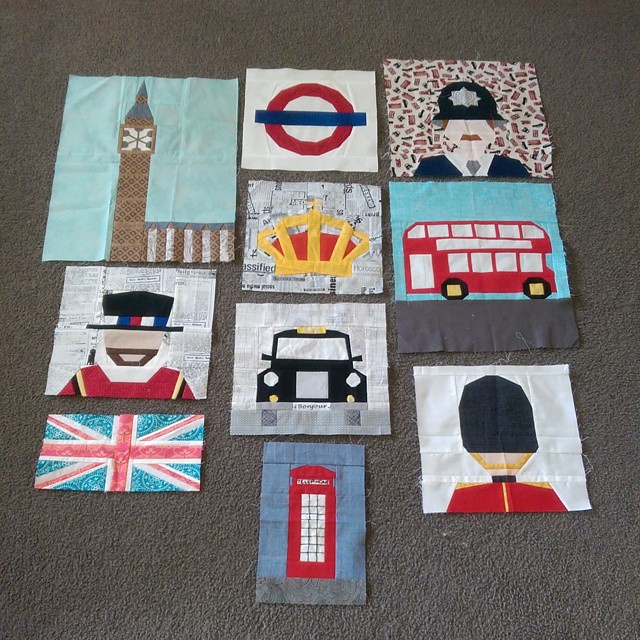
I feel like this quilt has taken me FOREVER, but in reality, it's just been a process of patience and lots of love.  It all started in April, when it was my turn to be Queen in our paper piecing Wombat Stew bee.  I knew I had lots of quilts to make for 40th birthdays in the coming 12 months, so tried to think of one in particular that could use some paper piecing blocks.  It didn't take me long to propose London themed blocks, and the lovely Kristy designed some amazing patterns for us to use, as well as Alyce designing her own Big Ben block!

London Calling Quilt 

The finished blocks started arriving and I was gobsmacked at how fabulous they were!  I received seven in total, so then just had to make up the rest myself.  I ended up with 13 paper pieced blocks, and added two fabric blocks to make up the numbers.  The lovely Deborah Gun on Instagram sent me a fat quarter of London subway fabric - it's amazing!  Putting the quilt top together was painstaking......literally, my brain was in pain with all the maths required.  Nine of the blocks were the same size, the others were all over the show!

So I just sat on my loungeroom floor with a calculator, pen and paper, and worked out how big each row of sashing needed to be between every single block, in order to end  up with a balanced quilt top.  I'm incredibly proud of myself for making it work!

London Calling Quilt 

When it came time to quilt, I really had no idea where to begin.  I threw it open on Instagram for suggestions, and I believe it was Melanie Sim who mentioned cobblestones.......  When I sat down at my first ever Melbourne MQG day, I thought I'd give it a go.  If you ask the ladies I was sitting with how much I enjoyed the pebbling process, I think you would hear a few expletives.  I think in total, the pebbling over the entire quilt top took me about seven hours.  I tried really hard to make the majority of them largish, so as to cut down the time - but really, who was I kidding?!?!?  I am very glad I stuck with it though, because I love the texture and character it has given the quilt.  I used a gorgeous variegated Aurifil thread #4060 - which is creamy/mossy/grey tones.

London Calling Quilt 

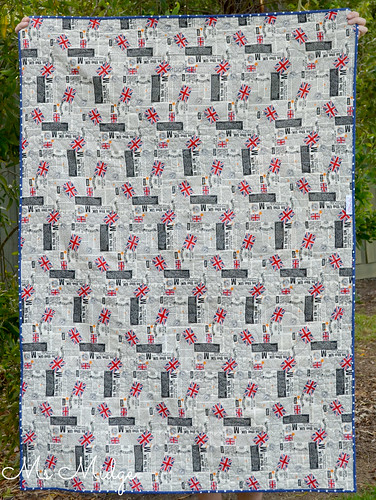
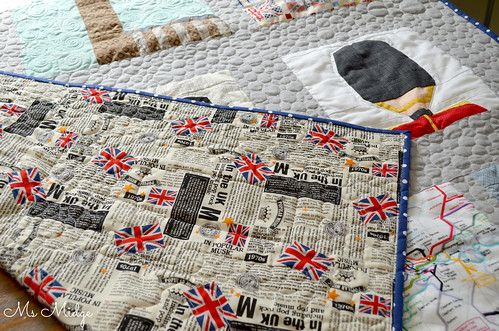
The backing I actually picked up at the beginning of the year!  I was at a Spotlight sale and this Union Jack/British newspaper print was reduced to $3 a metre!  I bought a few metres and stashed it away for the quilt I knew I'd make.  I did THE BEST print joining on the seam - you can't even notice it's two pieces of fabric!

Now - let me just take you through each block, because they're all so special!

London Calling Quilt 

I knew I had rain drop fabric stashed away for good reason.... Kristy upsized her umbrella pattern for me!

London Calling Quilt 

Marieka made this super cute Bus!  I free motion quilted the LONDON on!

London Calling Quilt 

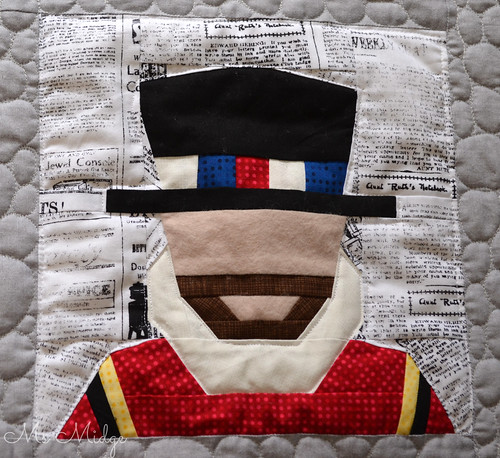
I pulled out my stash of these dots for the Beef Eater, and was able to use the same prints throughout the quilt.  I also use felt for faces in paper piecing - it adds a great texture!

London Calling Quilt 

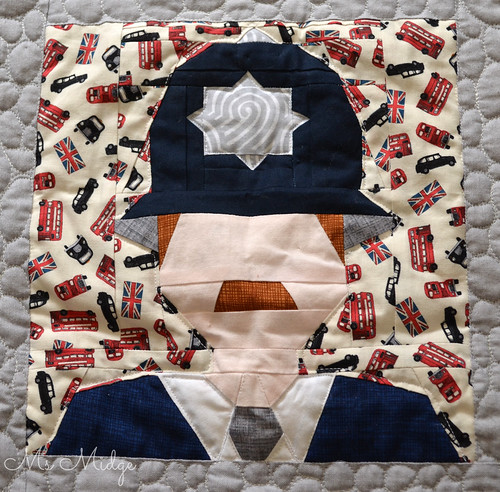
Gina sent me my London Bobby!  Isn't he fabulous!?

London Calling Quilt

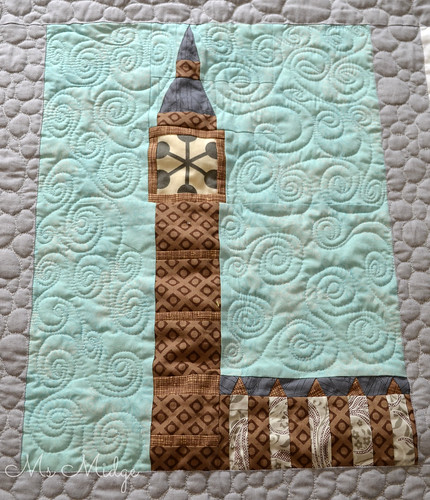
Alyce's fabulous Big Ben block!  The fussy cutting of the Comma fabric is spot on.

London Calling Quilt 

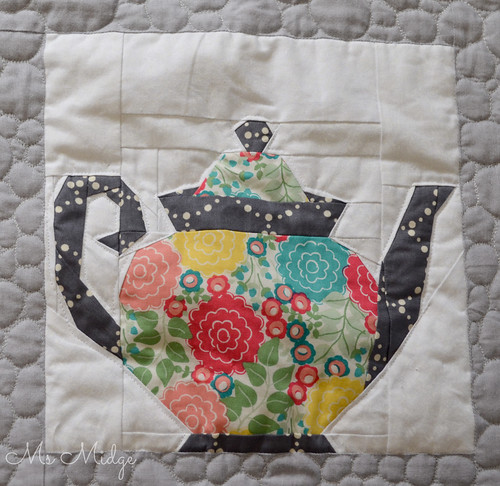
I also added the teapot. Another Quiet Play pattern.  It's actually one of my favourites blocks in the quilt.

London Calling Quilt 

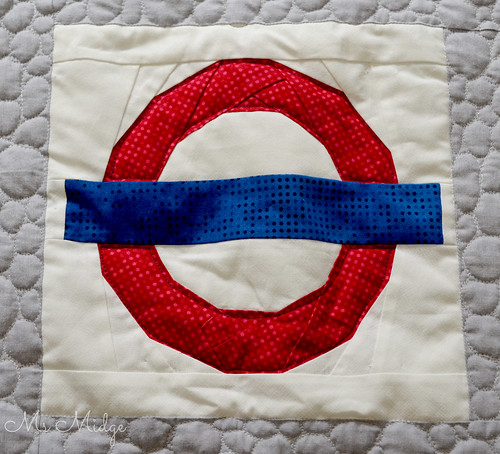
A very simple but great Underground sign.

London Calling Quilt 

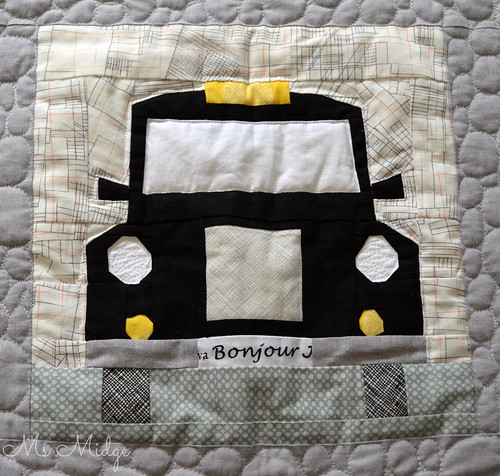
And my London Cab.  I wish I had "London" on fabric to use for the bumper bar, but thought French would work!

London Calling Quilt 

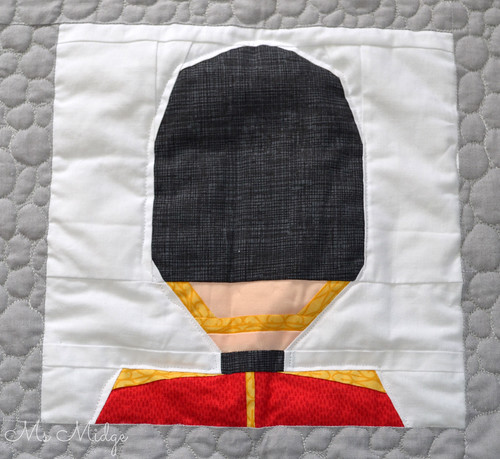
Kristy made the Guard block, and her fabric choices just make it pop!

London Calling Quilt 

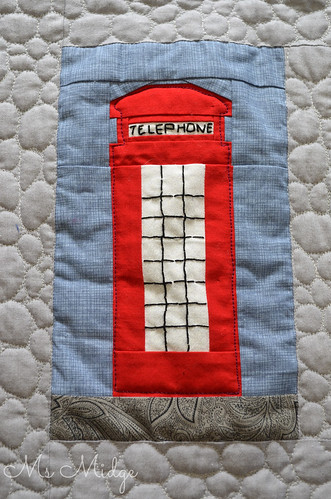
Jane made the telephone booth and embroidered all the details.  Love it!

London Calling Quilt 

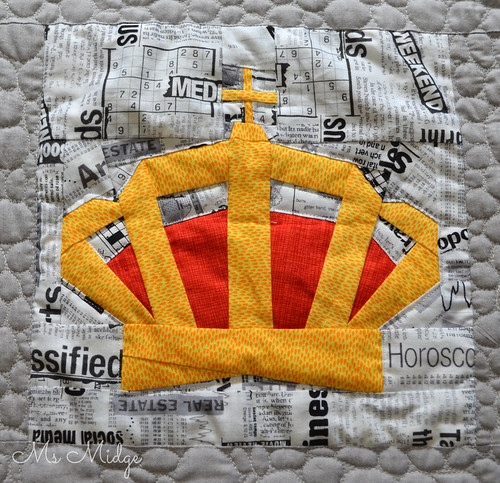
And Lara's crown block is awesome!

London Calling Quilt 

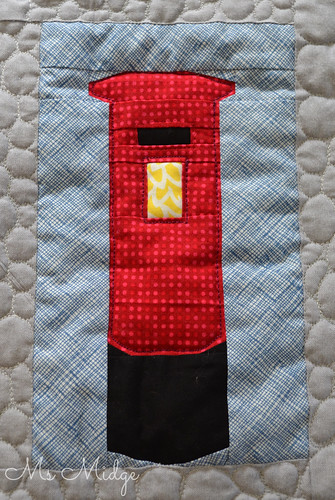
When I was one block short, Kristy just "whipped" up this post box block for me - she's amazing!

London Calling Quilt

So - there you have it!  I finished it all off with a lovely navy and white spot for the binding, which I think works beautifully.  I am reallllllly looking forward to handing this over to one of my best friends tonight, she's receiving this as it is being published!

The Stats:

Size:  61" x 44" - Lap Size
Fabrics:  A cast of millions!
Thread: Aurifil #4060 40wt
Batting: Wool/cotton blend - it's fabulous!
Recipient:  Karen - who just happened to live in London up until 18 months ago, when she returned to Melbourne!

I'm linking up - This was ready to post yesterday, but I didn't want the recipient to see!

Sunday, September 21, 2014

Sunday Stash - New Stuff

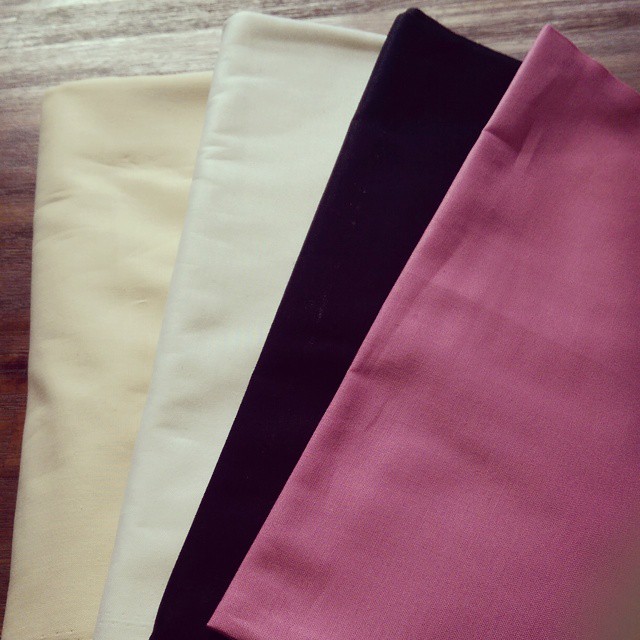
Some of you may remember the very recent Homespun-gate, which lead to my Bernina's meltdown?  Well, since then I have been investigating my options for good solid solids.  I've asked in a couple of my favourite FB groups, and have been given a range of leads, from Bella to Kona; Art Gallery to Michael Miller.  The majority of those beauties retail in Australia, on average, for around $14 per metre.  Now, given I have been used to using solids that cost around $7 per metre, I just about spat my peppermint tea out when doing such research!  I know, I know - quality blah blah blah.  But my dollar is very important to me, and I like to see it spent wisely.

Sooooo, a while back, my lovely friend Louise from The Oz Material Girls, sent me a sample pack of their quilter's solids.  I took this little pack out again a couple of weeks ago, midst research, and gave them a good looking over, as well as a good feel.  And then decided to jump in and order myself some.  I was able to take out the fat quarter pack of Nightshade I was using for a project, and hold the little sample squares up to them and figure out which colours I required.....

Just received a big bundle of new quilting cotton solids from @theozmaterialgirls great service as I only order yesterday mid afternoon and they express posted for me! I'm going to attempt to use my #nightshade this weekend....

The following day, these lovelies arrived (Yes, Louise even express posts if you ask her nicely).  And I have to say, they are beautiful.  And only $9 per metre.  I made up my quilt top over the following couple of days, and was REALLY happy with how lovely they are to work with.  I could just become a convert.  If you want to try them out, you'll find them HERE.

P.s. - This is NOT a sponsored post.  I just like to tell you when I find something I like.

Another new addition to the stash......

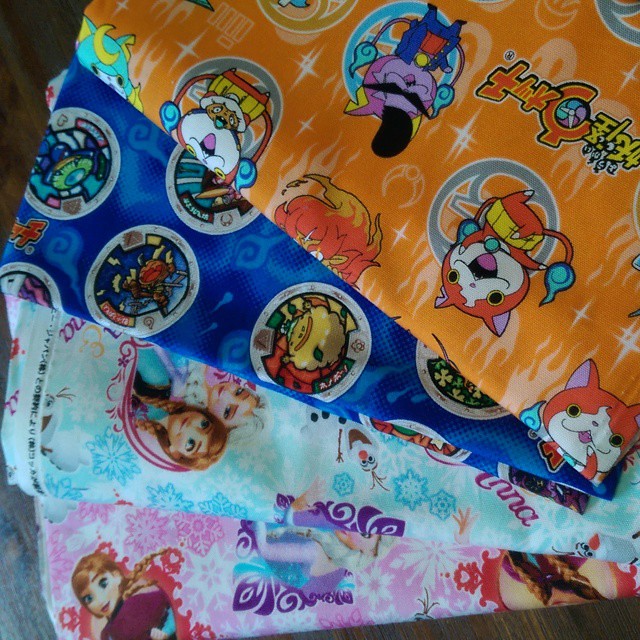
I love fabric deliveries from my #tokyobff her kids need new kindy bags and some frozen fabric for my chloe

Was this little bundle of brightness.  Straight from Tokyo via the Tokyo BFF.  The Japanese characters you saw in a little bag last week.  And the Disney Frozen prints were sent "just because".  So I've whipped up a couple of cute simple little skirts - one for my daughter, and one for my God-daughter in Tokyo.  I have some decent sized off cuts, so am thinking I'll make up a few zippered pouches or messenger bags for gifts and/or to sell.

And last, but certainly not least.....

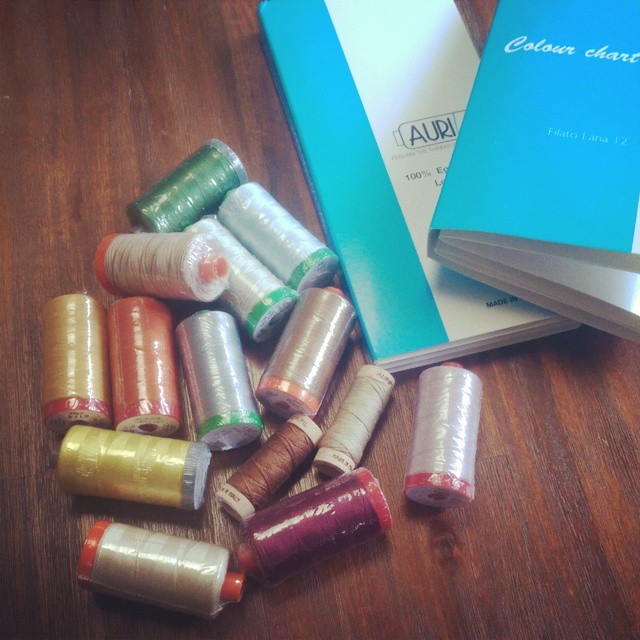
Thank you thank you thank you!!! @alexveronelli #aurifil #ineedathreadstand

This amazing parcel of Aurifil goodness arrived this week! I know, I know, Aurifil is not new around these digs, but some of the products in this parcel are!  You see, the lovely Alex Veronelli asked a favour of me on IG a couple of weeks ago - to see how many bobbins it takes to empty a 50wt spool of thread?  I quite happily obliged, and he very generously sent me all of this in return!

Now, admittedly, I have only ever used 40 & 50wt thread, because you know I'm no hand sewing fiend!  But these lovely little wooden spools of Floss almost make me want to!  The Lana wool thread is amazing but I need to do some more research on how to use them and well, the 28wt cotton spools will be fabulous to quilt with!  If you have any knowledge and/or advice to share with me - feel free to spill!

I hope you are all noticing an absence of new designer bundles entering my stash of late?  I finally put a stop to my purchasing in anticipation of Tokyober.  What's that I hear you say?  Well, in less than three weeks, I'll be off on my Tokyo journey.  At which time, I shall more than make up for my lack of fabric buying at present......

I'm linking up - You can too!

Molli Sparkles

Wednesday, September 10, 2014

W.I.P. Wednesday - Gaining Momentum

I wouldn't dare to count my WIP's right now.  The pile is getting a little bigger than I am comfortable with.  But two projects that are gaining a little momentum, I shall share here....

Nope.... #aquilttopthiswillnotmake #londoncalling #paperpieced 

I made another few blocks to add to my London Calling quilt.  The Underground sign, the Beef Eater and the taxi cab.  Thrilled with how it's all looking together, but was left wondering how I was going to make it a decent size quilt top?  The peeps on IG took care of that, throwing out all sorts of fabulous ideas for more blocks!  I even have the lovely Deborah Gunn sending me some underground map fabric.  I love crafty friends!  So I have now printed out a few more paper pieced patterns, and will add plenty of sashing in and around all the different sized blocks.  This has to be done and dusted by the end of October, so I'm feeling the pressure!

This is going to be one hell of a bright quilt! #aurifil @quilterpatsloan @katespain

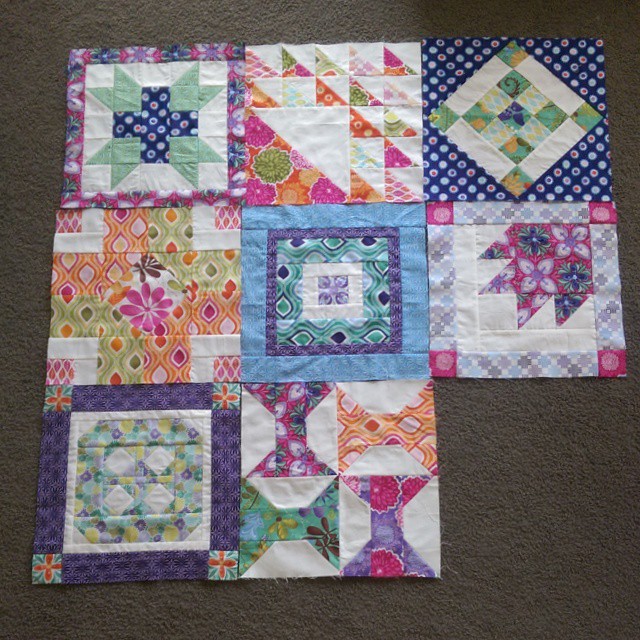
And my Aurifil Designer of The Month quilt top is taking shape!  I caught up, making July and August's blocks last week.  But of course, now it is September and I need to get that sorted!  I am loving how bright and vibrant each block is, and think that together, it will look amazing!  If you're interested in joining this BOM, I have each block pinned on one of my Pinterest boards HERE.

I'll leave all the other WIP's for another day!

I'm linking up - You can too!


Tuesday, August 19, 2014

Personalised Zipper Pouches - Tutorial

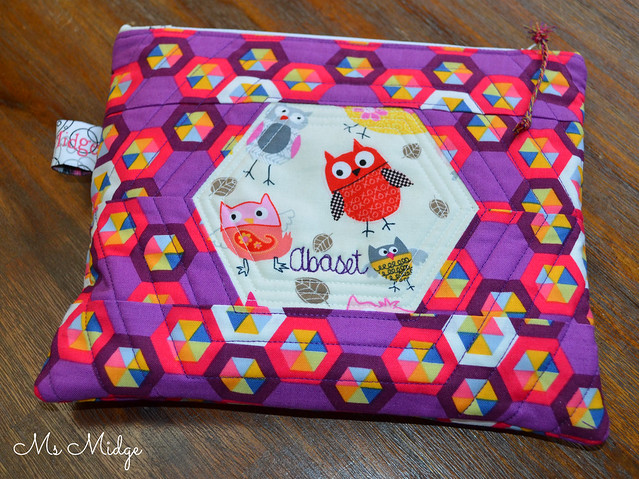
Another week, another birthday party!  My three youngest children are in the midst of a birthday party bonanza at present.  And buying a million birthday presents for kids I barely know is not my idea of fun!  So I've actually been making them all presents.  This weekend's birthday girl is turning 12, and my daughter told me she likes Owls and purple.  O. K. then.

I popped in to Spotlight this morning for a few bits and pieces, and grabbed 20cm of a very cute owl print, and then remembered the amazing purple hexagon Saffron Craig print I picked up a couple of months ago - at SPOTLIGHT?!?!?  What the!  And this is what I made....

pouch10 

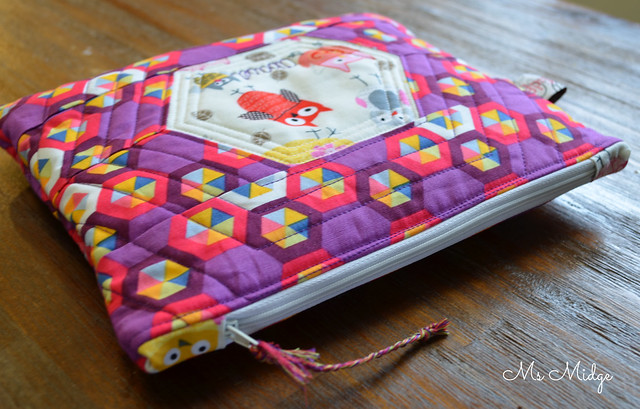
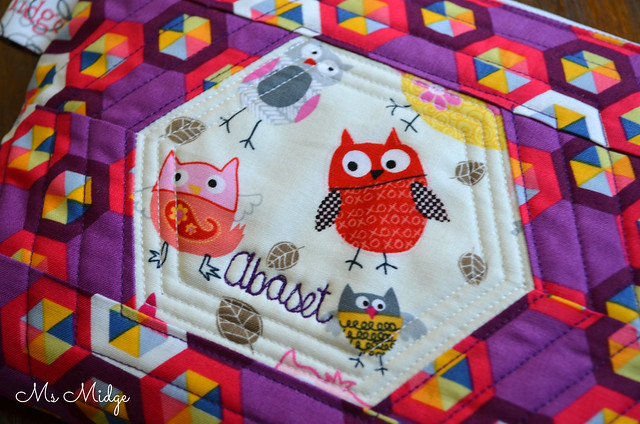
A very cute, VERY purple, personalised pouch.  Now as you can see, the birthday girl has a slightly unusual name - Abaset.  Odds are on that she doesn't get much personalised stuff in her life, so I thought it would be lovely to pop her name on it.  I free motioned her name and fit it in amongst the owls.  I used bright purple Aurifil #2545 and my trusty white #2420.  The front and back panels are quilted to give the pouch some body.  And would you believe that today I did my first ever Y Seam!?!?!?  I wanted to use a hexagon, so headed to Youtube and found this great little video below.


Now - on to a little tutorial for you all.

pouch1 

What you will need:

2 x quilted panels.  The size is completely up to you, but these are approximately 10.5" x 9".  My zip is 9" and then you need 2 x Lining panels.  

pouch2 

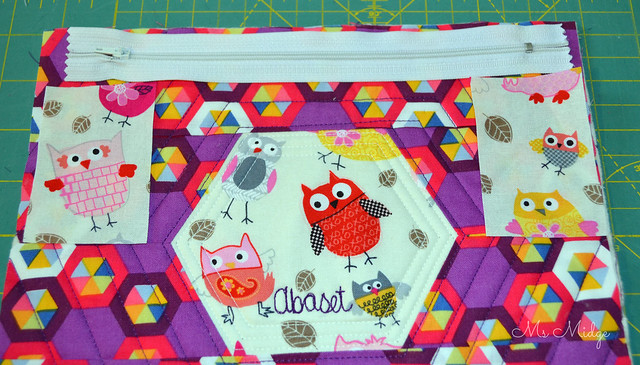
You will also need 2 little squares/rectangles on your coordinating fabric, as shown above, to cover the ends of your zip.  Press a little seam length ways on your zip covers as seen below.

pouch3 

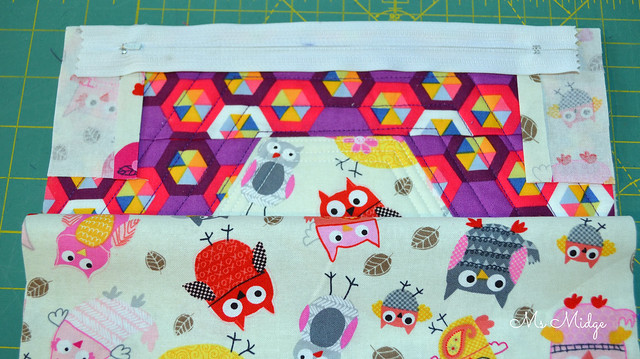
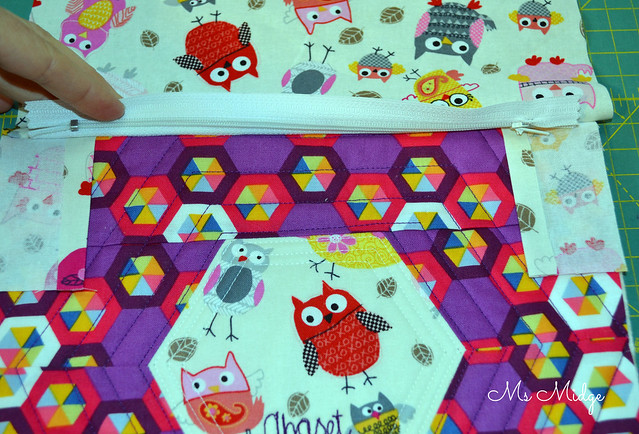
1. Take one panel, right side facing upwards.  Centre your zipper length ways along the edge, with your little zip cover pieces at the ends.  Then take a piece of lining and place over the top, right side facing downwards and pin all together.  

pouch5 

2.  Using a zipper foot, sew along the edge to join all pieces together.  It will look like the above photo when joined.  Pull the lining back underneath so panels are wrong sides together and press.  Top Stitch alongside the zipper.

pouch6 

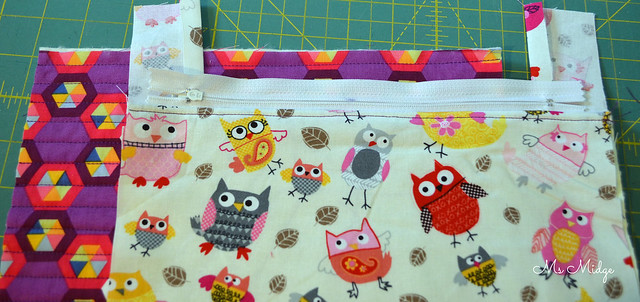
3.  Take your second panel, and place right side upwards.  Lay your first panel on top, right side down, aligning the edges of both pieces.  Trim off your zipper covers.  Place your second lining piece over the top and pin together, then sew together the same way you did previously.

pouch7

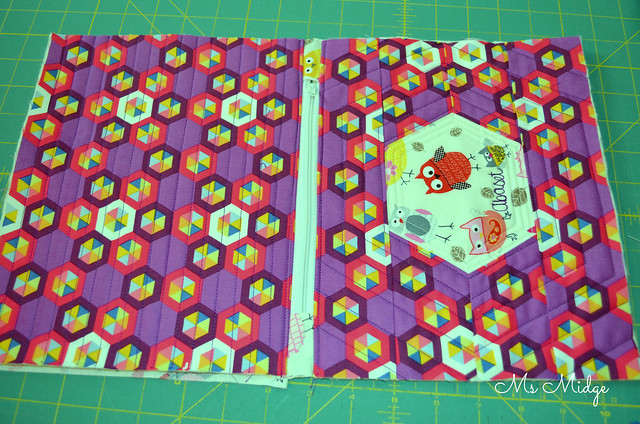
4.  Press and top stitch again.  When you have done so, your will end up with a layout like above.  Trim around to make everything neat and even in size.

pouch8 

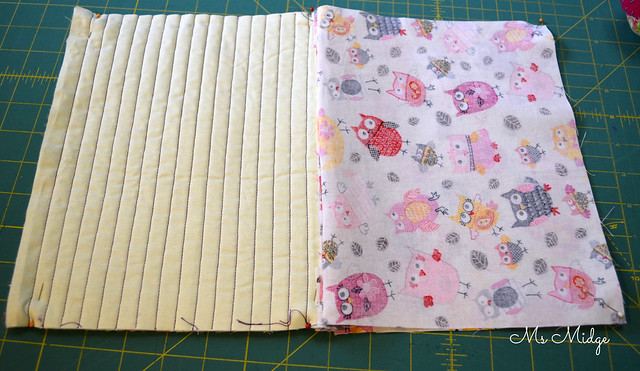
5.  Open your zipper a few inches, then take both quilted panels right sides together, and both lining pieces right sides together.  Pin them all around, leaving a 3" gap in the bottom of your lining pieces.

pouch9 

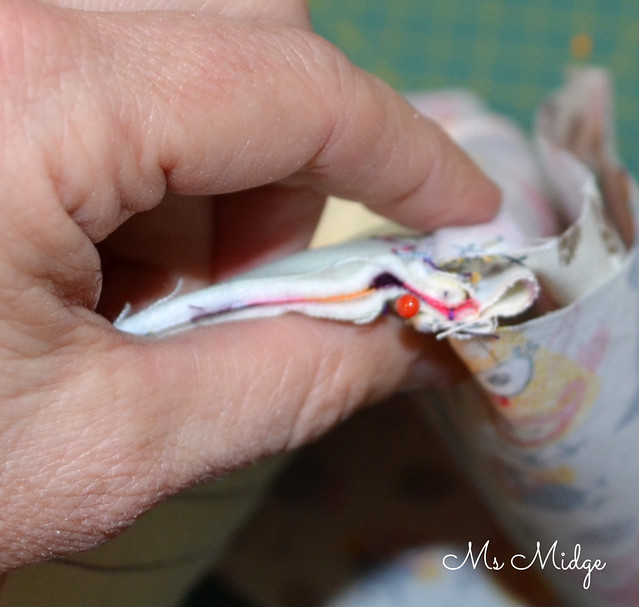
6.  Line up the top seam of your quilted panels, and have the zipper cover folded up towards the lining as demonstrated above.  Now sew all the way around, leaving the gap open at the bottom of the lining, backstitching on both sides.  Trim all four corners.  Reach through the gap in the lining and pull the pouch through, the right way out.  To get your corners nice and neat, you can use a chopstick or something similar to push them out nicely.  Pull your lining out and neatly machine sew the gap closed.

pouch13 

And you will have a delightful little gift!  I plaited four shades of Aurifil thread to make a cute little zipper pull!

pouch11 

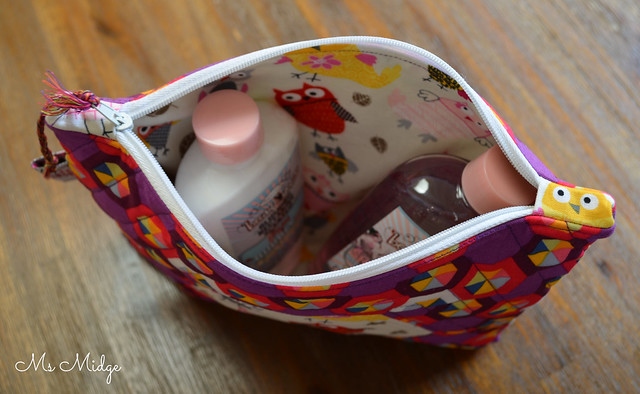
The best thing about these pouches is you can fill them with whatever you like!  I asked my daughter when she got home whether she'd like to put beauty products, lollies or pencils etc in it?  She chose the smelly stuff!

pouch12

I have made a tonne of pouches, so I hope this helps you out for some fun little gifts in future!

I'm linking up - You can too!


Sew Cute Tuesday
Related Posts Plugin for WordPress, Blogger...